Tuesday, 4 November 2025

This year we again participated in Google Summer of Code and we had 12 successful projects.
Akonadi/Merkuro
Merkuro is a modern groupware solution and uses Akonadi as backend. This year we had two mentees working on Akonadi, and in particular on how the resources and their configuration dialogs interact with Merkuro on mobile.
Pablo Ariño worked on improving the memory usage of the Akonadi agents and resources. He did that by ensuring the configuration dialogs of the agents is moved to a separate plugin which is then loaded on demand by the application, instead of having the agents being GUI processes which handle their configuration dialogs directly.
Shubham Shinde worked on the UI side of things by writing the infrastructure for config dialogs to be written in QML. This is extremely important to get mobile optimized dialogs on mobile and is also a good occasion to clean the dialog code up. All the major code changes can be found on the following merge requests: Akonadi and KDE PIM Runtime.
Kdenlive
Kdenlive brings you all you need to edit and put together your own movies. We had 1 project for KDE's full-featured video editor:
- Ajay Chauhan improved the supported for timeline markers in Kdenlive. Previously, we only supported single point markers, which can be used to mark a specific point in time. Ajay added support for duration-based markers that define a clear start and end time.
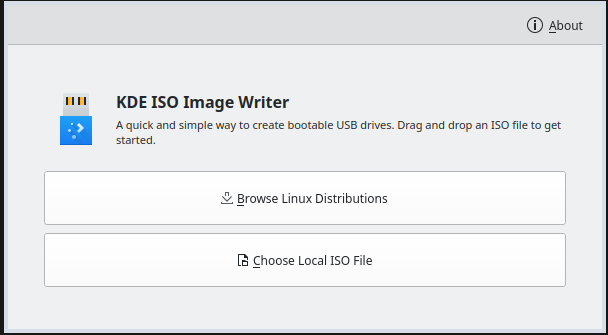
ISO Image Writer
- Akki Singh worked on a port of ISO Image Writer from QtWidgets to Kirigami. Akki also added a bunch of features to the app such as allowing you to download ISO images for some of the more popular KDE distributions, or from an URL automatically.
OSS-Fuzz Integration
OSS-Fuzz is a program by Google were our code is fuzzed by them in search for vulnerabilities.
- Azhar Momin focused his work on improving the OSS-Fuzz integration in the KDE libraries. Azhar moved our configuration to our repos, making them easier to maintain, and the fuzzer now scans many thumbnails formats (e.g. poppler, syntax highligted text, krita archives, mobipocket and many more). He also fixed some of the bugs detected by the fuzzer like a memory leak in the blender thumbnail extractor.
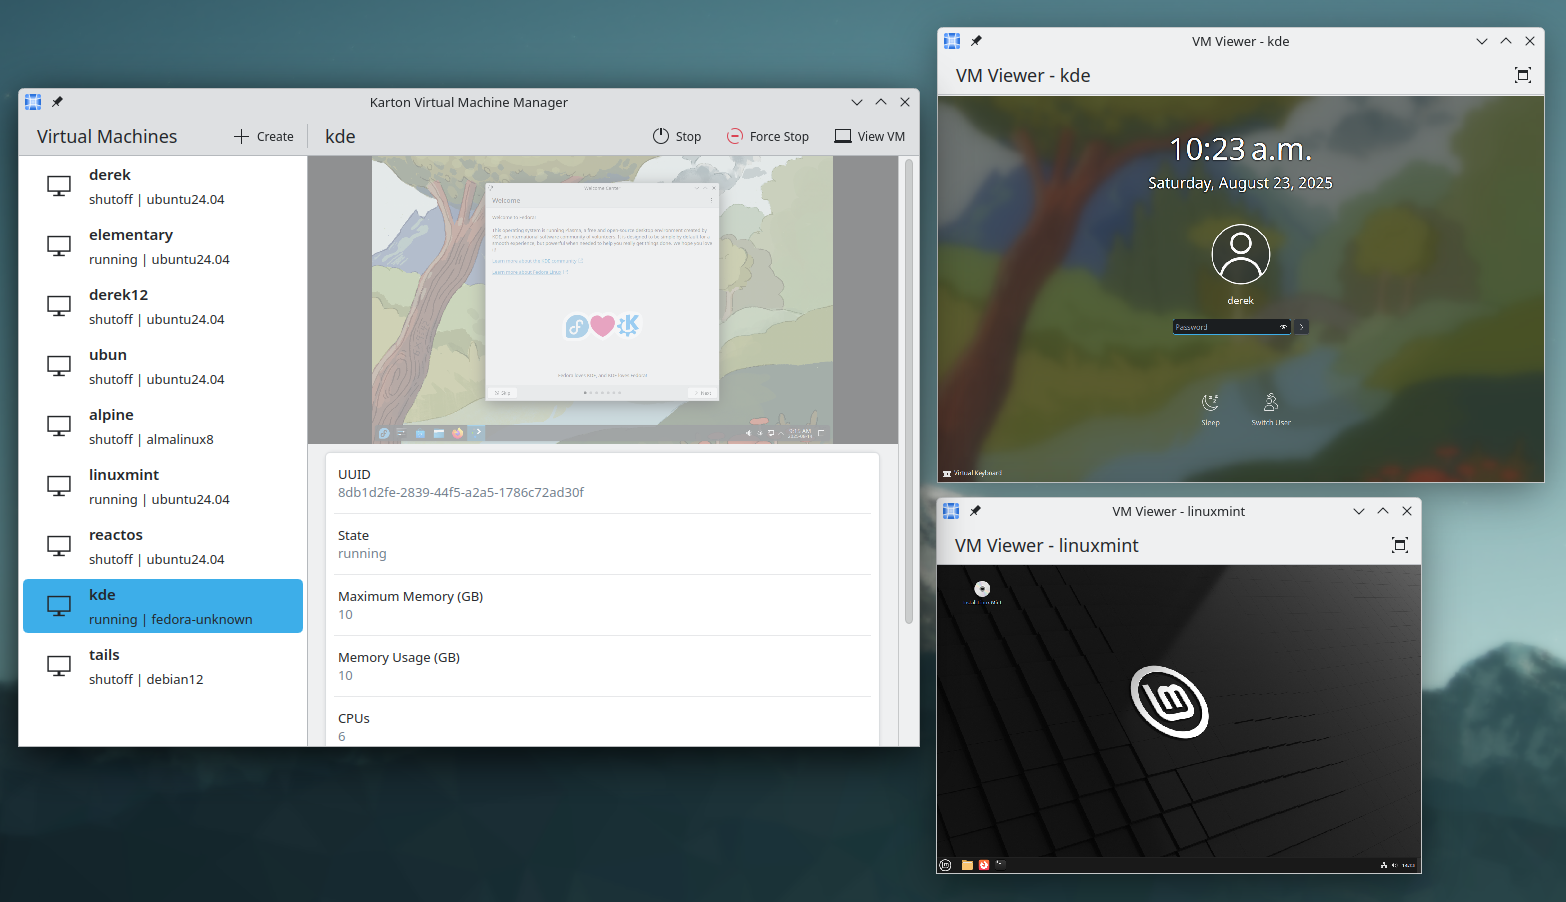
KDE Linux / Karton
- Derek Lin worked on the new virtual machine manager from KDE named Karton. He implemented, among other things, keyboard input support, basic SPICE viewer (non hardware accelerated) and audio support.
Since the end of GSoC, he has also added hardware acceleration to the playback and you can find more information about that on his blog.
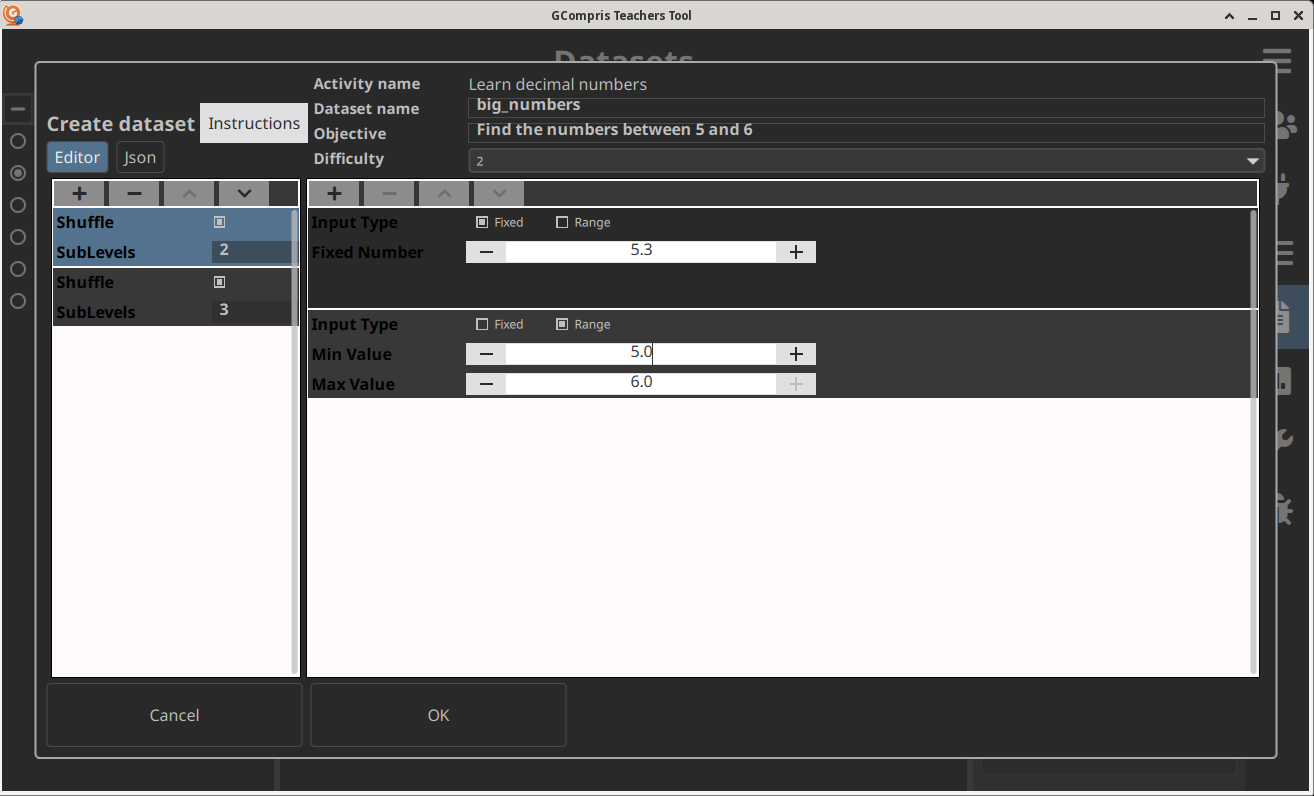
GCompris
GCompris is KDE's educational suite for children learning at home or school. It comes with around 200 activities to learn while having fun. The next iteration of the suite adds a teacher panel to follow the progress of children and provide customised exercises to focus on specific topics.
- Ashutosh Singh worked on adding new dataset editor for an in-progress GCompris admin software for teachers. This feature will allow teachers to send customized exercises to children and Ashutosh has added multiple editors: Learn decimals activities, Graduated lines activities and Fractions activities. These activities have been chosen as they are the ones most used at schools.
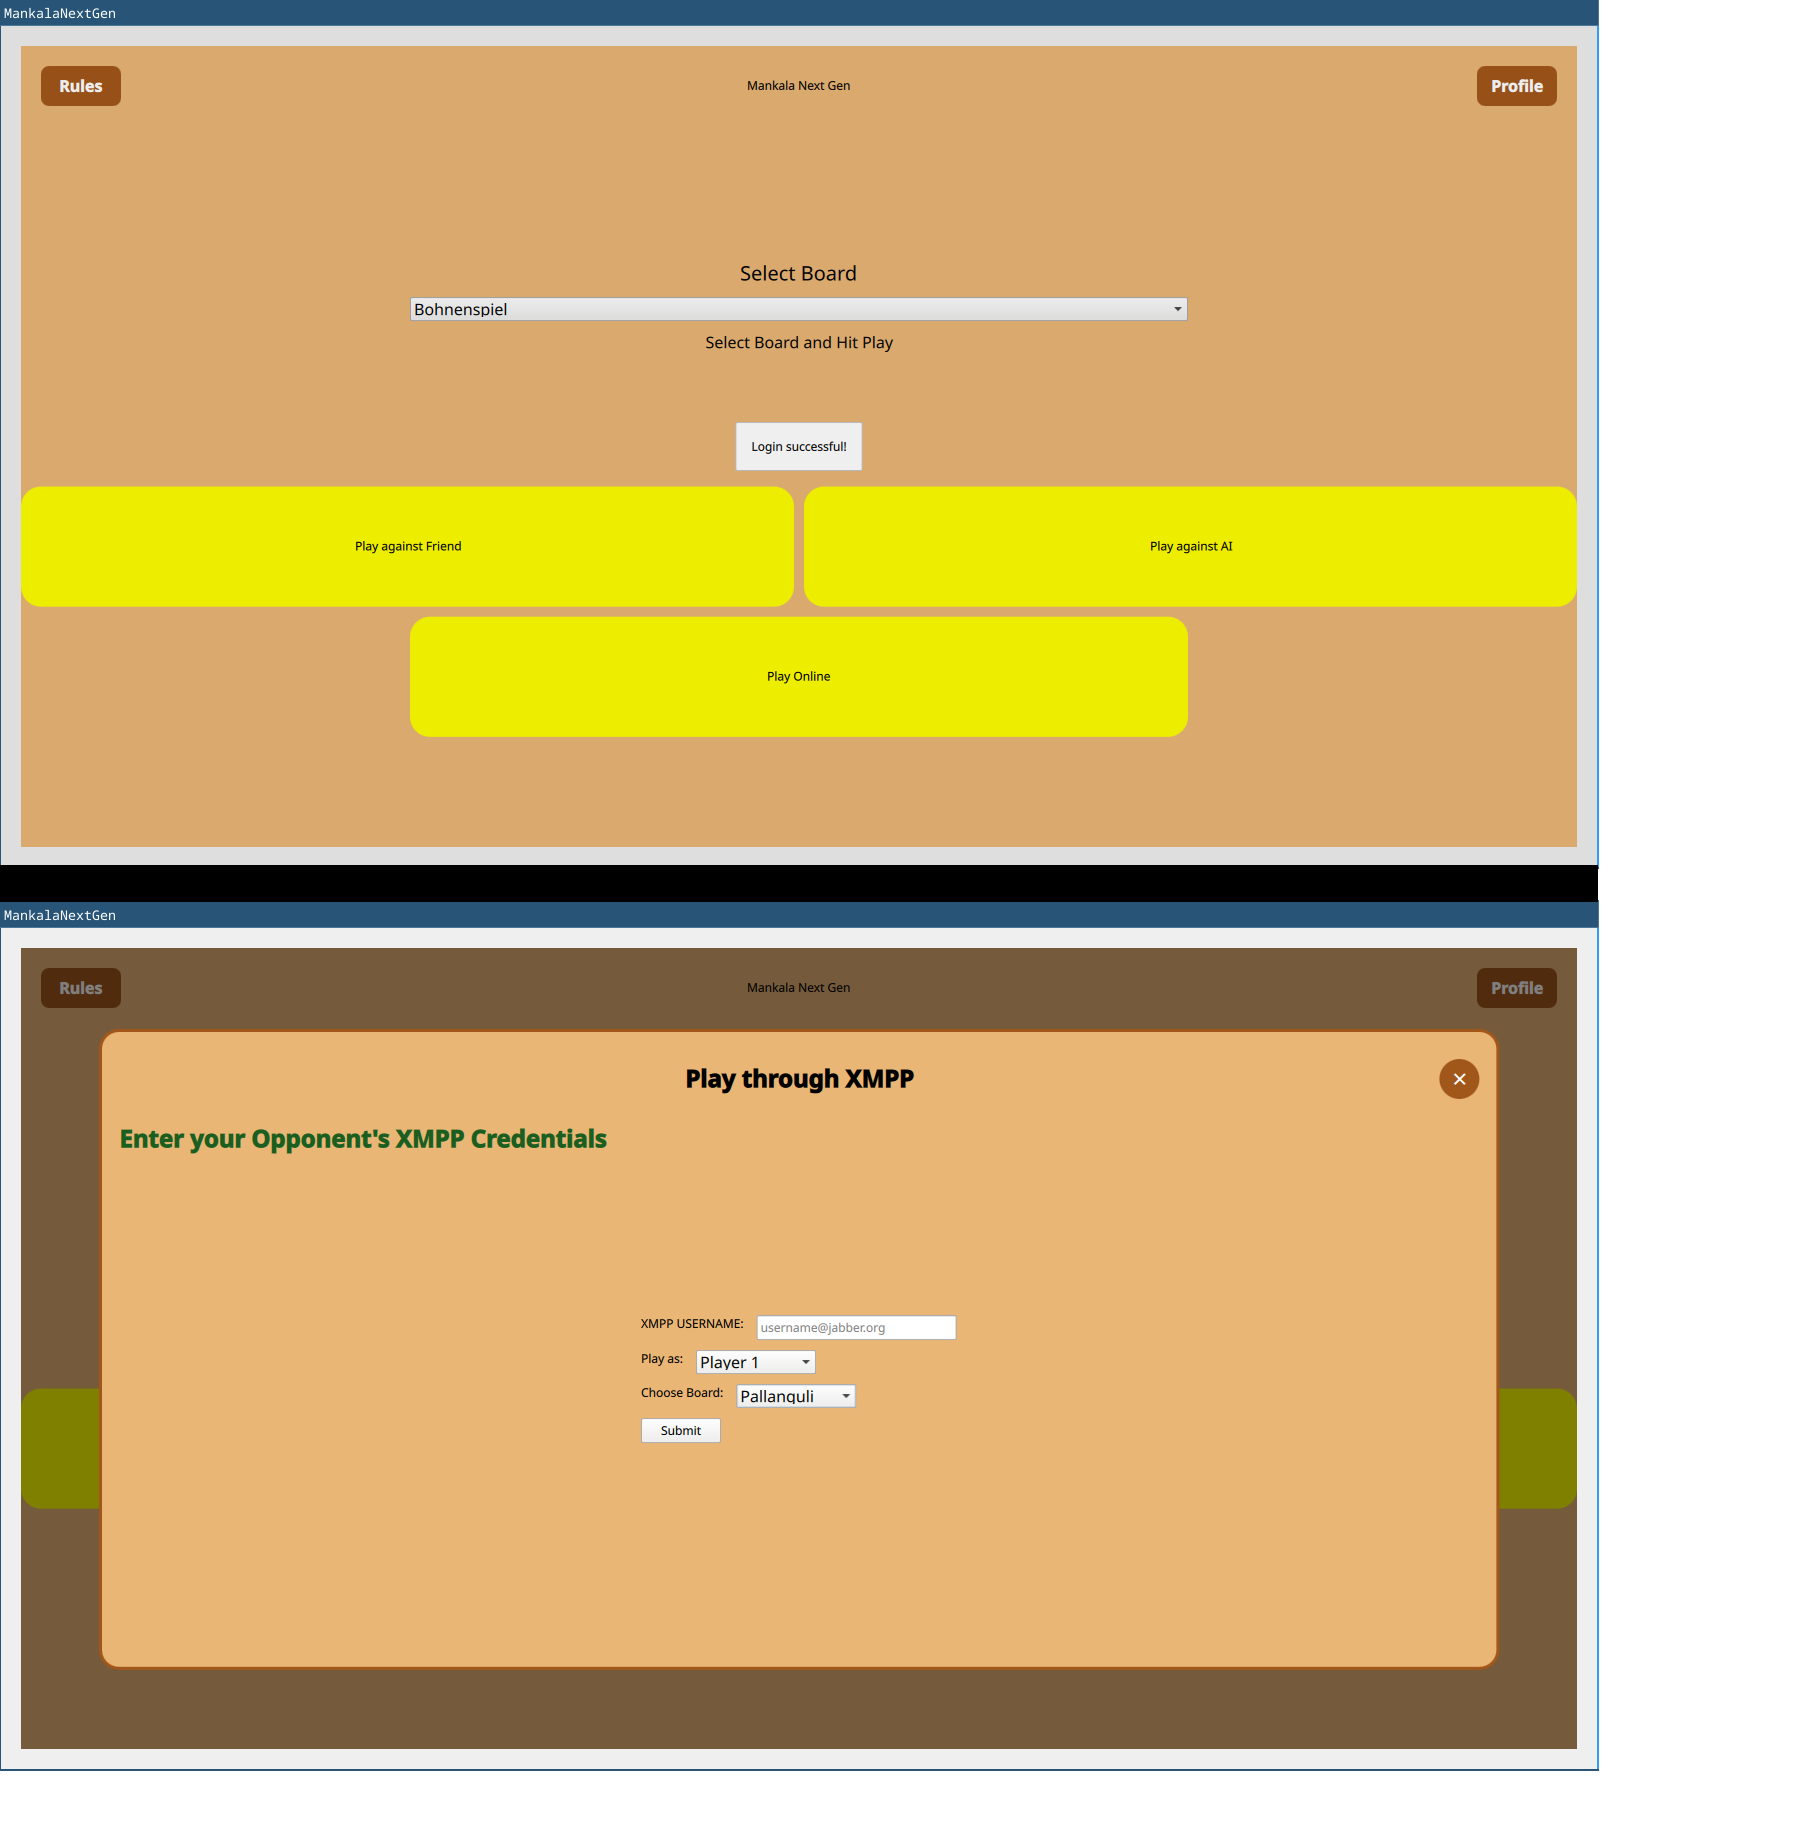
Mankala
The Mankala engine is a project that was started during last year's GSoC. The project is still in review and is pending integration into KDE.
- Srisharan V S worked on a cross platform GUI for MankalaEngine. On the desktop, it is possible to play Mankala games against a remote opponent provided both players have XMPP accounts. The GUI uses QXmpp for networking. The GUI works on both desktop and mobile, though network play is not yet available on mobile as support for this needs to be re-enabled in the QXmpp library.
Krita
Krita is KDE's free and open source cross-platform application for creating digital art files from scratch.
- Ross Rosales worked on improving Krita's usability by adding a UI to display common selection actions after selecting a layer. More details on Ross journey are available on his blog. The feature request was opened in 2022 and will be available in the upcoming 5.3 version of Krita.
Cantor
Cantor is a powerful mathematical and statistical computing front-end within the KDE ecosystem. Two contributors worked on improving Cantor this year:
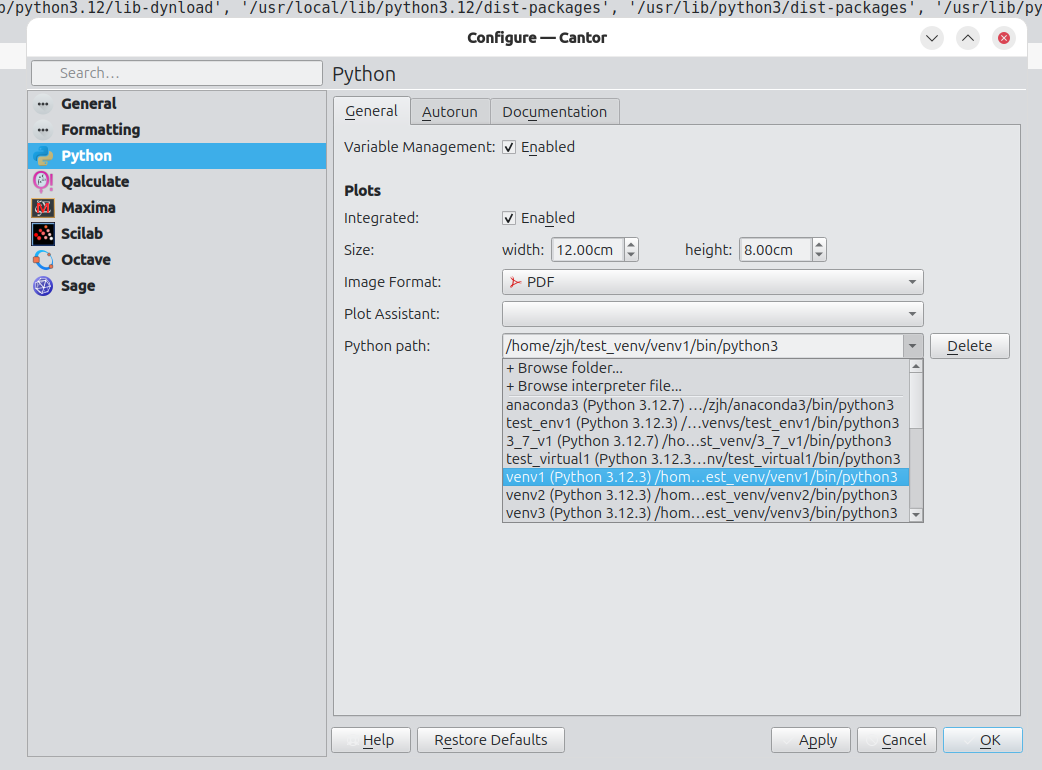
- ZhengJiahong added features to improve Python support. Once the merge request is finished, users will be able to switch Python virtual environments to improve the user experience.
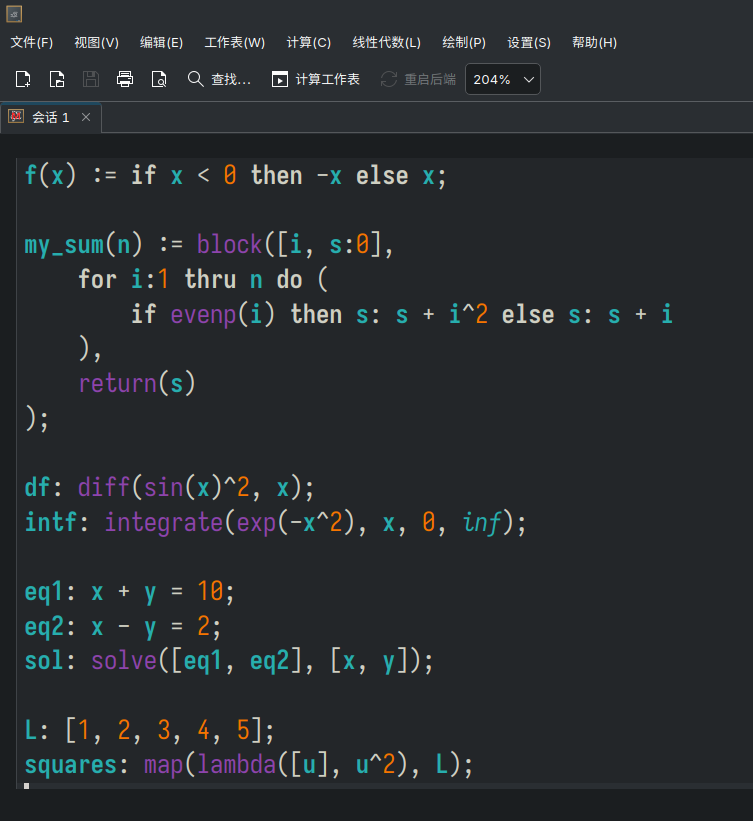
- Lv Haonan worked on integrating KTextEditor in Cantor to replace the custom made spreadsheets. This has several advantages: the current spreadsheets lack some features (auto-indent, code completion, spell checks...), they require extra maintenance from developers where a better solution already exists within KDE, and it will bring consistency between the different backend editors.
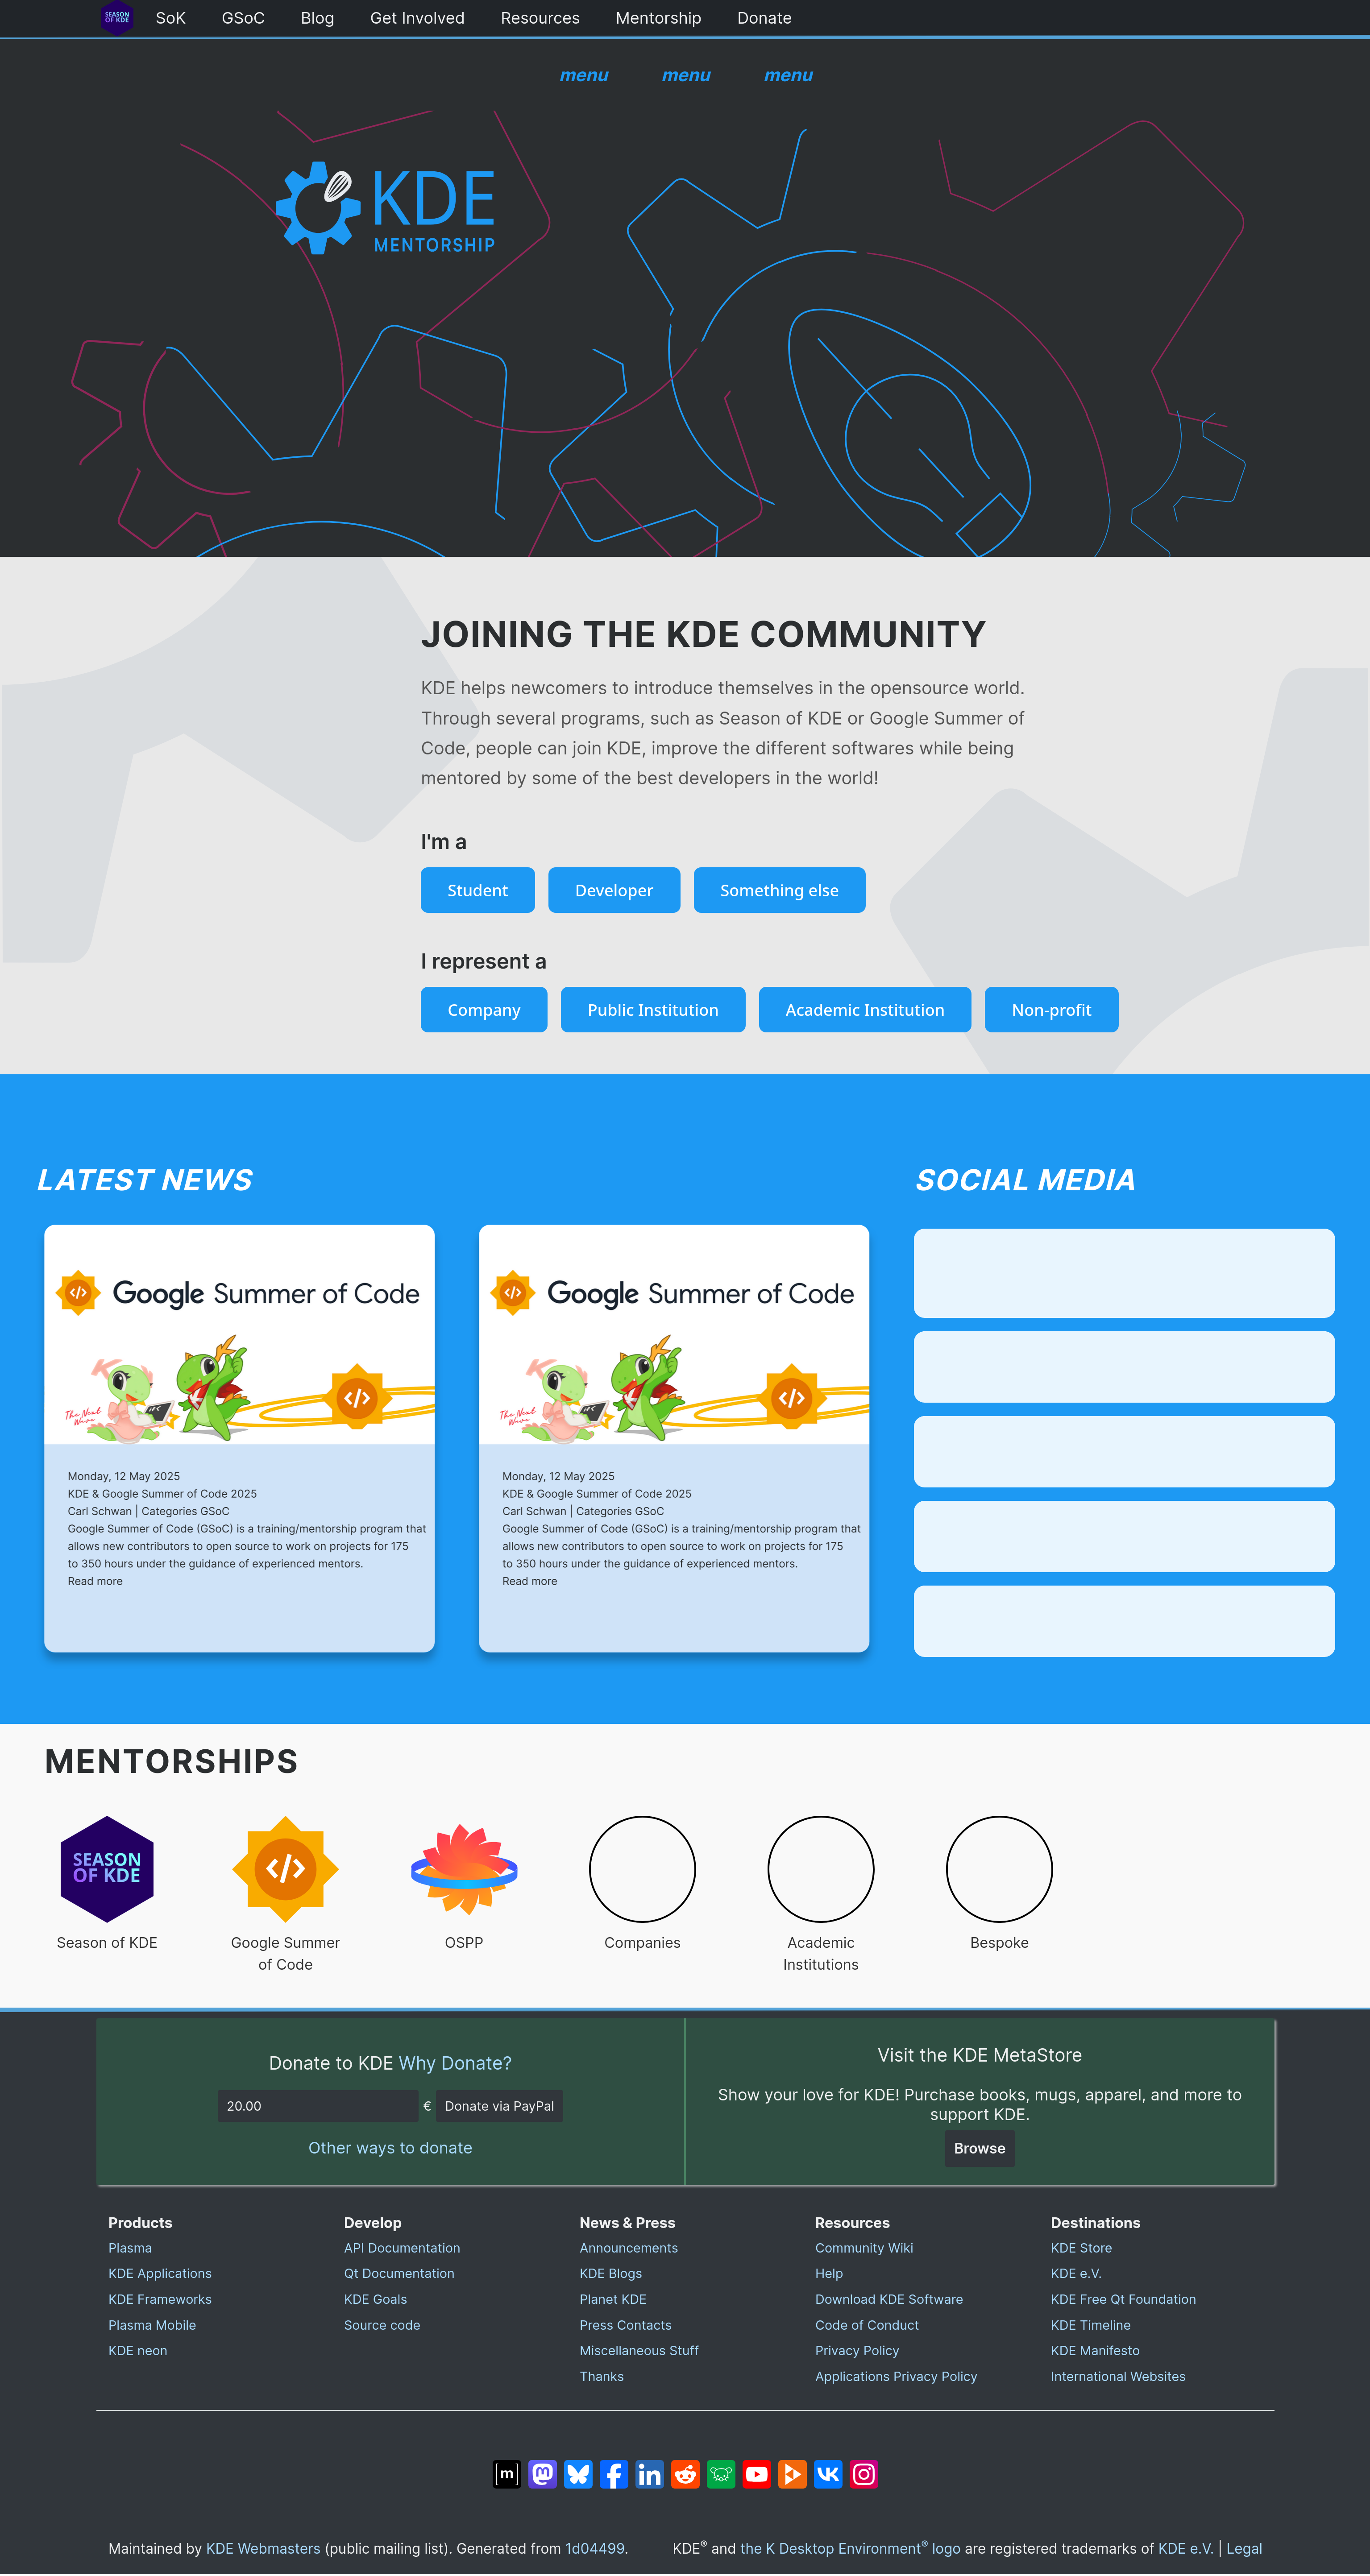
Mentorship Portal
One of the current KDE Goals is to improve the long term sustainability of KDE by recruiting and keeping more newcomers.
- Anish Tak worked on extending the current mentorship website to make it cleaner and with more information for newcomers.
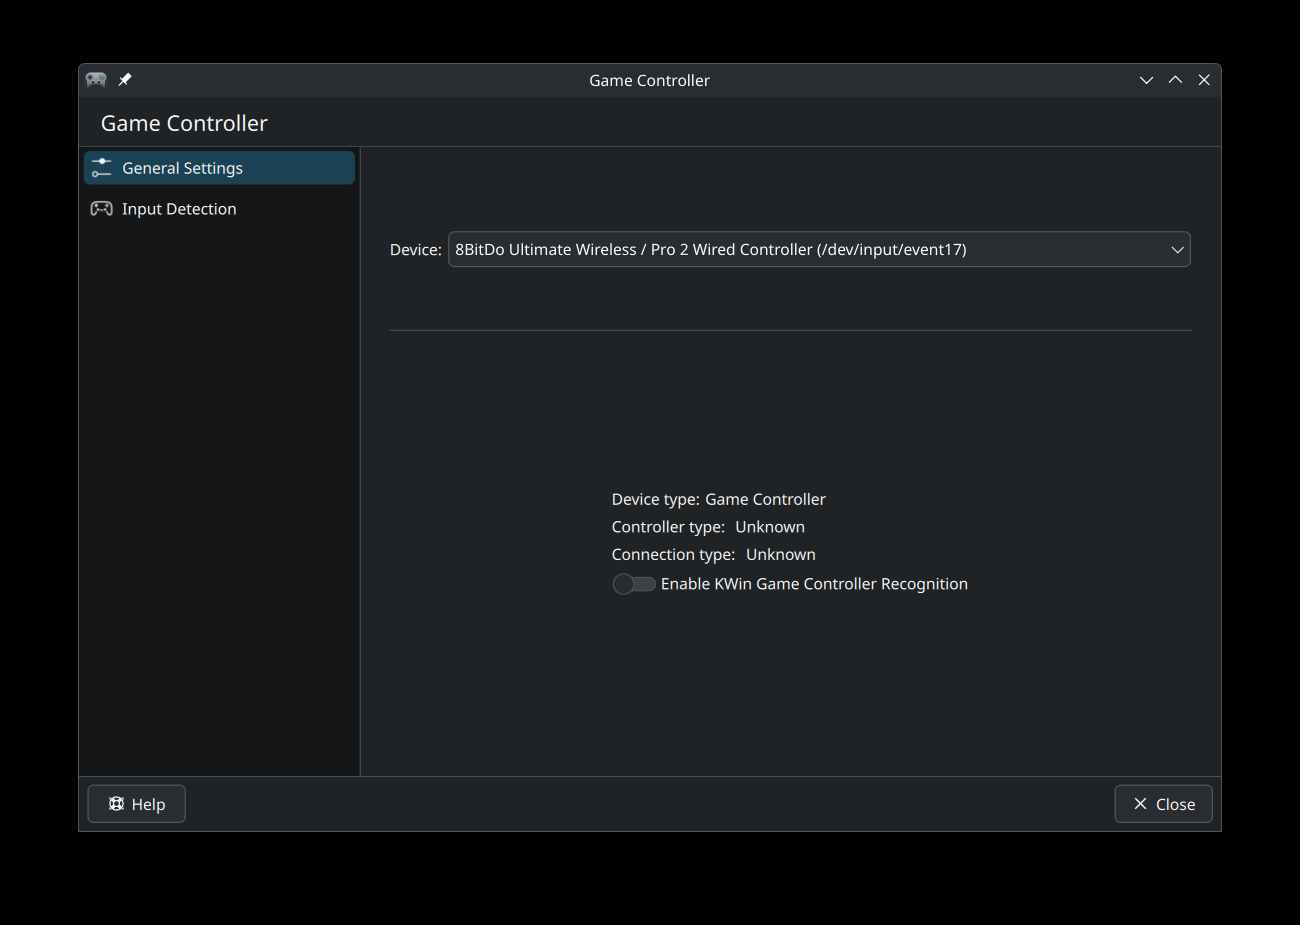
KWin
KWin is an easy to use, but flexible, window manager and compositor for the KDE Plasma desktop. It controls how windows are drawn, moved, and displayed, handles input (keyboard, mouse, touch, etc.).
Yelsin 'Yorisoft' Sepulveda worked on adding game controller input support to KWin. By using input libraries like libevdev he was able to add a option in Plasma System Settings that enables awareness of game controllers and detects their input.
This was essential for adding features, such as:
- Mapping Game Controller inputs to Keyboard and Mouse
- Navigating Plasma Desktop with Game Controllers
- Preventing Sleep/Suspend when gaming with controller and leaving keyboard/mouse idle
Next Steps
The 2025 GSoC period is finally over for KDE. A big thank you to all the mentors and contributors who have participated in GSoC! We look forward to your continuing participation in free and open source software communities and in contributing to KDE.


 @kbroulik:kde.org
 ) from System Settings to the debug console. You can access it by typing “kwin” in KRunner and selecting “KWin Debug Console”. Mind that it’s a developer tool, so function definitely outdoes form.


 obiwan_kennedy
 Core Features
 3D Dice Rolling Engine
 Roll Dice with Commands
 Reroll with Ease
 Macros – One Tap Commands
 Aliases – Shortcuts for Long Commands
 Character Sheet Integration
 Multiple Profiles
 Dark Mode
 Translation
 Watch it in Action!
 Check out our YouTube demo video showcasing the app’s features and real-time gameplay experience:
 Download Now on Android!