Skip to content

Tuesday, 11 November 2025

Plasma's first-run experience (FRE) / out-of-box experience (OOBE) has seen significant improvements in security recently.

Although first off I think I maybe hadn't mentioned yet how the project was renamed.

Previously known as "KDE Initial System Setup" (KISS), the project has been rebranded to "Plasma Setup" and now sits nicely alongside other system projects like "Plasma Desktop", "Plasma Mobile", "Plasma Keyboard", etc.

Enhancing Security in Plasma Setup

We received a notice of potential security issues from the folks at openSUSE, which have now been addressed.

This sort of thing is a great example of why it can be so difficult to provide ETAs and timelines for software development: unexpected issues often arise that need to be addressed before other planned work can proceed, and these issues can take time to investigate and fix properly; in this case, the security issues required careful review and testing to ensure that they were resolved without introducing new problems, and delayed our initial release by weeks.

I had very little experience with this sort of security-minded defensive programming before this, so it was a great learning experience for me personally as well. It required a whole lot of reading and research to understand the best practices and principles involved, and I definitely have a better feeling for how to think about defensive programming in the future.

It amazes me the kinds of things people will try to do to break software, and many of them (like path traversal attacks) are things I would never have thought of on my own!

I'd like to thank the openSUSE security team for responsibly disclosing these issues, and for their patience while we worked through them. Their help has made Plasma Setup more secure for all users, and I appreciate their dedication to improving the security of open source software.

A massive thank you specifically to Matthias Gerstner for the multiple rounds of detailed and thoughtful reviews and suggestions on the MR to address these issues. Your help was invaluable, and it was a pleasure working with you! 🙇‍♀️ 💙 🦎

Looking Ahead

Plasma Setup is nearly ready for initial testing and adoption. There are a couple more items to wrap up, but (barring further unforeseen delays!) we are very close to being able to release it for early adopters to try out! 🎉

Monday, 10 November 2025

Quality of live improvements in Kate, basic HDR support in Krita on Wayland and touch improvements in Photos

Welcome to a new issue of "This Week in KDE Apps"! Every week (or so), we cover as much as possible of what's happening in the world of KDE apps.

As part of our yearly fundraiser, you can adopt one of KDE's apps and we can share with the whole world how awesome you are and how much you're doing to support us.

Getting back to all that's new in the KDE app scene, let's dig in!

Multimedia/Graphics Applications

Photos Image Gallery

Anders Lund added support for navigating between images when zoomed in using a touchscreen or stylus in Photos (25.12.0 - link). He also made the viewer auto-zoom when releasing a pinch when appropriate (e.g., the image is now smaller than the view) (25.12.0 - link).

Anders also enabled the slideshow feature on mobile (25.12.0 - link).

Travel Applications

KDE Itinerary Digital travel assistant

Jonah Brüchert implemented auto-resolving from railway station names to coordinates based on Nominatim (the geocoding engine powering OSM) (25.12.0 - link).

Volker Krause added support to the extractor for citycity.se, Comboios de Portugal, and Wiener Linien barcodes, and improved a bunch of existing extractors (25.12.0 - link 1, link 2, ...).

PIM Applications

Akonadi Background service for KDE PIM apps

Christoph Erhardt fixed a segmentation fault when migrating an existing Akonadi database to SQLite (25.12.0 - link).

Nicolas Fella dropped the barely used feature to show an "About Data" dialog in Akonadi resources (25.12.0 - link).

Office Applications

Okular View and annotate documents

Jack Barmes added new bookmark actions to add and remove books in various context menus in Okular (26.04.0 - link).

Utilities Applications

Kate Advanced text editor

Waqar Ahmed improved Git support in Kate. The list of branches now shows the latest activity (25.12.0 - link).

Additionally, he improved the Quick Open dialog, and it is now possible to jump to a specific line and column by entering something like 10:5 (25.12.0 - link).

Dennis Lübke added a plugin to transparently edit encrypted text files with GPG in Kate (25.12.0 - link).

Social Applications

NeoChat Chat on Matrix

Joshua Goins added an informational Keyboard Shortcuts settings page to NeoChat (25.12.0 - link).

Joshua also improved the design of the room notification settings and made it more consistent in terms of wording with the context menu used to configure notifications (25.12.0 - link).

Among a multitude of other small fixes, he improved the user experience related to the basic Jitsi meeting button to show whether a meeting is in progress, and to only enable it when the user has permission to start a meeting (25.12.0 - link).

Creative Applications

Krita Digital Painting, Creative Freedom

Carsten Hartenfels added a way to trigger the "toggle eraser preset" action via touch gestures in Krita (Krita 5.2.x - link).

Wolthera van Hövell ported the text tool dock to QML (link).

Dmitry Kazakov implemented basic HDR support on Wayland (link).

Games

Chessament Chess tournament manager

Manuel Alcaraz replaced the hamburger menu with a menu bar (link).

Third-Party Applications

Easy Effects - Audio Effects for PipeWire Applications

Easy Effects 8 was released and now uses Kirigami! Read the full announcement for details.

…And Everything Else

This blog only covers the tip of the iceberg! If you’re hungry for more, check out Nate's blog about Plasma and be sure not to miss his This Week in Plasma series, where every Saturday he covers all the work being put into KDE's Plasma desktop environment.

For a complete overview of what's going on, visit KDE's Planet, where you can find all KDE news unfiltered directly from our contributors.

Get Involved

The KDE organization has become important in the world, and your time and contributions have helped us get there. As we grow, we're going to need your support for KDE to become sustainable.

You can help KDE by becoming an active community member and getting involved. Each contributor makes a huge difference in KDE — you are not a number or a cog in a machine! You don’t have to be a programmer either. There are many things you can do: you can help hunt and confirm bugs, even maybe solve them; contribute designs for wallpapers, web pages, icons and app interfaces; translate messages and menu items into your own language; promote KDE in your local community; and a ton more things.

You can also help us by donating. Any monetary contribution, however small, will help us cover operational costs, salaries, travel expenses for contributors and in general just keep KDE bringing Free Software to the world.

To get your application mentioned here, please ping us in invent or in Matrix.

A mobile-centric look at the Plasma 6.5 release

About three weeks ago we released Plasma 6.5 and it's high time we talk about the plethora of improvements and bug fixes that arrived in Plasma Mobile and related projects. Let's not delay any further and get right into the juicy details!

Waydroid Integration

While our end goal is obviously KDE for world domination and a resulting breadth of native apps, we're not quite there yet and until then we wanted to make it easier to use and integrate apps running through Waydroid into your Plasma Mobile system. To that end, Florian made it so you can now set up and manage your Waydroid install right from the comfort of your settings app and turn on/off the Waydroid container from the quicksettings dropdown.

Screenshot of <nil>
Screenshot of <nil>
Screenshot of <nil>
Screenshot of <nil>
Screenshot of <nil>

(Florian Richer, Link 1, 2, 3, 4, 5, 6, 7)

Lockscreen

The lockscreen is one of the most often used and seen parts of a phone's UI and it has two jobs: Securely lock your device, but ultimately, get out of your way. So far we succeeded at the first of these jobs, but in 6.5 Devin made sure we do in the second as well. Plasma Mobile's lockscreen will now load much faster, due to reusing the existing status bar and action drawer process from the shell, instead of loading them separately each time the lockscreen is loaded. This also has the positive side effect of notifications now properly being synced between the lockscreen and unlocked shell. (Devin Lin, Link)

Screenshot of <nil>

Florian also worked on some other nifty additions:

  • Add double tap to lock
  • Polish UI feedback for lockscreen actions

(Florian Richer, Link 1, 2, 3)

Folio Homescreen

Micah improved and expanded the background blur effect for both the Folio and Halcyon homescreens, resulting in more consistent use of blur.

Screenshot of <nil>
Screenshot of <nil>
Screenshot of <nil>
Screenshot of <nil>

(Micah Stanley, Link)

Devin put in some work to make Folio more keyboard navigation friendly, as well as improving it in various places under the hood: from cleanup to performance improvements there's a good mix of changes here

(Devin Lin, Link 1, 2, 3, 4, 5, 6)

Meanwhile, Florian added double tap to lock to Folio, as well as a number of other improvements.

(Florian Richer, Link 1, 2, 3, 4, 5)

Halcyon Homescreen

Devin unified some code paths between Halcyon and Folio, and added a small settings page to Halcyon. Like with Folio, he also ported Halcyon to use a new applet registration method which allows it to be precompiled by qmlcachegen

(Devin Lin, Link 1, 2, 3)

Settings

There's a good bunch of stuff here as well:

  • Separated out the navigation settings from the Shell settings page to its own page and added a small tutorial for the gesture navigation mode there. (Luis Büchi, Link)
Screenshot of <nil>
  • Added a setting to change the maximum number of quicksetting columns, really useful for tablets! (Sebastian Kügler, Link)
Screenshot of <nil>
Screenshot of <nil>
Screenshot of <nil>

Devin made sure mobile settings pages only show up on form factors that they make sense on so we stop showing the mobile shell settings on desktop. (Devin Lin, Link 1, 2)

Taskswitcher

Luis has worked on the taskswitcher internals to make it more compatible with qmlcachegen. This lays the groundwork for improving its performance while also making the code more maintainable for the future.

(Luis Büchi, Link 1, 2, 3, 4)

Haptics

Devin has done the first step on porting over our haptics plugin to use feedbackd as backend. In the future, this will allow us more fine-grained control over haptic feedback, as well as better cross-desktop compatibility

(Devin, Link)

Action Drawer

Besides Devin's work on making the action drawer overlay over the lockscreen mentioned above, there's also been some more work on improving performance of it and its contained quick actions.

For all of you running multi-monitor setups with Plasma Mobile and/or regularly docking and undocking, thanks to Sebastian there's now a quick settings to configure multi monitor layouts when several monitors are connected.

(Devin Lin, Link)

(Florian Richer, Link)

(Sebastian Kügler, Link)

Envmanager

The envmanager, responsible for keeping track of the settings environment of the shell has gotten more robust while improving how Plasma Mobile and Plasma Desktop coexist: there is now less cross-talk between potentially conflicting settings between the two shells making a hybrid setup (like on a 2-in-1 laptop/tablet combo) easier to use. In light of the work on Plasma keyboard, envmanager now also properly supports changing of the selected virtual keyboard for the mobile session.

(Devin Lin, Link 1, 2, 3, 4, 5, 6)

UI Polish

We've also spent some time improving the general look and feel of the UI. This includes updating some elements to use more appropriate theme colors, using system-wide animation durations and better layouting to reduce overlapping text/UI controls.

Screenshot of <nil>
Screenshot of <nil>
Screenshot of <nil>
Screenshot of <nil>

(Devin Lin, Link 1, 2, 3, 4)

(Micah Stanley, Link 1, 2, 3)

(Florian Richer, Link 1, 2)

(Luis Büchi, Link)

Plasma Keyboard

While not technically part of the 6.5 release cycle, we've recently also released the first unstable version (0.1.0) of our new virtual keyboard. While it's not ready for prime-time just yet, progress is quick and it's already something enthusiasts may want to tinker with - so tinker away and do let us know of any feedback you might have!

...and there’s much more. To see the full list of changes, check out the complete changelog for Plasma 6.5.

Contributing

Do you want to help with the development of Plasma Mobile? We are a group of volunteers doing this in our free time, and are desperately looking for new contributors, beginners are always welcome!

See our community page to get in touch!

We are always happy to get more helping hands, no matter what you want to do, but we especially need support in these areas:

  • QA Testing
  • Telephony (Calling and SMS)
  • Camera
  • App development (Photo Viewer, Browser, Audio Recorder, Games, etc.)
  • Shell work
  • You can also check out our Plasma Mobile issue tracker for more details.

Even if you do not have a compatible phone or tablet, you can also help us out with application development, as you can easily do that from a desktop!

Take Plasma Mobile for a spin! Check out the device support for each distribution and find the version which will work for your device.

If you have any further questions, view our documentation, and consider joining our Matrix channel. Let us know what you would like to work on or where you need support to get going!

Our issue tracker documentation also gives information on how and where to report issues.

Sunday, 9 November 2025

(Please note this is still a draft of my final blog)

And just like that, my Google Summer of Code journey with OpenPrinting is drawing to a close. This post serves as a final summary of my project: rebuilding pycups from the ground up for libcups3. While I still have a few things I plan to update, this covers the core of my work over the summer.

It’s been an incredible experience, and I’m excited to share the architectural decisions, challenges, and “magic” tricks that went into creating the new pycups.

Friday, 7 November 2025

The last maintenance release of the 25.08 series is out with fixes to issues with clip pasting on projects with different fps, subtitle styles, image rendering, as well as problems with image sequences. This version also adds support for SVG file replacement and correctly checks for disk space when archiving among other improvements.

For the full changelog continue reading on kdenlive.org.

Thursday, 6 November 2025

Meeting Link:
https://meet.kde.org/playback/presentation/2.3/13c9edf5ab7dc3a850feebda14fe5ed07fbe3577-1762448228740

We got together with the PenPot team’s leader, Pablo Ruiz, to discuss our updates and changes to migrate to PenPot from Figma.

One are of focus for this discussion was in the “sharing” aspect of the libraries built in PenPot. We have use cases where developers and designers need to interact with the graphical assets in a way that makes sense to each group.

We talked about working together in building a sharing model that helps both groups. We are hoping we can have things like:

  • Selective library sharing
  • Automatic library publication (Without the need for a library export)
  • Automatic library updating
  • Easy code and graphical contributions, where users can have a copy of the library in their own PenPot instance and submit changes or updates to the original library.
  • Easier library management.

Current issues

  • We also received updates on the latest changes PenPot is doing around their Web Assembly + Skia library work. They hope to have a working beta version for the KDE team, and others, to test in 2-3 weeks. The team is still deciding how to propose this beta.

Ticket Review

  • The team also provided a graphical update on tickets we have submitted. Some are more important than others but still, these tickets are on their radar and they are processing them.

A new version of Plasma Camera and Plasma Settings have been released

We have a new release of Plasma Camera and Plasma Settings!

Plasma Camera changes:

  • Timestamp EXIF data is now added to photos (MR)
  • Fix log of libcamera property names (MR)
  • Don't default to first pixel format by libcamera (MR)
  • Selectable filename pattern and output path (MR)
  • New translations

Plasma Settings gained the ability to show all settings modules (for all platforms, such as desktop) under a toggle. It now supports the ability to show an "Apply" button for settings modules that do not want settings to save automatically. The header being misaligned on category pages is now fixed.

  • Use custom page stack (MR)
  • Have larger delegates on mobile (MR)

Visit /info/independent-releases-25-11 for the tarballs.

Please note: most Plasma Mobile software is now shipped under the Plasma or KDE Gear release cycles.

Wednesday, 5 November 2025

This post is about how we met KITE‘s team and visited some schools during our family visit trip in Kerala. For those who don’t know, KITE stands for “Kerala Infrastructure and Technology for Education”; they are in charge among other things of the GNU/Linux distribution for Kerala schools and training teachers to use it. GCompris is used a lot there, as it is the main software used in their ICT curriculum textbooks for classes I to IV. The widespread and official use of Free Software in Kerala schools really is an awesome model.

Some names from left to right: 1st is Abdul Hakeem, 3rd is my wife Aiswarya, 4th is Anvar Sadath K., 5th is me.

The connection with KITE happened thanks to Aiswarya’s sister’s husband, Karunraj K. He recently got hired by KITE, so even before going we knew we would try to meet some of their team. During some discussions with him, I understood they did some small customization to their GCompris package to fit their specific needs, but most importantly they added translations and voices for Tamil and Kannada languages. They need those with Malayalam and English as the Kerala state shares borders with Karnataka and Tamil Nadu, so they have many pupils in border areas speaking those languages. Of course my first reaction was to look for their sources to upstream those translations and voice files missing from our GCompris package. Sadly, after searching through their distribution and online, the sources were nowhere to be found, the only way to get them was to ask for it. This was one more motivation to get in touch with their team.

From right to left: Karunraj, Aiswarya, me, Surendran, and two other KITE team members in Kannur

Karunraj invited us to visit KITE’s office of Kannur district, where we were warmly greeted by the local team. We met Surendran Aduthila (head of the local team), with whom we could start discussing several topics, including how to get their translation files. He made some calls to investigate the issue, and soon enough we got in contact with KITE’s CEO Anvar Sadath who invited us for a meeting at KITE’s headquarters in Trivandrum a few days later.

Everyone is listening…

For this meeting, they also invited several team members from various districts involved in their GNU/Linux distribution and software development projects. First, I explained how important it is to publish their sources, especially for customized Free Software packages, ideally using both some public git repositories and the standard way to publish source packages for debian-based distributions. Using public git repositories could also help them to organize their work, and allow some external contributions. It seems they understood it clearly, and decided to follow this path.

I showed them for reference the French education forge portal, which includes a dedicated gitlab instance for teachers to host and share their projects (mostly software and tutorials), and a dedicated instance of matrix chat server for internal communications. They looked very interested, and discussed about how they could do something similar and reuse some of the educational content available from this forge. I also showed them the work from Primtux, the French GNU/Linux distribution for primary schools, which has a lot in common with their own distribution.

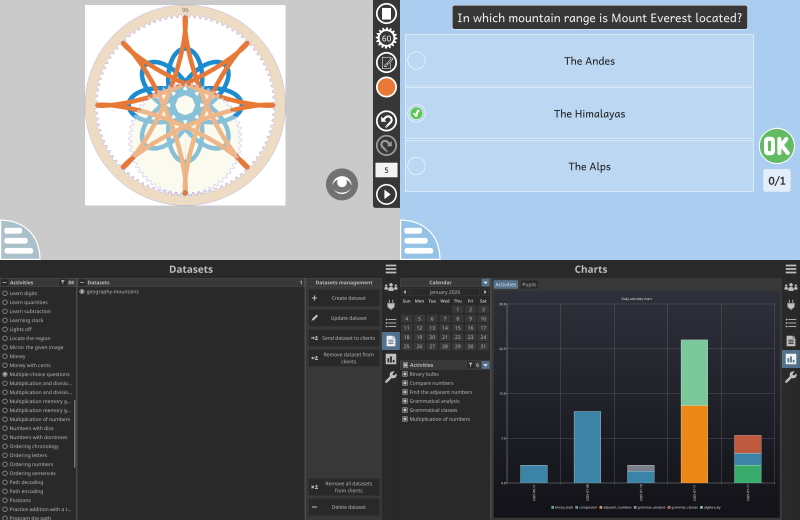
We discussed about how we could collaborate, like how it would be better for their translation team to work directly with us, or how we could develop some new activities together. We also discussed especially about how GCompris is used for children with special needs, and how the coming “GCompris-teachers” (a new side application we are working on, allowing teachers to create customized datasets and analyze pupils results) could be useful for this use case. And I spent some time with the head of their GNU/Linux distribution project, Abdul Hakeem, giving various tips, especially to improve their customized packaging of GCompris. And of course I could get those wanted translation and voice files from his computer, with all the necessary info to add them to our repositories 🙂

Discussions…

Also, I gave them some tips about how to turn some of their in-house software into proper Free Software projects, as it is something they were interested to do but were missing some insights about how to proceed.

Finally, Aiswarya shared her experience with Kerala’s Free Software based education and how it helped her to build her career. Also, she helped me a lot during the meeting when translating some things to and from Malayalam was needed.

Globally it was a very tight-scheduled session, but I think we could cover all the most important topics. I’m very happy of this meeting, and looking forward to future collaborations.

It was covered by the press, and an article was published in The Hindu newspaper the next day (original article behind a paywall).

Article in The Hindu newspaper

Two days later, I was invited to Kannur district’s “IT MELA” (IT Fair), a yearly school event with some competitions on IT topics. On this day was the digital painting contest, which I was very interested to attend: pupils had one hour to paint an image on a given subject, using either Krita or GIMP and a mouse(!). Digital painting without a graphic tablet is super difficult, so I was very impressed to see what those pupils could achieve this way. There was also a Malayalam typing contest (using a special in-house software to track typing), and a web design contest. Again I was super impressed to see what some pupils could produce in one hour with pure HTML+CSS (no frameworks allowed).

A laptop used for the digital painting contest, with the event’s wallpaper

This time again my visit was covered by the press, and the next day almost all local Malayalam newspapers had an article about it.

A Malayalam newspaper
Another Malayalam newspaper

Finally, I had the chance to visit Kuttiattoor’s primary school where I made a little speech to pupils about the importance of Free Software in education. The teachers showed me the ICT “PLAYBOX” textbooks, and gave me an English hard copy of the book for class I.

The ICT textbook for class I (1st Standard)

I’d like to thank again all those who were involved in the meeting organization, the IT MELA visit and the school visit. And thanks a lot to our family in India for the support!

Introduction🔗

I finally have a good desktop computer for streaming, and I have been testing streaming KDE documentation work on Twitch (with occasional Silksong speedrunning) while using a bunny avatar.

It's time to announce it: I now stream mondays to fridays at 8 PM UTC (5 PM UTC-3 / Brasilia time) on twitch.tv/herzenschein. Come and say hi, ask about KDE stuff there!

Today I'm going to teach you how to make a fully working 3D VTubing setup on Fedora KDE 42. Realistically, this guide applies to any modern Fedora, really.

Things you'll need:

  • A computer with a GPU that can handle 3D models
  • A webcam
  • A VRM avatar
  • SnekStudio or VSeeFace
  • OBS Studio
  • Codecs
  • rpmfusion (for OBS virtual camera)

Things you'll achieve:

  • Streaming to OwnCast/YouTube/Twitch
  • Optional: stream to all the above at the same time
  • Using your 3D VTubing avatar as webcam

Things I'll not detail here:

  • Streaming with a PNG avatar (see veado.tube)
  • Streaming with a 2D avatar (see 2D VTubing)
  • Any other setup involving different software

Addendum🔗

After posting this blog post I was made aware of SnekStudio which runs natively on Linux.

Originally, I was going to just do an honorary mention of the project.

However, I did some battle testing and I've determined that SnekStudio is good enough to replace my previous VSeeFace instructions, but I'll keep the original instructions here for those who may happen to not have a good experience with SnekStudio for whatever reason (with VSeeFace, my model moved smoother for example).

Aside from the not-so-smooth movements, the only problems I had were actually preexisting issues in my model: twitchy hair and blinking issues when using wide eye mode. I didn't really get any noteworthy issues with SnekStudio despite the fact that it's alpha. It's pretty good.

Revision changes🔗

Revision 2:

  • Replace VSeeFace with SnekStudio as default recommendation
  • Added addendum
  • Added other resources
  • Mention microphone lip sync

Revision 3:

  • Mention COPR package for easy install
  • Link to PNGtubing page
  • Mention veado.tube
  • Add revision changes

Notes about VTubing🔗

VTubing means "virtual YouTubing", and a VTuber is a "virtual YouTuber", where you use a digital avatar as your online persona while making videos or streaming. There's three types of avatars you can use: static PNGs, 2D rigged, and 3D rigged avatars.

Digital 3D avatars are usually in VRM format. That's what I use.

PNGTubers actually use just still PNG images you can switch on the fly while streaming. 2D avatars usually come in Live2D format. I won't talk about them here, but I know of two VTubers in the Linux space who use a 2D avatar:

You can read more about this sort of thing in Streamlabs: VTubing for beginners.

The place where I got my current VRM avatar was on Gumroad, namely Rabbit by vr-zab, although there are many other stores you can use to find one, like Etsy or VRoid Hub. Oftentimes you can also find VRM avatars as a bonus for Resonite / VRChat avatars and assets.

Once you have a VRM avatar, if you want to make it more "you", you can pay an artist to retexture your model (not too expensive) or to use it as a base for direct model modifications / rigging (expensive). A similar thing applies to Resonite / VRChat models, actually.

VRM avatars can contain metadata detailing the terms of use the author expects you to follow; a fairly common practice is for the model to not allow usage for commercial purposes for example.

You can stream in two ways:

  • Directly from something like OBS Studio to some platform like YouTube or Twitch by using the RTMPS protocol
  • By replacing your webcam output with a virtual camera

Setting the system up🔗

If you've just installed Fedora, the first thing you should always do is update your system:

sudo dnf update

This is non-obvious, but the first update always triggers DNF to install the necessary free codecs. The free codecs are actually sufficient for streaming and work well, so you can just install obs-studio and skip rpmfusion if you want:

sudo dnf install obs-studio

However, if you plan on using the OBS virtual camera, you will need the v4l2loopback kernel module which is only available in rpmfusion.

To set up rpmfusion, you can use upstream Fedora's instructions.

You probably also want to swap to the non-free codecs as per the upstream rpmfusion instructions.

After that, make sure to install obs-studio and v4l2loopback:

sudo dnf install obs-studio v4l2loopback

Reboot and you're done.

If you prefer, you can also use the OBS Studio flatpak; its virtual camera will work too after you have v4l2loopback installed.

Running SnekStudio natively🔗

Enable the Flathub flatpak repository if you haven't already:

flatpak remote-add --if-not-exists flathub https://dl.flathub.org/repo/flathub.flatpakrepo

First, install SnekStudio. I recommend the flatpak (suffixed with _x86_64).

Download it by visiting its Download page or directly with the terminal:

wget https://github.com/ExpiredPopsicle/SnekStudio/releases/latest/download/SnekStudio_x86_64.flatpak
flatpak install SnekStudio_x86_64.flatpak

That's it!

If you want to use microphone lip sync as well, you need to install the experimental version as mentioned in Setting up microphone lip sync.

Preparing SnekStudio for an OBS Scene🔗

Upon installing and running SnekStudio, you will need to do a few things:

  • Click on Modules -> Mod list... -> MediaPipe Controller to select your webcam
  • In Eye Adjustments, enable Link eyes blinking
  • In Poselk, set Chest Yaw Rotation Scale to either -0.3 or 0.3, whichever you prefer
    • This makes looking sideways more natural as the chest moves towards or against the blick gaze!
  • In BlendShapeScalingAndOffset you'll find all of the settings for modifying your character model (depends on what the model creator made available)
    • The model shapes available will be shown in MediaPipe, the facial expressions in VRM
    • You'll most likely want to alter the second slider of each shape, namely the offset
    • You'll then want to use the third slider of each shape, the smoothing, which changes the transition animation between movements (you probably want it all the way to the max)
  • Lastly, you'll want to play with the lighting in SceneBasic, specifically Ambient Light Energy and Directional Light Energy
    • Directional Light Pitch and Directional Light Yaw let you control where the lighting comes from

There's also a few useful controls you'll want to get used to:

  • Whenever you open a dialog inside the program, by clicking the upper right p you'll pop it out into a separate window
  • Use middle click drag or right click drag to rotate around the scene / your character
  • Use Shift + Middle click drag or Right click drag to move your "in-camera" position

Lastly, you can go to Settings -> Window and enable Transparent background.


Now, KDE Plasma (the default desktop environment on Fedora KDE) has a nice feature we can use for convenient window placement: tiling.

You can toggle the tile editor with Windows key (otherwise known as Meta or Super) + T. If you've never played with this feature before, you will probably have a default tiling with a lean left tile, a large center tile, and a lean right tile.

On your adjacent monitor, expand the left tile a bit and delete the right tile.

If you don't have an adjacent monitor where to hide your SnekStudio and OBS windows from stream, that's fine. You can use a virtual desktop for this later.

Now, drag the SnekStudio window to the place where the left tile would be while also holding Shift. The SnekStudio window will have resized to that space and will always have the same window geometry when you move the window there. You can then click the weird X button to hide the UI and then hide the button with Space.

The SnekStudio setup is now complete.


Open OBS Studio, click on the plus ➕ button and select Screen Capture (Pipewire). Create a new screen capture and in the Screen Sharing: Choose what to share with OBS Studio window, select the Windows tab and find the SnekStudio window.

Right click your screen capture source and select Transform -> Edit Transform (or press Ctrl+E). You can then use the Crop left/right/top/bottom spinboxes to cut the window borders from your screen capture. The titlebar usually takes around 40 px to be removed, the left border around 6 px.

You might want to readjust your character in SnekStudio while in this mode.

If you're using an ultra wide monitor, use your ultra wide Base (Canvas) Resolution output resolution. While 16:9 is a more standard and accessible resolution for streaming, the recommendation you find online (using the Scaling/Aspect Ratio filter) is for the most part outdated; platforms like Twitch do letterboxing (add black bars below and above the screen) on the ultra wide output so it looks ok on 16:9 screens.

Lastly, move the OBS window to the large right tile using Shift, as before.

The OBS setup is now complete.

Setting up microphone lip sync🔗

This section was added in the second revision.

By default, SnekStudio does lip sync using your webcam. While that may suffice for you, it can often malfunction and cause your avatar's mouth and jaw to open excessively or not at all, especially if you are under bad lighting conditions or have a bad webcam.

To address this, use microphone lip sync instead. This is currently only available as an experimental feature, which means you will need to install the SnekStudio nightly instead of the stable release.

Enable the Flathub flatpak repository if you haven't already:

flatpak remote-add --if-not-exists flathub https://dl.flathub.org/repo/flathub.flatpakrepo

You can only download the experimental version from the git repository at https://github.com/ExpiredPopsicle/SnekStudio/releases/tag/nightly.

Then, in SnekStudio, go to Modules -> Mod list... and click the Add button at the bottom of the dialog. Add the LipSync module and, with it selected, click the arrow buttons to move it to after SceneBasic and before AnimationApplier.

By default the lip sync will use every sound that comes out of your microphone that sounds voice-like, which will be a lot, so your avatar will look like it's talking on its own! To get more accurate lip sync, you will need noise reduction so that only your voice is detected. And you need that for SnekStudio, so you can't set this in OBS.

You can easily do that by installing EasyEffects from Flathub:

flatpak install com.github.wwmm.easyeffects

In EasyEffects, click on Input at the top of the window, Effects at the bottom of the window, and then on Add Effect at the left of the window.

Select Noise Reduction. Voilà! It should apply immediately. You can then go to the application's Preferences and set it to Autostart on login.

Running VSeeFace with Bottles🔗

You can skip this if you're using SnekStudio! If you really want VSeeFace, click this text.
Enable the Flathub flatpak repository if you haven't already:

flatpak remote-add --if-not-exists flathub https://dl.flathub.org/repo/flathub.flatpakrepo

Install Bottles:

flatpak install com.usebottles.bottles

Start Bottles, then click on the upper left plus ➕ button that when hovered says "Create new Bottle".

Write the name for the new Bottle and click on the Create button on the top right, using the defaults.

Click on the newly created Bottle and click on Add Shortcuts....

Don't actually do anything there: just check out the location bar on the top and copy the path that you see, then close the dialog window.

This is the path to the hidden Bottles directory where your Bottle installation is stored. It should look something like this:

/home/yourusername/.var/app/com.usebottles.bottles/data/bottles/bottles/TheBottleYouJustCreated/

Open that directory in your file manager, Dolphin 🐬.

Download VSeeFace and extract it in the above directory + drive_c/Program Files/, so:

/home/yourusername/.var/app/com.usebottles.bottles/data/bottles/bottles/TheBottleYouJustCreated/drive_c/Program Files/

You can use F3 for split view or Ctrl+T for a new tab in Dolphin to make it easier to move files around.

Now you get back to Bottles, open the Bottle you made, click on Add Shortcuts... and select drive_c/Program Files/VSeeFace/VSeeFace.exe in there.

After that, you should see a play button ▶️ to the right. Upon clicking it, VSeeFace should show up! Just select the right webcam to get started, you can use the default VRM avatar for testing.

Back to Bottles real quick, you can click the hamburger menu (three dots) next to the play button ▶️ and click on "Add Desktop Entry". You'll get an entry in your menu for running VSeeFace directly, very handy.

Preparing VSeeFace for an OBS Scene🔗

You can skip this if you're using SnekStudio! If you really want VSeeFace, click this text.
I have a few recommendations for your VSeeFace settings:

  • Use Reset position after positioning yourself mostly neutral to the webcam with the mouth slightly open, lip detection works better this way
  • Enable Mirror motion
  • Keep Movement Smoothing and Movement Range at 0.30
  • If your VRM avatar came with faulty eye tracking, enable Auto blink
  • Set Default Camera Position to Custom, choose a desirable angle for your character, then save

There's also a few useful controls you'll want to get used to:

  • You can rotate your character with Alt + left mouse drag
  • You can zoom in/out with Alt + right mouse drag
  • You can move the character around with Alt + middle mouse drag
  • You can control the lighting with Ctrl + left mouse drag
    • up moves the light source to above and/or behind the character
    • down moves the light source to below and/or the front of the character
    • left/right rotates relative to the up/down axis
    • I recommend putting the light source to the front and to the right of the character (your left), as this works well when in the bottom left corner of the screen while streaming
  • You can hide the interface with the weird X button on the bottom right
  • You can then hide the weird X button by pressing Space

Remember to save your camera position. The other settings should be saved upon close.


Now, KDE Plasma (the default desktop environment on Fedora KDE) has a nice feature we can use for convenient window placement: tiling.

You can toggle the tile editor with Windows key (otherwise known as Meta or Super) + T. If you've never played with this feature before, you will probably have a default tiling with a lean left tile, a large center tile, and a lean right tile.

On your adjacent monitor, expand the left tile a bit and delete the right tile.

If you don't have an adjacent monitor where to hide your VSeeFace and OBS windows from stream, that's fine. You can use a virtual desktop for this later.

Now, drag the VSeeFace window to the place where the left tile would be while also holding Shift. The VSeeFace window will have resized to that space and will always have the same window geometry when you move the window there. You can then click the weird X button to hide the UI and then hide the button with Space.

The VSeeFace setup is now complete.


Open OBS Studio, click on the plus ➕ button and select Screen Capture (Pipewire). Create a new screen capture and in the Screen Sharing: Choose what to share with OBS Studio window, select the Windows tab and find the VSeeFace window. Simple enough. You should see your VSeeFace avatar with a horrid gray background.

Left click on the screen capture Source you just created and then on Filters. Click on the plus ➕ button, add Color Key, then use Select Color -> Pick Screen Color to select the gray color from VSeeFace. Done! You should see a transparent background behind your character.

If your monitor is HDR capable, it will probably not work, though. That's a known and expected issue in OBS. You'll need to add another filter called Apply LUT and tick Passthrough Alpha to get it to work.

Now, if for some reason you prefer to capture the actual monitor output instead of the individual window, or if you can see your window borders, right click your screen capture source and select Transform -> Edit Transform (or press Ctrl+E). You can then use the Crop left/right/top/bottom spinboxes to cut the window borders from your screen capture. The titlebar usually takes around 40 px to be removed, the left border around 6 px.

You might want to readjust your character in VSeeFace while in this mode.

If you're using an ultra wide monitor, use your ultra wide Base (Canvas) Resolution output resolution. While 16:9 is a more standard and accessible resolution for streaming, the recommendation you find online (using the Scaling/Aspect Ratio filter) is for the most part outdated; platforms like Twitch do letterboxing (add black bars below and above the screen) on the ultra wide output so it looks ok on 16:9 screens.

Lastly, move the OBS window to the large right tile using Shift, as before.

The OBS setup is now complete.

Connecting via RTMPS🔗

On your streaming service of preference you should see a stream settings page of sort. For example, on Twitch, you navigate to Settings -> Stream, while on YouTube you navigate to ➕ Create -> Livestreaming -> Stream Settings. There, you need to copy your private Stream Key.

If you heavily dislike relying on a third party, properietary service for this, you can use Owncast, a FOSS, selfhosted, federated, single user Twitch-like streaming platform. I have an extremely easy way to set it up on port 8080 as a Podman Quadlet container, and you can use your own Owncast instance on your own computer to test drive your own stream, privately and securely.

Go to the OBS Settings -> Stream -> Service, select the service, then paste the copied key. Make sure to always keep it hidden.

Clicking on Start Streaming should, unimpressively, start streaming to the platform!

Connecting to everything at the same time via RTMPS🔗

There is an interesting plugin for OBS called obs-multi-rtmp whose purpose is to allow you to stream to multiple platforms at the same time, so you can stream to Owncast, YouTube, Twitch with the same OBS stream (if your hardware is capable and you have the bandwidth).

I have packaged it myself, and it is available on my Fedora COPR under herzenschein/obs-studio-plugin-multi-rtmp.

Just run the following to install the plugin:

sudo dnf copr enable herzenschein/obs-studio-plugin-multi-rtmp
sudo dnf install obs-studio-plugin-multi-rtmp

If you experience any issues, feel free to report them on Codeberg herz-rpms.

If instead you'd like to build it manually and ensure things are done the way you want, you may click on the next collapsible:

You can skip this if you're using my self-packaged Fedora package! If you really want to build it manually, click this text.
Unfortunately the process is convoluted to do as you'll need to compile the plugin using the instructions mentioned in one of the Github issues for the project.

Install obs-studio-devel:

sudo dnf install obs-studio-devel

Clone the project and enter it:

git clone https://github.com/sorayuki/obs-multi-rtmp.git
cd obs-multi-rtmp

Build it using the Ubuntu CI preset:

cmake -B build/ --install-prefix $PWD/obs-plugin-here --preset ubuntu-x86_64 --fresh 
cmake --build build/ --parallel
cmake --install build/

If you have issues trying to compile the project, see Installing build dependencies to learn how to address them.

The plugin files will be installed to an obs-plugin-here/ directory right in the source directory for convenience. But it does not have a directory structure that OBS Studio uses for its plugins, so we need to move files around.

Create the directory structure necessary for the plugin:

mkdir --parents obs-multi-rtmp/bin/64bit
mkdir --parents obs-multi-rtmp/data/locale

Copy the necessary files:

cp obs-plugin-here/lib/x86_64-linux-gnu/obs-plugins/obs-multi-rtmp.so obs-multi-rtmp/bin/64bit/
cp obs-plugin-here/share/obs/obs-plugins/obs-multi-rtmp/locale/* obs-multi-rtmp/data/locale/

Lastly, copy the newly-created obs-multi-rtmp/ directory to your OBS plugins installation:

mkdir ~/.config/obs-studio/plugins
cp --recursive obs-multi-rtmp/ ~/.config/obs-studio/plugins/

Finally, open OBS Studio, click on Docks -> Multiple Output, then attach it to whatever region of OBS Studio you prefer.

Note that you will need to add the correct RTMPS server for services like YouTube and Twitch. This is ordinarily handled by OBS, but the plugin doesn't have access to the list of servers that OBS has.

Fret not, because the list of streaming servers that OBS has are actually listed directly in the source code. Just find the best one for you and manually add new streaming targets to your Multiple Output plugin.

Kudos to AntonioGomes42 for figuring out and detailing how to build the plugin.

Using a virtual camera🔗

A virtual camera can be useful to stream to absolutely any webcam-using service or platform using your digital avatar. This includes things like Jitsi, Slack, BigBlueButton, and Discord. Anything that can use your webcam, really. You can be a cute bunny instead of a cute human with your friend, or you may just be really privacy conscious.

To use the virtual camera, as mentioned before, you'll need to install v4l2loopback which is only available in rpmfusion, so if you haven't skipped anything in Setting the system up, including rebooting after installing it, you should have the Start Virtual Camera button in your OBS.

Fedora has changed the default webcam backend for Firefox from v4l2 to Pipewire libcamera. It's cool and all, but apparently I ended up uncovering a weird bug in it that hinders the OBS virtual camera from showing up in Firefox.

Thankfully, there's a simple workaround: go to about:config, set media.webrtc.camera.allow-pipewire to false (both instances of the config), then restart pipewire and wireplumber as per the blog post:

systemctl restart --user pipewire wireplumber

Make sure to restart Firefox and OBS after that.

I made a bug report about this recently, but I had already been somewhat in contact with the Fedora Firefox maintainer for a while about this and I've been helping investigate to my limited capacity. Eventually we should see this fixed upstream and no modification should be required in Firefox in the future.

Final thoughts🔗

I had to figure out many pieces to get this working. Some things were not obvious at all, some things were much more complicated even months ago:

  • There are two main ways to install software with Bottles; either running the installer, or by having the files inside the prefix (the case here)
  • What was silently causing Firefox to not see the virtual camera
  • The OBS Studio plugin directory structure
  • The build failures that obs-multi-rtmp would get unless you used the CI preset
  • I originally used the OpenSeeFace script to make VSeeFace use face tracking until I figured things out with VSeeFace
  • The fact that VSeeFace only supports VRM0 instead of VRM1, so editing VRM models with Blender doesn't quite work even with the correct plugins
  • The rabbit hole I went down to edit my own VRM file (not mentioned here), not knowing the only functional way is to use a hella old Unity version
  • Not knowing how camera devices are managed on Linux
  • The HDR workaround was so cryptic
  • I had to test Twitch letterboxing myself to even be sure it was a thing to begin with

Among other things. Some of these are not even Linux specific, they're just obscure in general.

All because I wanted to stream as a cute femboy bnnuy online.

Hopefully with my instructions it is now not too painful to set things up, even something complicated like compiling a plugin. This blog post should be generally replicable on other distributions too. It was originally written to celebrate Fedora KDE 42 becoming an official edition alongside GNOME, but alas, I took too long and we're already at Fedora KDE 43.

Maybe we'll see more Linux VTubers now at least? :3c

Other resources🔗

The next couple paragraphs were the result of a revision.

Only multiple days after I published this blog post did I hear about this one repository containing their own guides on how to run multiple pieces of VTubing software on Linux (mostly on WINE). And then this other website that has more resources as well.

This blog post was specifically designed to give you a very battle tested functional way to do VTubing on Linux, hence why there's only one method highlighted (with an optional secondary method), I'm opinionated.

But it's always worth linking to other people's projects so they're easier to find and support.

Here's a honorary mention to the community maintained Linux-Guide-To-VTubing.

Here's a honorary mention to the community maintained Linux VTubing Guide.

Tuesday, 4 November 2025

Image of a yellow star with an orange circle centered in the star and within the star the text "</>" representing Google summer of code next to a plus sign next to a three quarter gear with a K representing KDE

This year we again participated in Google Summer of Code and we had 12 successful projects.

Akonadi/Merkuro

Merkuro is a modern groupware solution and uses Akonadi as backend. This year we had two mentees working on Akonadi, and in particular on how the resources and their configuration dialogs interact with Merkuro on mobile.

  • Pablo Ariño worked on improving the memory usage of the Akonadi agents and resources. He did that by ensuring the configuration dialogs of the agents is moved to a separate plugin which is then loaded on demand by the application, instead of having the agents being GUI processes which handle their configuration dialogs directly.

  • Shubham Shinde worked on the UI side of things by writing the infrastructure for config dialogs to be written in QML. This is extremely important to get mobile optimized dialogs on mobile and is also a good occasion to clean the dialog code up. All the major code changes can be found on the following merge requests: Akonadi and KDE PIM Runtime.

Kdenlive

Kdenlive brings you all you need to edit and put together your own movies. We had 1 project for KDE's full-featured video editor:

  • Ajay Chauhan improved the supported for timeline markers in Kdenlive. Previously, we only supported single point markers, which can be used to mark a specific point in time. Ajay added support for duration-based markers that define a clear start and end time.

ISO Image Writer

  • Akki Singh worked on a port of ISO Image Writer from QtWidgets to Kirigami. Akki also added a bunch of features to the app such as allowing you to download ISO images for some of the more popular KDE distributions, or from an URL automatically.

OSS-Fuzz Integration

OSS-Fuzz is a program by Google were our code is fuzzed by them in search for vulnerabilities.

  • Azhar Momin focused his work on improving the OSS-Fuzz integration in the KDE libraries. Azhar moved our configuration to our repos, making them easier to maintain, and the fuzzer now scans many thumbnails formats (e.g. poppler, syntax highligted text, krita archives, mobipocket and many more). He also fixed some of the bugs detected by the fuzzer like a memory leak in the blender thumbnail extractor.

KDE Linux / Karton

  • Derek Lin worked on the new virtual machine manager from KDE named Karton. He implemented, among other things, keyboard input support, basic SPICE viewer (non hardware accelerated) and audio support.

Since the end of GSoC, he has also added hardware acceleration to the playback and you can find more information about that on his blog.

GCompris

GCompris is KDE's educational suite for children learning at home or school. It comes with around 200 activities to learn while having fun. The next iteration of the suite adds a teacher panel to follow the progress of children and provide customised exercises to focus on specific topics.

Mankala

The Mankala engine is a project that was started during last year's GSoC. The project is still in review and is pending integration into KDE.

  • Srisharan V S worked on a cross platform GUI for MankalaEngine. On the desktop, it is possible to play Mankala games against a remote opponent provided both players have XMPP accounts. The GUI uses QXmpp for networking. The GUI works on both desktop and mobile, though network play is not yet available on mobile as support for this needs to be re-enabled in the QXmpp library.

Krita

Krita is KDE's free and open source cross-platform application for creating digital art files from scratch.

  • Ross Rosales worked on improving Krita's usability by adding a UI to display common selection actions after selecting a layer. More details on Ross journey are available on his blog. The feature request was opened in 2022 and will be available in the upcoming 5.3 version of Krita.

Cantor

Cantor is a powerful mathematical and statistical computing front-end within the KDE ecosystem. Two contributors worked on improving Cantor this year:

  • ZhengJiahong added features to improve Python support. Once the merge request is finished, users will be able to switch Python virtual environments to improve the user experience.

  • Lv Haonan worked on integrating KTextEditor in Cantor to replace the custom made spreadsheets. This has several advantages: the current spreadsheets lack some features (auto-indent, code completion, spell checks...), they require extra maintenance from developers where a better solution already exists within KDE, and it will bring consistency between the different backend editors.

Mentorship Portal

One of the current KDE Goals is to improve the long term sustainability of KDE by recruiting and keeping more newcomers.

  • Anish Tak worked on extending the current mentorship website to make it cleaner and with more information for newcomers.

KWin

KWin is an easy to use, but flexible, window manager and compositor for the KDE Plasma desktop. It controls how windows are drawn, moved, and displayed, handles input (keyboard, mouse, touch, etc.).

Yelsin 'Yorisoft' Sepulveda worked on adding game controller input support to KWin. By using input libraries like libevdev he was able to add a option in Plasma System Settings that enables awareness of game controllers and detects their input. This was essential for adding features, such as:

  • Mapping Game Controller inputs to Keyboard and Mouse
  • Navigating Plasma Desktop with Game Controllers
  • Preventing Sleep/Suspend when gaming with controller and leaving keyboard/mouse idle

Next Steps

The 2025 GSoC period is finally over for KDE. A big thank you to all the mentors and contributors who have participated in GSoC! We look forward to your continuing participation in free and open source software communities and in contributing to KDE.