Our 5th annual Awards are open for nominations and our 2024 judges are waiting for your nominations! Hannah Foxwell, Jonathan Riddell, and Nicole Tandy will be selecting winners for 12 categories. ?
The OpenUK Awards 2024 are open for nominations until Sunday, September 15.. Our 5th Awards again celebrate the UK’s leadership and global collaboration in open technology!
Up to 3 shortlisted nominees will be selected in each category by early October and each nominee will be given one place at the Oscars of Open Source, the black tie Awards Ceremony and Gala Dinner for our 5th Awards held at the House of Lords on 28 November, thanks to the sponsorship of Lord Wei.
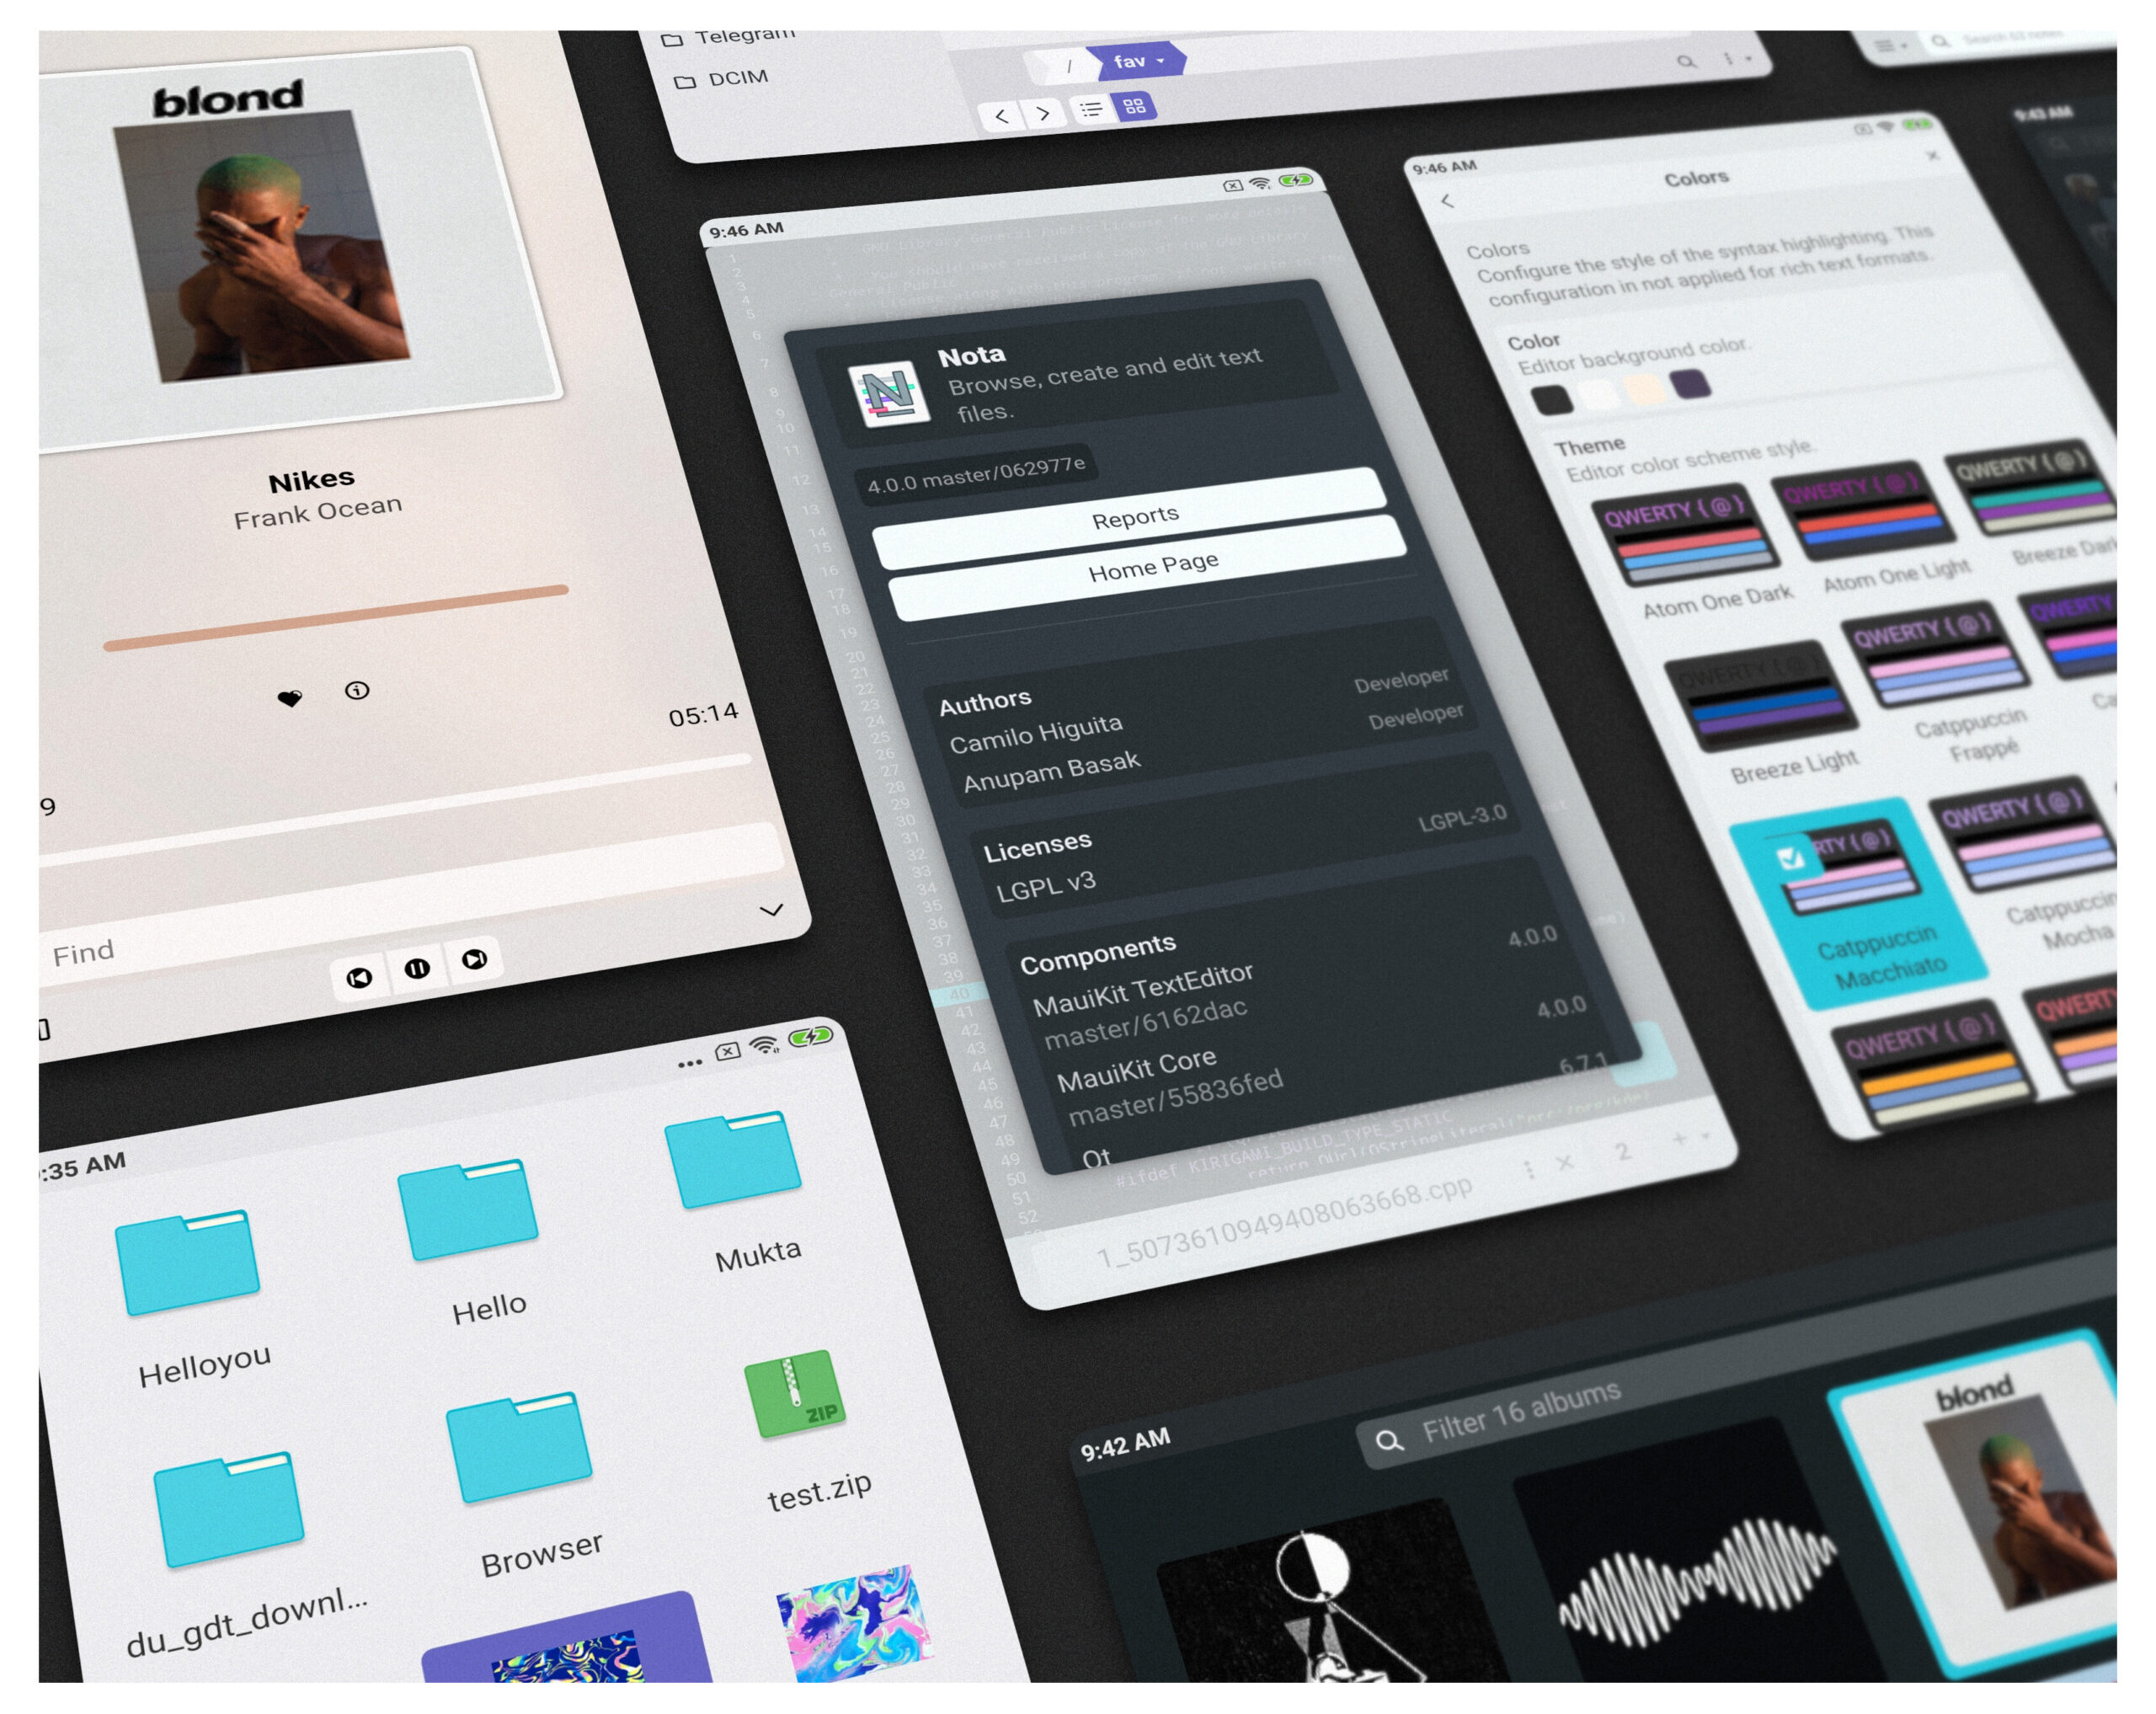
Today, we bring you a report on the brand-new release of the Maui Project.
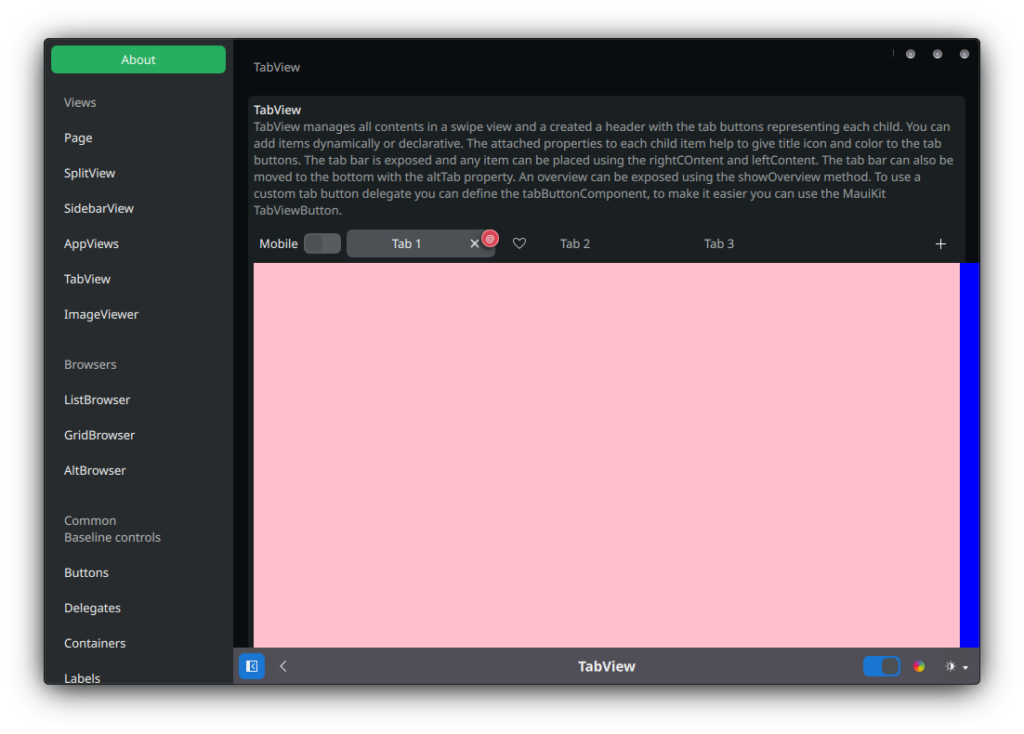
We are excited to announce the latest release of MauiKit version 4.0.0, our comprehensive user interface toolkit specifically designed for convergent interfaces, the complying frameworks, and an in-house developed set of convergent applications.
Built on the solid foundations of Qt Quick Controls, QML, and the power and stability of C++, MauiKit empowers developers to create adaptable and seamless user interfaces across a range of devices, and with this release, we have finally migrated to Qt6 and made available the documentation for the frameworks.
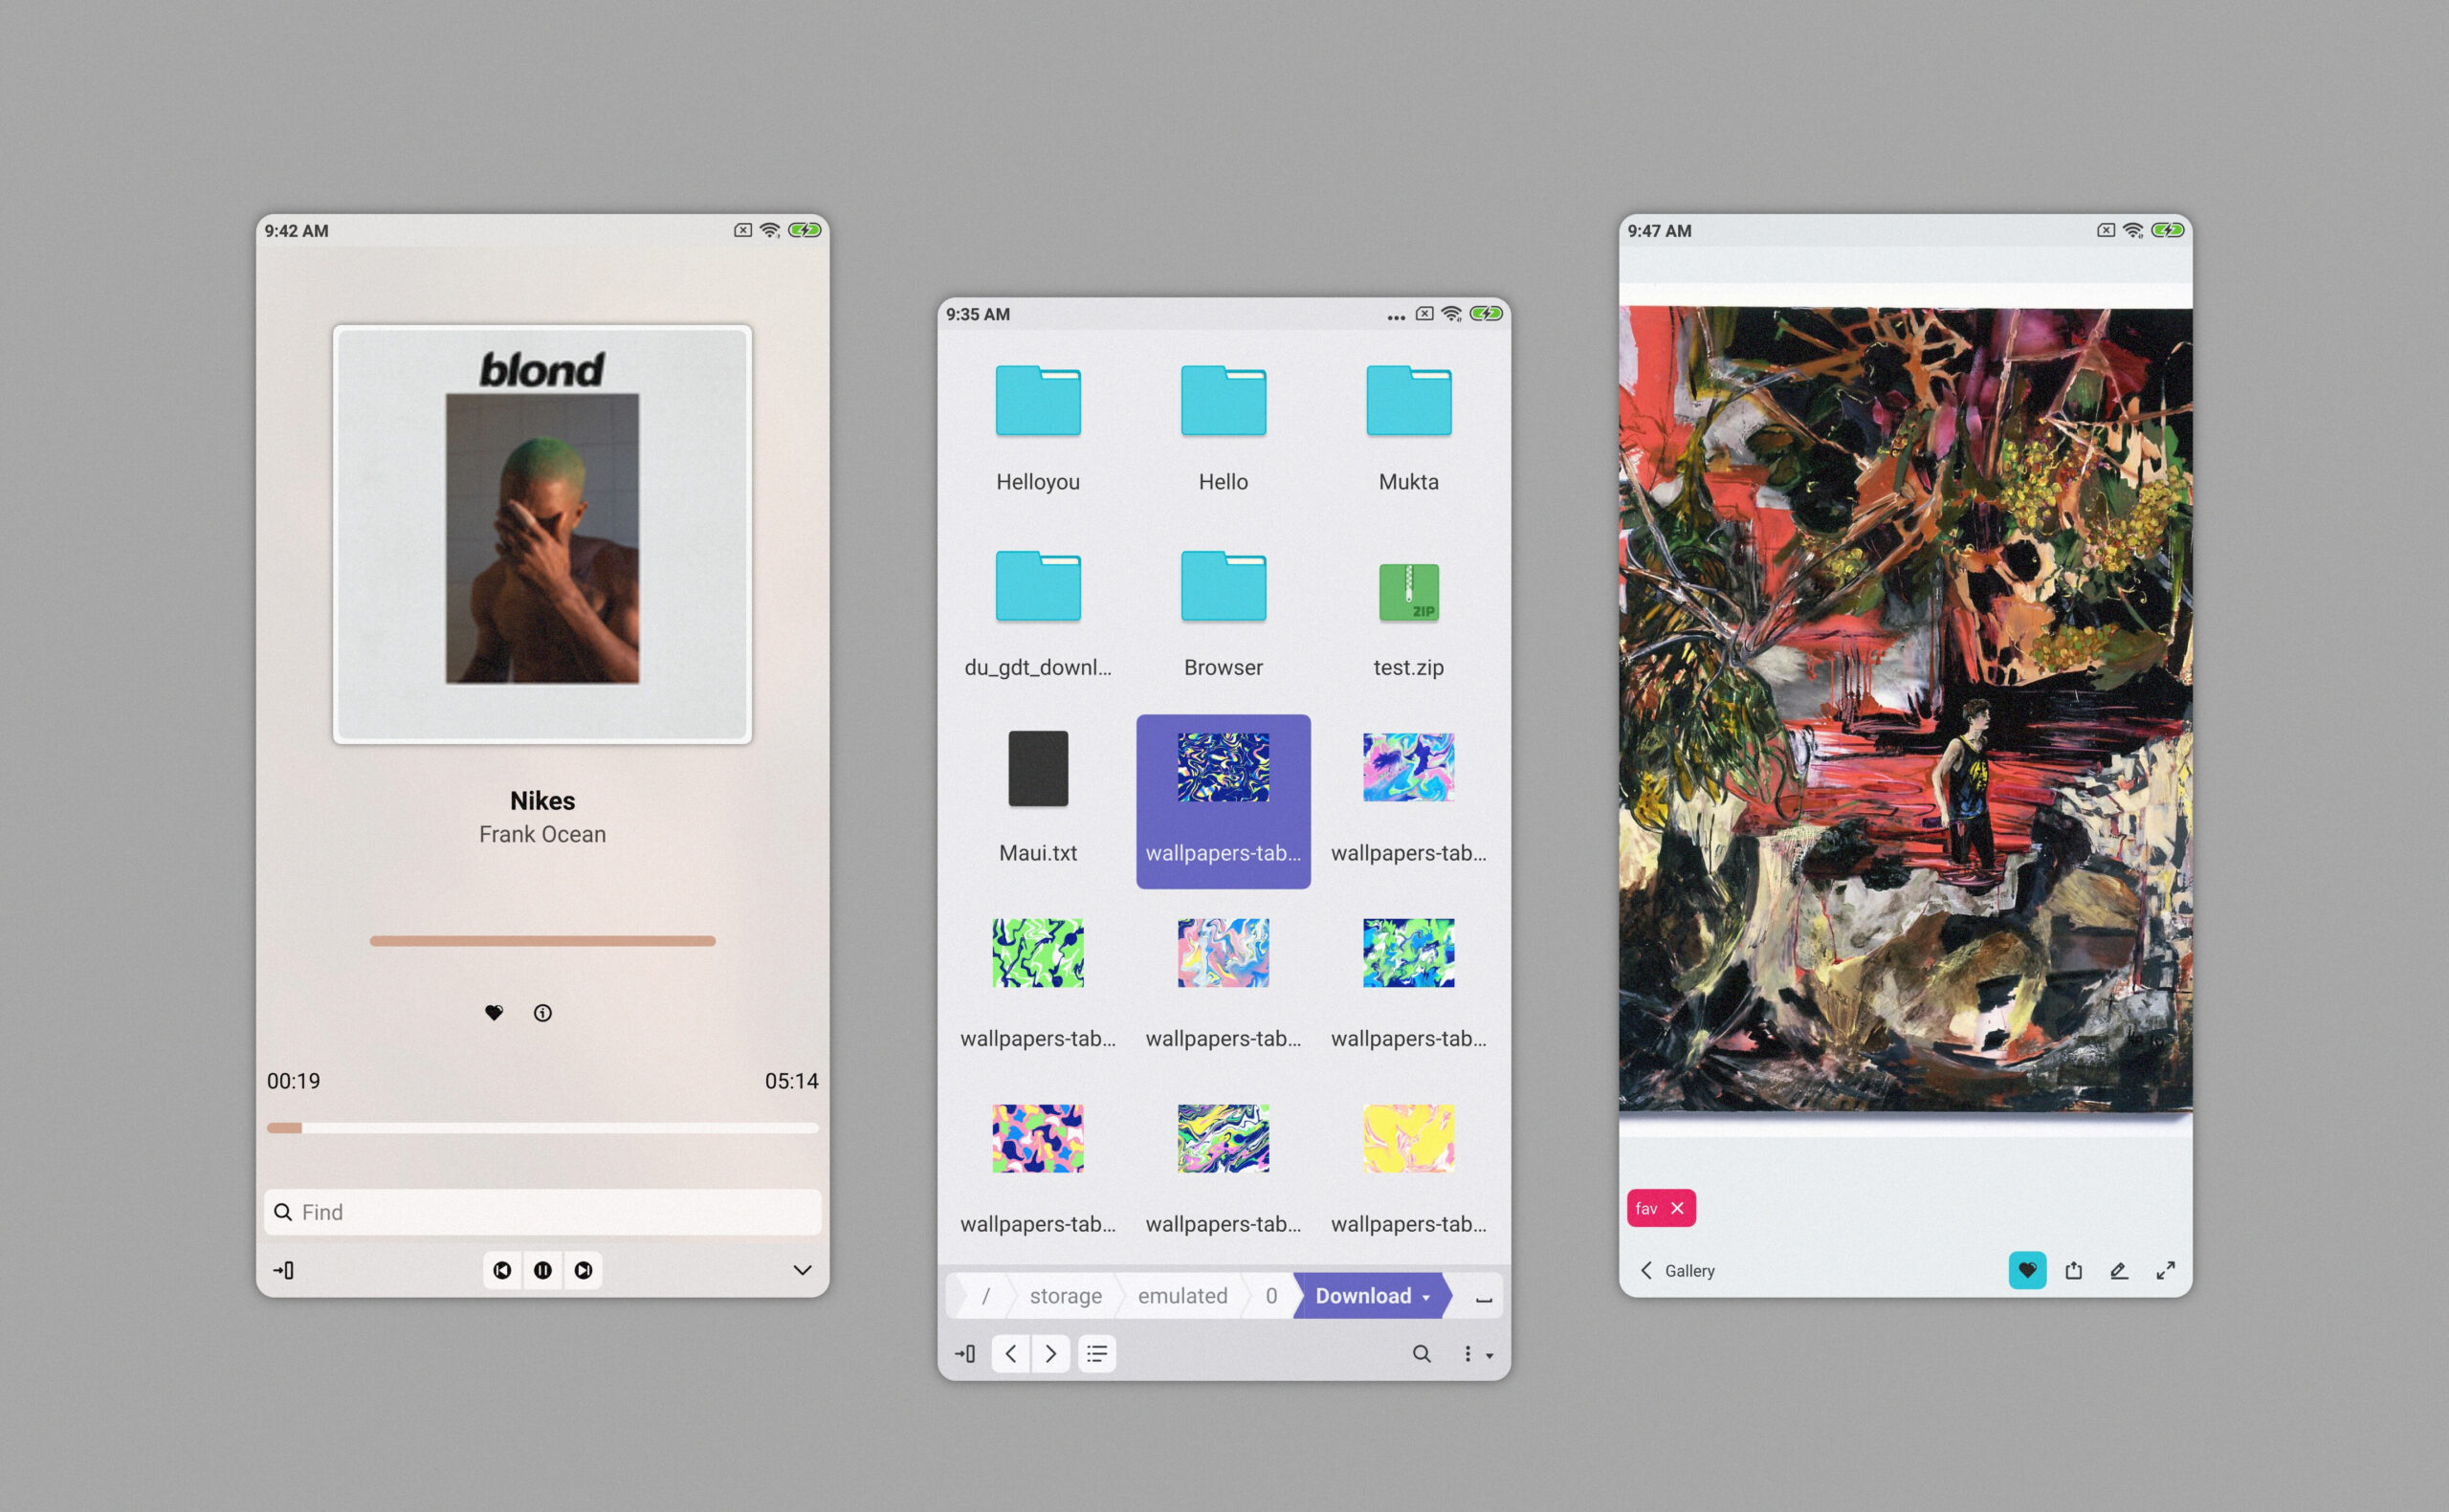
Join us on this journey as we unveil the potential of MauiKit 4 for building convergent interfaces, and finally discover the possibilities offered by the enhanced Maui App stack.
Community
To follow the Maui Project’s development or to just say hi, you can join us on our Telegram group @mauiproject
All of the Maui repositories have the newly released branches and tags. You can get the sources right from the Maui group: https://invent.kde.org/maui
Qt6
With this version bump the Maui team has finalized the migration over to Qt6, which implies more stability and better performance coming from Qt upgraded QQC engine; but also means that some features have been removed or did not make the cut and still need more time to be brought back in posterior releases.
MauiKit 4 Frameworks & Apps
Currently, there are over 10 frameworks, with two new ones recently introduced. They all, for the most part, have been fully documented, and although, the KDE doxygen agent has some minor issues when publishing some parts, you can find the documentation online at https://api.kde.org/mauikit/ (and if you find missing parts, confusing bits, or overall sections to improve – you can open a ticket at any of the framework repos and it shall be fixed shortly after)
A script element has been removed to ensure Planet works properly. Please find it in the original post.
Core & Others
MauiKit Core controls also include the Mauikit Style, which along with the core controls has been revised and improved in the migration. New features have been introduced and some minor changes in the API have been made.
A good way to test the new changes made visually is via the MauiDemo application, when building MauiKit from the source, just add the -DBUILD_DEMO=ON flag and then launch it as MauiDemo4
All of the other frameworks have also been fully ported and reviewed, and some features are absent – for example, for ImageTools the image editor is missing for Android due to KQuickImageEditor problems.
Comic book support is missing in MauiKit-Documents, due to a big pending refactoring.
Finally, TextEditor new backend rendering engine migration is yet to be started.
Most of these pending issues will be tackled in the next releases bit by bit.
More details can be found in the previous blog posts:
MauiKit-Archiver is a new framework, and it was created to share components and code between different applications that were duplicating the same code: Index, Arca, and Shelf.
The same goes for MauiKit-Git, which will help unify the code base for implementations made in Index, Bonsai, and Strike, so all of those apps can benefit from a single cohesive and curated code base in the form of a framework.
Archiver is pending to be documented, and Git is pending to be finished for its first stable release.
I have now finished porting all the Maui Apps and MauiKit frameworks to Qt6.
A script element has been removed to ensure Planet works properly. Please find it in the original post.
Known Issues
MauiKit-Documents comic book support is stalled until the next release due to heavy refactoring under Android.
MauiKit-ImageTools under Android does not include the image editor, since KQuickImageEditor is not working correctly under Android
Clip is not working under Android due to issues with the libavformat not finding openssl.so when packaging the APK, this is still under review
MauiKit-Git is still being worked on, and due to this Bonsai is not included on this stable release as it is being ported over to MauiKit-Git
@maui_project looking good. after the port to qt6 the next goal is to put out a stable version of Maui Shell with a tight integration to the app ecosystem and the HIG #mauikitpic.twitter.com/BkR9ecTzMT
A script element has been removed to ensure Planet works properly. Please find it in the original post.
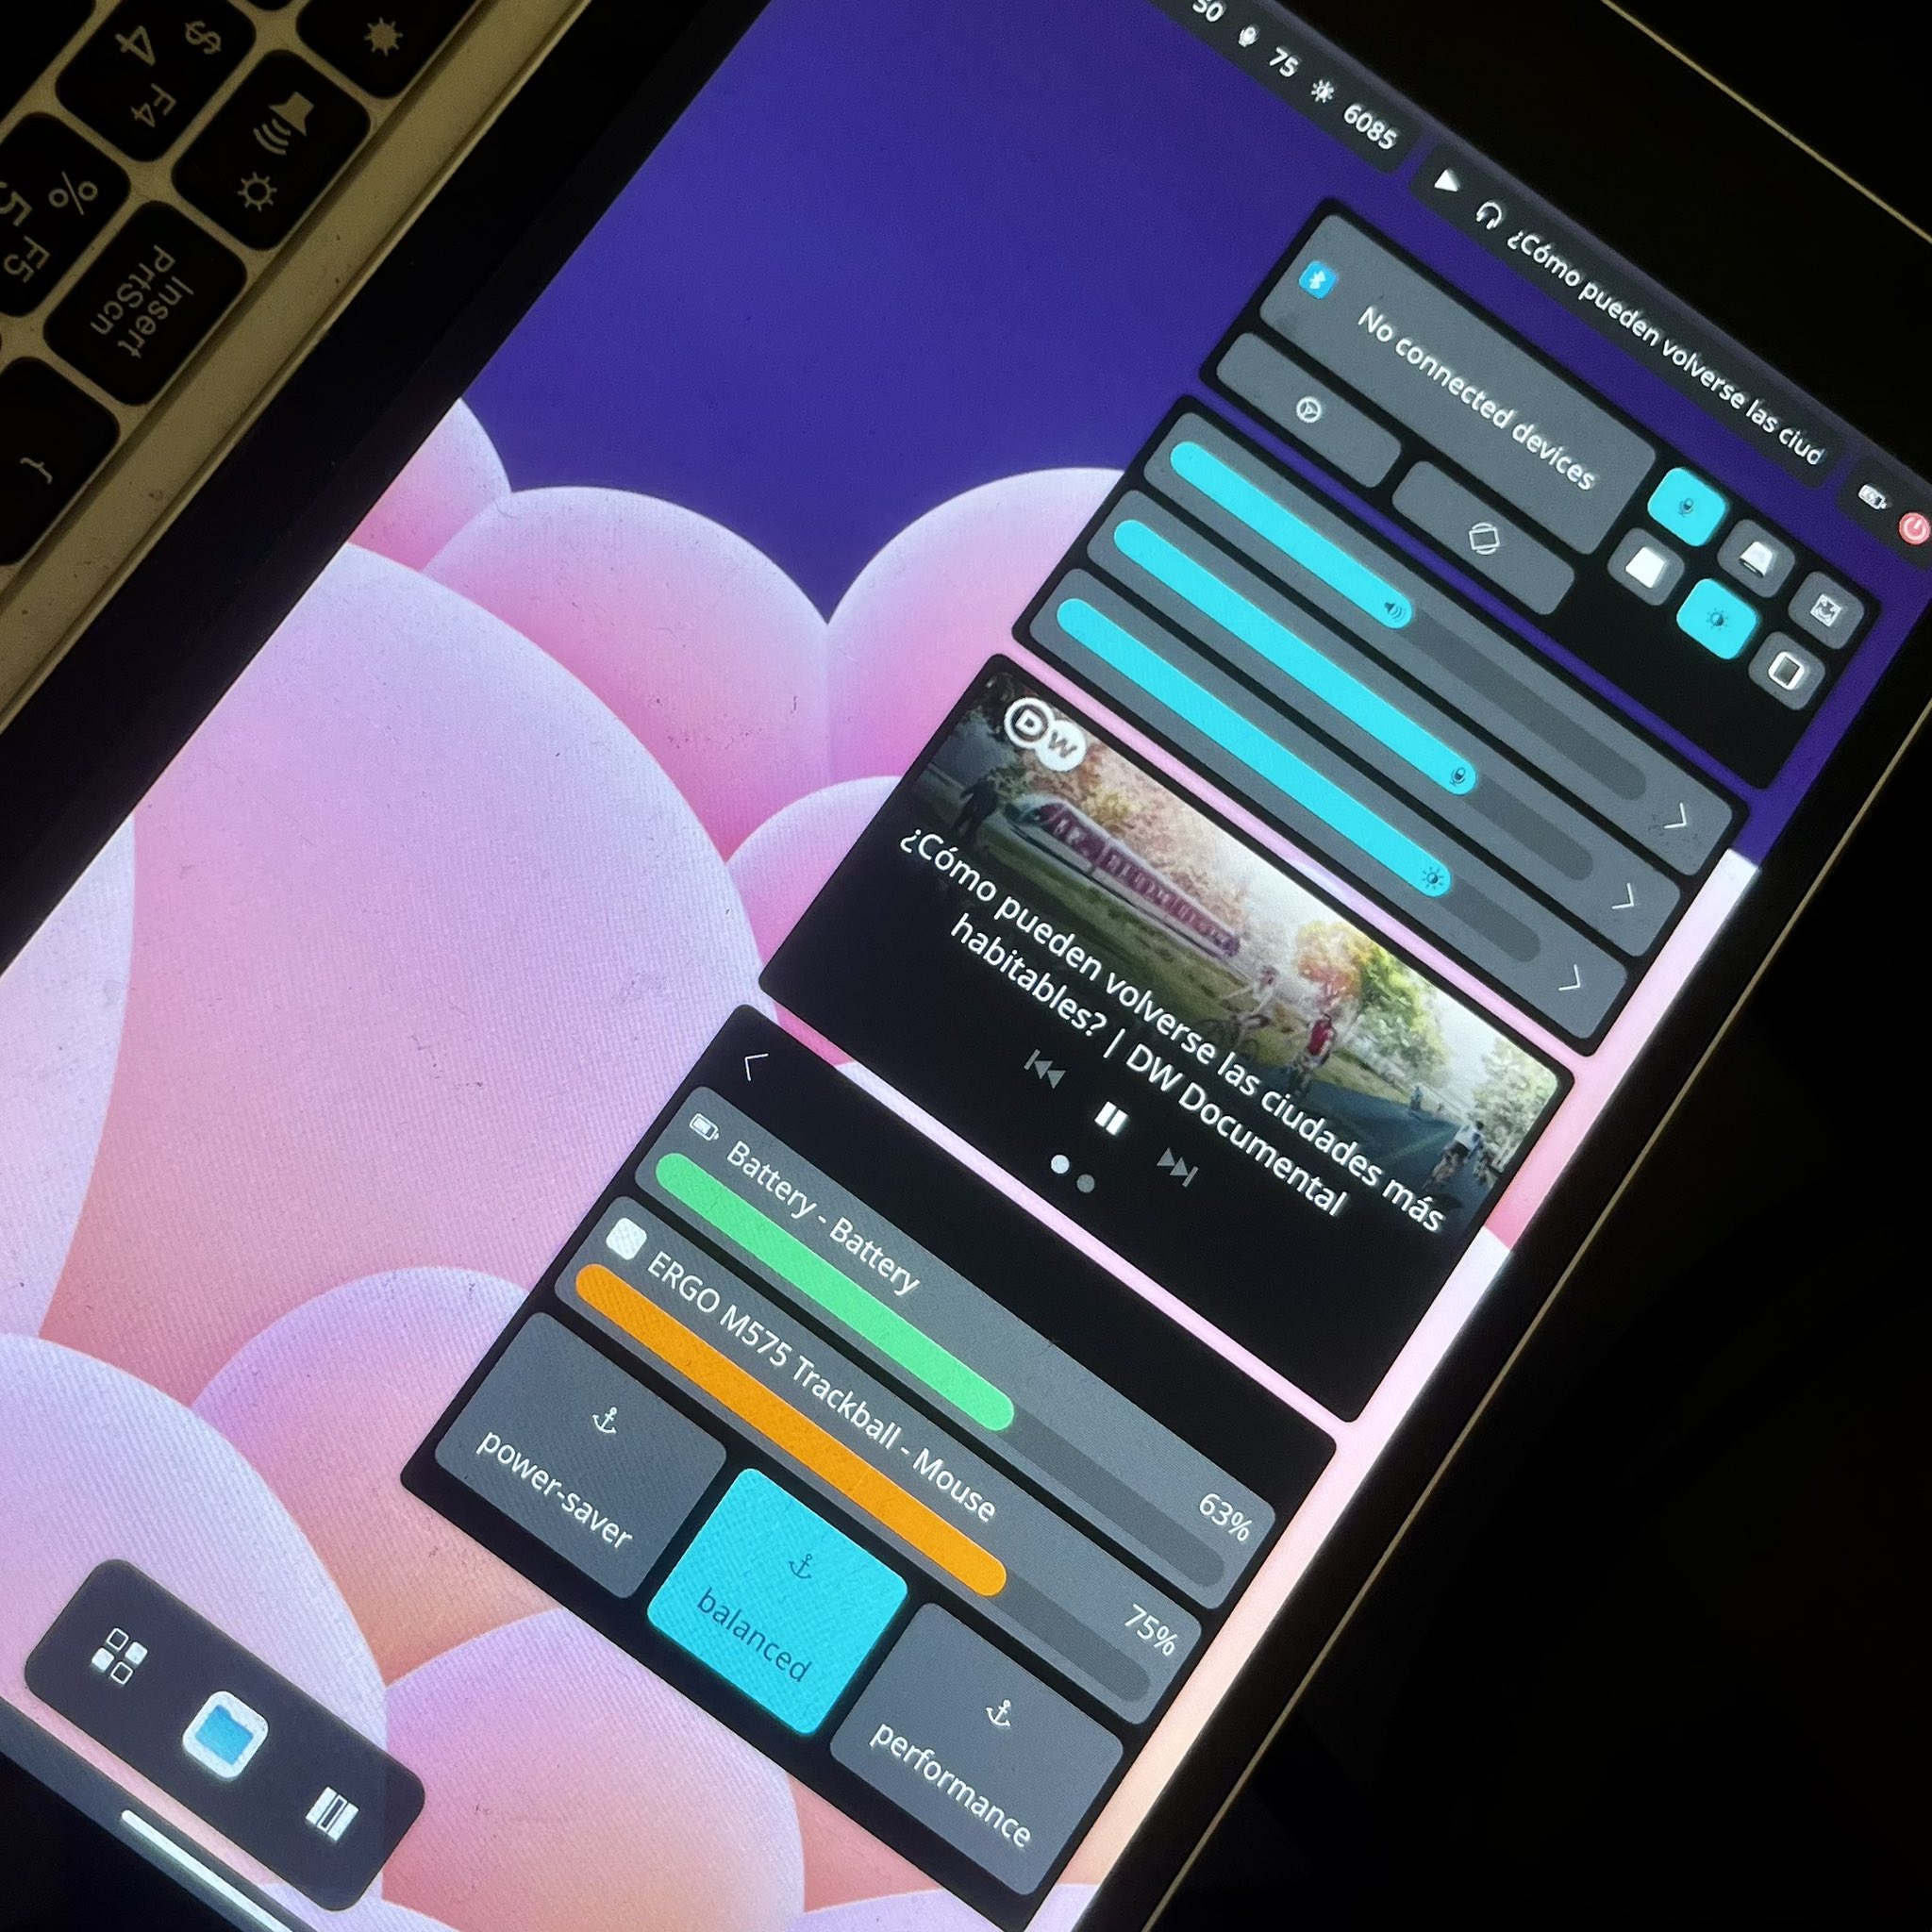
Maui Shell
Although Maui Shell has been ported over to Qt6 and is working with the latest MauiKit4, a lot of pending issues are still present and being worked on. The next release will be dedicated fully on Maui Shell and all of its subprojects, such as Maui Settings, Maui Core, CaskServer, etc.
That’s it for now. Until the next blog post, that will be a bit closer to the 4.0.1 stable release.
After years and years of working together on KPhotoAlbum, a considerable part of the devs team (Johannes and me ;-) finally met in-person, at Akademy in Würzburg!
It was a very nice and pleasurable meeting, with lots of information around KDE, e.g. community goals, where we stand with Qt 5 and 6 and where we want to go, programming, sustainability and so on. Thoroughly nice and friendly people (esp. the two of us of course ;-), with whom one could have nice and productive conversations. If you can, go to Akademy – it's worth it!
Also, we hopefully again could emphasize – in person – the importance a Qt6/KF6 port of Marble for KPhotoAlbum and also KGeoTag. We now actively work on porting KPA to Qt6/KF6, but we need Marble to be able to finally release it. But we're confident everything will work out.
The KDE community has charted its course for the coming years, focusing on three interconnected paths that converge on a single point: community. These paths aim to improve user experience, support developers, and foster community growth.
This goal focuses on improving the application development process. By making it easier for developers to create applications, KDE hopes to attract more contributors and deliver better software for both first-party and third-party applications. A notable task within this goal is enhancing the experience of building KDE apps with languages beyond C++, such as Rust or Python.
KDE has a diverse users base with unique input needs: artists using complex monitor and drawing tablet setups; gamers with controllers, fancy mice, and handhelds; users requiring accessibility features or using a language optimally types with complex input methods; students with laptops, 2-in-1s, and tablets — and more! While KDE has made significant progress in supporting these diverse sources of input over the years, there are still gaps to be addressed. This goal aims to close those gaps and deliver a truly seamless input experience for everyone.
Champions: Gernot Schiller, Jakob Petsovits and Joshua Goins
KDE’s growth depends on new contributors, but a lack of fresh involvement in key projects like Plasma, Kdenlive, Krita, GCompris, and others is a concern. This goal focuses on formalizing and enhancing recruitment processes, not just for individuals but also for institutions. Ensuring that bringing in new talent becomes a continuous and community-wide priority, vital for KDE's long-term sustainability.
Champions: Aniqa Khokhar, Johnny Jazeix and Paul Brown
Join us!
Your voice, your code, and your ideas are what will shape the KDE of tomorrow — whether you're a user, developer, or contributor. Let’s go on this journey together and make these goals a reality!
Join the Matrix room and keep an eye on the website for the latest KDE Goals updates.
In April we had the combined goals sprint, where a fine group of KDE people working on things around Automation & Systematization, Sustainable Software, and Accessibility got together. It was a nice cross-over of the KDE goals, taking advantage of having people in one room for a weekend to directly discuss topics of the goals and interactions between them. David, Albert, Nate, Nico, and Volker wrote about their impressions from the sprint.
So what happened regarding the Sustainable Software goal at the sprint and where are we today with these topics? There are some more detailed notes of the sprint. Here is a summary of some key topics with an update on current progress.
Kick-Off for the Opt-Green project
The Opt-Green project is the second funded project of the KDE Eco team. The first one was the Blue Angel for Free Software project, where we worked on creating material helping Free Software projects to assess and meet the criteria for the Blue Angel certification for resource and energy-efficient software products.
The Opt Green project is about promotion of extending the operating life of hardware with Free Software to reduce electronic waste. It's funded for two years by the German Federal Environment Agency and the Federal Ministry for the Environment, Nature Conservation, Nuclear Safety and Consumer Protection and is running from April 2024 to March 2026.
Joseph introduced the project, why it's important, how the environment is suffering from software-induced hardware obsolescence, and how Free Software in general and KDE specifically can help with fighting it. The approach of the project is to go beyond our typical audience and introduce people who are environmentally aware but not necessary very technical to the idea of running sustainable, up-to-date Free Software on their computers, even devices they may think are no longer usable due to lack of vendor support. In many cases this is a perfectly fine solution, and it's surprisingly attractive to a number of people who care about sustainability but haven't really been introduced to Free Software yet.
Where we are today
The project is in full swing. The project has already been present at quite a number of events to motivate people to install Free Software on their (old) devices and support them in how to do it. See for example the report about the Academy of Games for upcoming 9th graders in Hannover, Germany.
Revamping the KDE Eco website
We had a great session putting together ideas and concepts about how we could improve the KDE Eco website. From brainstorming ideas to sketching a wireframe as a group, we discussed and agreed on a direction of how to present what we are doing in the KDE Eco team.
The key idea is to focus on three main audiences (end users, advocates, and developers) and present specific material targeted at these groups. This nicely matches what we already have, e.g., the KDE Eco handbook for how to fulfill the Blue Angel criteria for developers, or the material being produced for events reaching out to end users, and while giving it a much more focused presentation.
Where we are today
The first iteration of the new design is now live on eco.kde.org. There is more to come, but it already gives an impression where this is going. Anita created a wonderful set of design elements which will help to shape the visual identity of KDE Eco going forward.
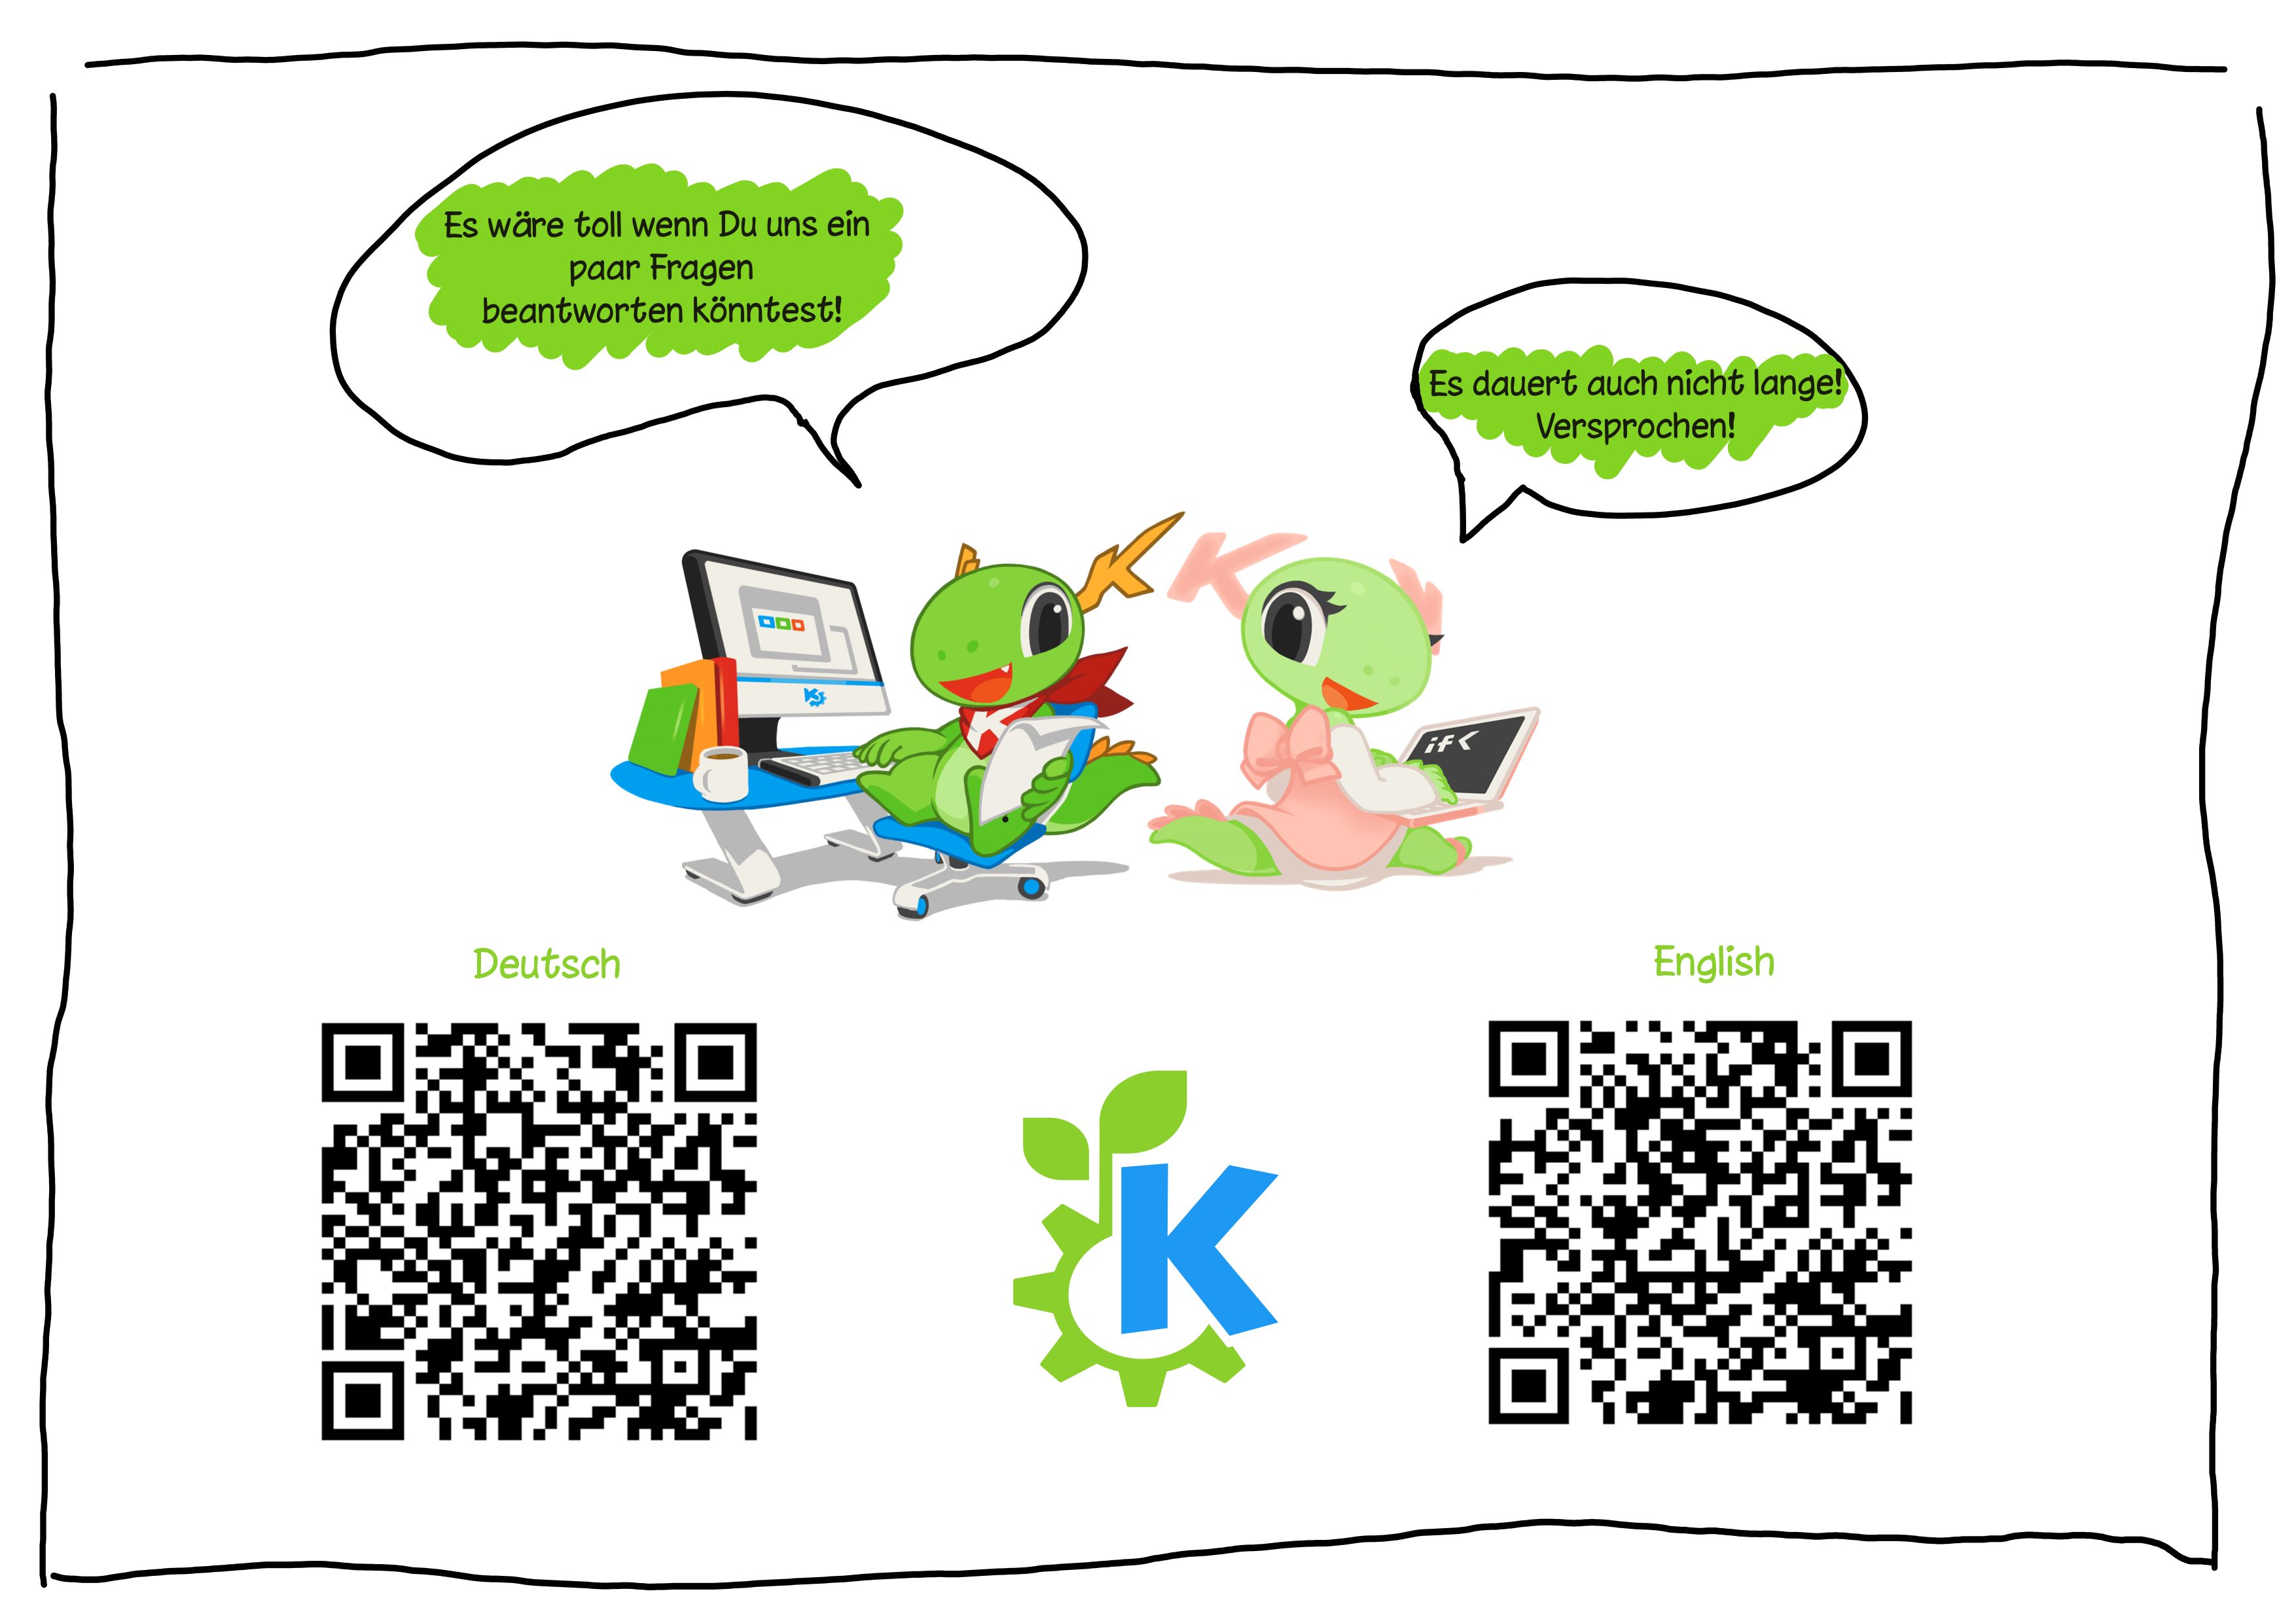
Surveying end users about their attitude to hardware reuse
Making use of old hardware by installing sustainable free software on it is a wide field. There are many different variations of devices and what users do with them also varies a lot. What are the factors that might encourage users to reuse old hardware, what is holding them back?
To get a bit more reliable answers to these questions we came up with a concept for a user survey which can be used at events where we present the Opt Green project. This includes questions about what hardware people have and what is holding them back from installing new software on it.
Where we are today
The concept has been implemented with an online survey on KDE's survey service. It's available in English and German and is being used at the events where the Opt Green project is present.
Sustainable AI
One of the big hype topics of the last two years has been Generative AI and the Large Language Models which are behind this technology. They promise to bring revolutionary new features, much closer to how humans interact in natural language, but they also come with new challenges and concerns.
One of the big questions is how this new technology affects our digital freedoms. How does it relate to Free Software? How does licensing and openness work? How does it fit KDE's values? Where does it make sense to use its technology? What are the ethical implications? What are the implications in terms of sustainability?
We had a discussion around the possible idea of adopting something like Nextcloud's Ethical AI rating in KDE as well. This would make it more transparent to users how use of AI features affects their freedoms and gives them a choice to use what they consider to be satisfactory.
Where we are today
This is still pretty much an open question. The field is moving fast, there are legal questions around copyright and other aspects still to be answered. Local models are becoming more and more an option. But what openness means in AI has become very blurry. KDE still has to find a position here.
A while ago a colleague of mine asked about our crash infrastructure in Plasma
and whether I could give some overview on it. This seems very useful to
others as well, I thought. Here I am, telling you all about it!
Our crash infrastructure is comprised of a number of different components.
KCrash: a KDE Framework performing crash interception and prepartion for handover to…
coredumpd: a systemd component performing process core collection and handover to…
Sentry: a web service and UI for tracing and presenting crashes for developers
We’ve already looked at KCrash and coredumpd. Now it is time to look at DrKonqi.
DrKonqi
DrKonqi is the UI that comes up when a crash happens. We’ll explore how it integrates with coredumpd and Sentry.
Crash Pickup
When I outlined the functionality of coredumpd, I mentioned that it starts an instance of systemd-coredump@.service. This not only allows the core dumping itself to be controlled by systemd’s
resource control and configuration systems, but it also means other systemd units can tie into the crash handling as well.
That is precisely what we do in DrKonqi. It installs drkonqi-coredump-processor@.service which, among other things, contains the rule:
WantedBy=systemd-coredump@.service
…meaning systemd will not only start systemd-coredump@unique_identifier but also a corresponding drkonqi-coredump-processor@unique_identifier. This is similar to how services start as part of the system boot sequence: they all are “wanted by” or “want” some other service, and that is how systemd knows what to start and when (I am simplifying here 😉). Note that unique_identifier is actually a systemd feature called “instances” — one systemd unit can be instantiated multiple times this way.
drkonqi-coredump-processor
When drkonqi-coredump-processor@unique_identifier runs, it first has some synchronization to do.
As a brief recap from the coredumpd post: coredumpd’s crash collection ends with writing a journald entry that contains all collected data. DrKonqi needs this data, so we wait for it to appear in the journal.
Once the journal entry has arrived, we are good to go and will systemd-socket-activate a helper in the relevant user.
The way this works is a bit tricky: drkonqi-coredump-processor runs as root, but DrKonqi needs to be started as the user the crash happened to. To bridge this gap a new service drkonqi-coredump-launcher comes into play.
drkonqi-coredump-launcher
Every user session has a drkonqi-coredump-launcher.socket systemd unit running that provides a socket. This socket gets connected to by the processor (remember: it is root so it can talk to the user socket). When that happens, an instance of drkonqi-coredump-launcher@.service is started (as the user) and the processor starts streaming the data from journald to the launcher.
The crash has now traveled from the user, through the kernel, to system-level systemd services, and has finally arrived back in the actual user session.
Having been started by systemd and initially received the crash data from the processor, drkonqi-coredump-launcher
will now augment that data with the KCrash metadata originally saved to disk by KCrash.
Once the crash data is complete, the launcher only needs to find a way to “pick up” the crash. This will usually be DrKonqi, but technically other types of crash pickup are also supported. Most notably, developers can set the environment variable KDE_COREDUMP_NOTIFY=1 to receive system notifications about crashes with an easy way to open gdb for debugging. I’ve already written about this a while ago.
When ready, the launcher will start DrKonqi itself and pass over the complete metadata.
DrKonqi kicks off crash processing. This is hugely complicated and probably worth its own post. But let’s at least
superficially explore what is going on.
The launcher has provided DrKonqi with a mountain of information so it can now utilize the CLI for systemd-coredump, called
coredumpctl, to access the core dump and attach an instance of the debugger GDB to it.
GDB runs as a two step automated process:
Preamble Step
As part of this automation, we run a service called the preamble: a Python program that interfaces with
the Python API of GDB.
Its most important functionality is to create a well-structured backtrace that can be converted to a
Sentry payload.
Sentry, for the most part, doesn’t ingest platform specific core dumps or crash reports, but instead relies on an abstract
payload format that is generated by so called Sentry SDKs. DrKonqi essentially acts as such an SDK for us.
Once the preamble is done, the payload is transferred into DrKonqi and the next step can continue.
Trace Step
After the preamble, DrKonqi executes an actual GDB trace (i.e. the literal backtrace command in gdb) to generate the developer output. This is also the trace that gets sent to KDE’s Bugzilla instance at bugs.kde.org if the user chooses to file a bug report. The reason this is separate from the already
created backtrace is mostly for historic reasons. The trace is then routed through a text parser to figure out if it is of sufficient
quality; only when that is the case will DrKonqi allow filing a report in Bugzilla.
Transmission
With all the trace data assembled, we just need to send them off to Bugzilla or Sentry, depending on what the user chose to do.
Bugzilla
The Bugzilla case is simply sending a very long string of the backtrace to the Bugzilla API (albeit surrounded by some JSON).
Sentry
The Sentry case on the other hand requires more finesse. For starters, the Sentry code also works when offline. The trace and optional user message get converted into a Sentry envelope tagged with a receiver address — a Sentry-specific URL for ingestion so it knows under which project to file the crash. The envelope is then written to ~/.cache/drkonqi/sentry-envelopes/. At this point, DrKonqi’s job is done; The actual transmission happens in an auxiliary service.
Writing an envelope to disk triggers drkonqi-sentry-postman.service which will attempt to send all pending envelopes to Sentry using the URL inside the payload. It will try to do so every once in a while in case there are pending envelopes as well, thereby making sure crashes that were collected while offline still make it to Sentry eventually. Once sent successfully, the envelopes are archived in ~/.cache/drkonqi/sentry-sent-envelopes/.
This concludes DrKonqi’s activity. There’s much more detail going on behind the scenes but it’s largely inconsequential to the overall flow. Next time we will look at the final piece in the puzzle — Sentry itself.
Whoops, it's already been months since I last blogged. I've been actively involved with Plasma and especially its power management service PowerDevil for over a year now. I'm still learning about how everything fits together.
Turns out though that a little bit of involvement imbues you with just enough knowledge and confidence to review other people's changes as well, so that they can get merged into the next release without sitting in limbo forever. Your favorite weekly blogger for example, Nate Graham, is a force of nature when it comes to responding to proposed changes and finding a way to get them accepted in one form or another. But it doesn't have to take many years of KDE development experience to provide helpful feedback.
Otfen we simply need another pair of eyes trying to understand the inner workings of a proposed feature or fix. If two people think hard about an issue and agree on a solution, chances are good that things are indeed changing for the better. Three or more, even better. I do take pride in my own code, but just as much in pushing excellent improvements like these past the finish line:
In turn, responsible developers will review your own changes so we can merge them with confidence. Xaver, Natalie and Nate invested time into getting my big feature merged for Plasma 6.2, which you've already read about:
So how hard could it be to add another slider to your applet? Turns out there are indeed a few challenges.
In KDE, we like to include new features early on and tweak them over time. As opposed to, say, the GNOME community, which tends to discuss them for a loooong time in an attempt to merge the perfect solution on the first try. Both approaches have advantages and drawbacks. Our main drawback is harder to change imperfect code, because it's easy to break functionality for users that already rely on them.
Every piece of code has a set of assumptions embedded into it. When those assumptions don't make sense for the next, improved, hopefully perfect solution (definitely perfect this time around!) then we have to find ways to change our thinking. The code is updated to reflect a more useful set of assumptions, ideally without breaking anyone's apps and desktop. This process is called "refactoring" in software development.
But let's be specific: What assumptions am I actually talking about?
There is one brightness slider for your only display
This one's obvious. You can use more than just one display at a time. However, our previous code only used to let you read one brightness value, and set one brightness value. For which screen? Well... how about the code just picks something arbitrarily. If you have a laptop with an internal screen, we use that one. If you have no internal screen, but your external monitor supports DDC/CI for brightness controls, we use that one instead.
What's that, you have multiple external monitors that all support DDC/CI? We'll set the same value for all of them! Even if the first one counts from 0 to 100 and the second one from 0 to 10.000! Surely that will work.
No it won't. We only got lucky that most monitors count from 0 to 100.
The solution here is to require all software to treat each display differently. We'll start watching for monitors being connected and disconnected. We tell all the related software about it. Instead of a single set-brightness and a single get-brightness operation, we have one of these per display. When the lower layers require this extra information, software higher up in the stack (for example, a brightness applet) is forced to make better choices about the user experience in each particular case. For example, presenting multiple brightness sliders in the UI.
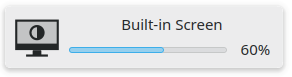
A popup indicator shows the new brightness when it changes
So this raises new questions. With only one display, we can indicate any brightness change by showing you the new brightness on a percentage bar:
Now you press the "Increase Brightness" key on your keyboard, and multiple monitors are connected. This OSD popup shows up on... your active screen? But did the brightness only change for your active screen, or for all of them? Which monitor is this one popup representing?
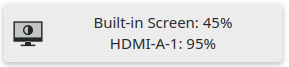
Ideally, we'd show a different popup on each screen, with the name of the respective monitor:
That's a good idea! But Plasma's OSD component doesn't have a notion of different popups being shown at the same time on different monitors. It may even take further changes to ask KWin, Plasma's compositor component, about that. What we did for Plasma 6.2 was to provide Plasma's OSD component with all the information it needs to do this eventually. But we haven't implemented our favorite UI yet, instead we hit the 6.2 deadline and pack multiple percentages into a single popup:
That's good enough for now, not the prettiest but always clear. If you only use or adjust one screen, you'll get the original fancy percentage bar you know and love.
The applet can do its own brightness adjustment calculations
You can increase or decrease brightness by scrolling on the icon of the "Brightness and Color" applet with your mouse wheel or touchpad. Sounds easy to implement: read the brightness for each display, add or subtract a certain percentage, set the brightness again for the same display.
Nope, not that easy.
For starters, we handle brightness key presses in the background service. You'd expect the "Increase Brightness" key to behave the same as scrolling up with your mouse wheel, right? So let's not implement the same thing in two different places. The applet has to say goodbye to its own calculations, and instead we add an interface to background service that the applet can use.
Then again, the background service never had to deal with high-resolution touchpad scrolling. It's so high-resolution that each individual scroll event might be smaller than the number of brightness steps on your screen. The applet contained code to add up all of these tiny changes so that many scroll events taken together will at least make your screen change by one step.
Now the service provides this functionality instead, but it adds up the tiny changes for each screen separately. Not only that, it allows you to keep scrolling even if one of your displays has already hit maximum brightness. When you scroll back afterwards, both displays don't just count down from 100% equally, but the original brightness difference between both screens is preserved. Scroll up and down to your heart's content without messing up your preferred setup.
Dimming will turn down the brightness, then restore the original value later
Simple! Yes? No. As you may guess, we now need to store the original brightness for each display separately so we can restore it later.
But that's not enough: What if you unplug your external screen while it's dimmed? And then you move your mouse pointer again, so the dimming goes away. Your monitor, however, was not there for getting its brightness restored to the original value. Next time you plug it in, it starts out with the dimmed lower brightness as a new baseline, Plasma will gladly dim even further next time.
Full disclosure, this was already an issue in past releases of Plasma and is still an issue. Supporting multiple monitors just makes it more visible. More work is needed to make this scenario bullet-proof as well. We'll have to see if a small and safe enough fix can still be made for Plasma 6.2, or if we'll have to wait until later to address this more comprehensively.
Anyway, these kind of assumptions are what eat up a good amount of development time, as opposed to just adding new functionality. Hopefully users will find the new brightness controls worthwhile.
So let's get to the good news
Your donations allowed KDE e.V. to approve a travel cost subsidy in order to meet other KDE contributors in person and scheme the next steps toward world domination. You know what's coming, I'm going to:
Akademy is starting in just about two days from now! Thank you all for allowing events like this to happen, I'll try to make it count. And while not everyone can get to Germany in person, keep in mind that it's a hybrid conference and especially the weekend talks are always worth watching online. You can still sign up and join the live chat, or take a last-minute weekend trip to Würzburg if you're in the area, or just watch the videos shortly afterwards (I assume they'll go up on the PeerTube Akademy channel).
I'm particularly curious about the outcome of the KDE Goals vote for the upcoming two years, given that I co-drafted a goal proposal this time around. Whether or not it got elected, I haven't forgotten about my promise of working on mouse gesture support on Plasma/Wayland. Somewhat late due to the aforementioned display work taking longer. Other interesting things are starting to happen as well on my end. I'll have to be mindful not to stretch myself too thinly.
Thanks everyone for being kind. I'll be keeping an eye out for your bug reports when the Plasma 6.2 Beta gets released to adventurous testers in just over a week from today.
Calligra 4.0.1 is out. This small releases mostly contains fixes for
distributions issues and updated translations.
I fixed some compatibility issues for Flatpak which is since yesterday
available on Flathub.
Flathub website showing Calligra
Yaakov Selkowitz fixed the installation of the Okular generators so now if
Calligra is installed, you can read your office document in Okular correctly.
Antonio Rojas dropped the unused KPart dependency and reenabled the user
documentations.
I removed the old space navigator plugin which didn’t build anymore and was
only used to navigate an office document with some retro controllers.
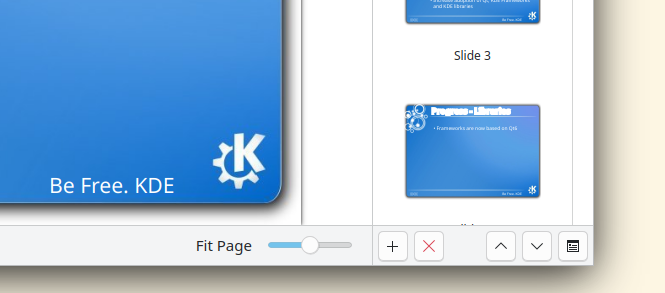
Finally, I fixed a few issues in Stage, I found while dog footing it for my
slides for my Akademy presentation.
The updated slides sidebar of Calligra Stage
Get It
Calligra 4.0 is now available on
Flathub. It’s also now available
on Arch, KDE Neon and OpenBSD and I am aware there is some work in progress for
Fedora and Mageia. Thanks everyone for packaging Calligra!
Here's our bi-monthly update from KDE's personal information management
applications team. This report covers progress made in July and August 2024.
Since the last report, 32 people have contributed over 1300 changes to the KDE PIM
code base. We also released a new version of the KDE PIM Suite in August with
the Gear release
We have decided to plan and track our work in milestones. Milestones represent
concrete goals with clear definitions of what we understand as done,
and be achievable within a reasonable time frame. Each milestone is then split
into smaller bite-sized tasks that can be worked on independently.
This helps us prioritize important work, make our progress more visible
and, most importantly, make it easier for people to get excited about what we
are working on. New contributors will also be able to pick a well-defined
task and start contributing to PIM.
You can see the milestones on our Gitlab
board. If anything there
catches your eye and you would like to help, reach out to us on the
#kontact:kde.org Matrix channel!
Retiring KJots and KNotes
We made some progress on this front and KNotes was not part of the 24.08
release. The repositories for KNotes and KJots are now archived and the
remaining bits related to the Akonadi Note support were removed from
KOrganizer,
Calendar Support,
KDE PIM Runtime,
and Event Views.
Moving Protocol Implementations to KDE Frameworks
Volker continued to cleanup and optimize
KMime
in preparation for moving it to the KDE Frameworks. KMime is the library used to
parse and write emails.
Itinerary
Our travel assistant app Itinerary got a new
seat information display in the timeline, integration with the Träwelling
check-in service, more use of Wikidata/Wikimedia online content and a pretty
new website.
See its own bi-monthly update for
more details.
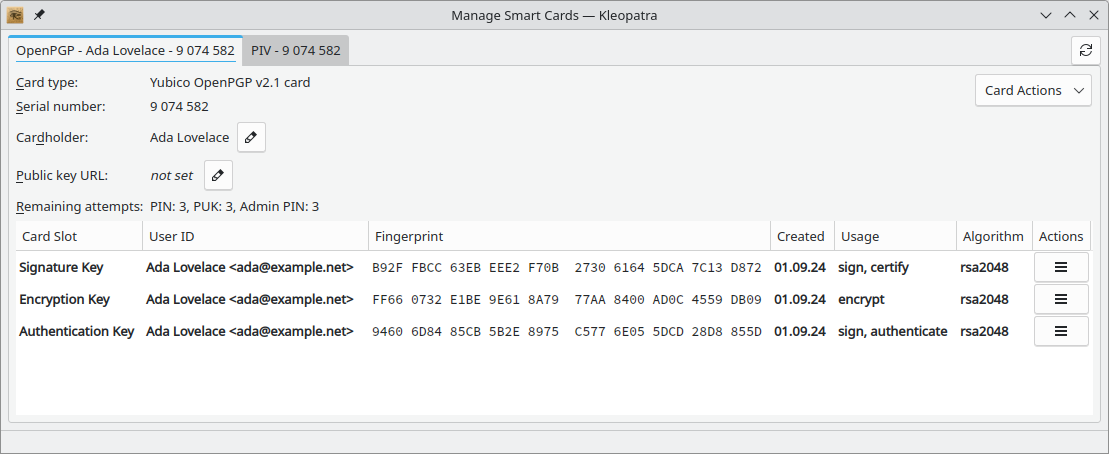
Kleopatra
Over the last two months the smart card views for the different types of supported
smart cards got a facelift to make them look more unified and less crowded
(T7018).
Kleopatra now supports disabling OpenPGP certificates (T7216).
This is sometimes useful to prevent accidentally using a certificate for encryption.
changing the expiration of subkeys (T7198, T7215).
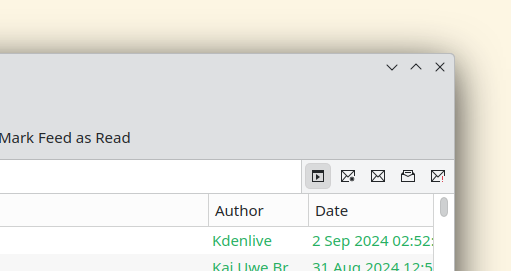
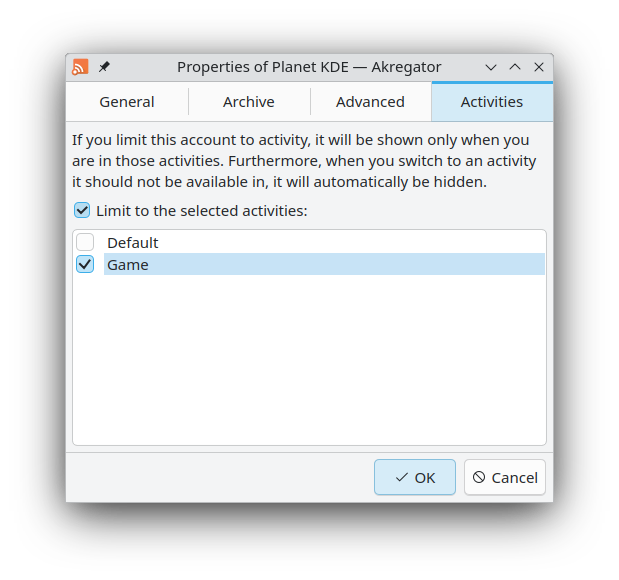
Akregator
Akregator is the RSS feed reader integrated into Kontact. Laurent reimplemented
the filter bar to avoid multiple clicks and it is now similar to the one from
Thunderbird.
Akregator now supports Plasma Activities so you can select which feeds are
visible depending on the activity you are in. Similar functionalities are
planned for KMail, KOrganizer and KAddressBook.
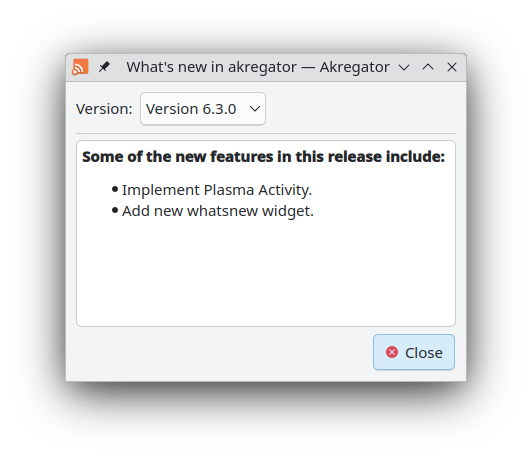
Finally, Akregator now has a What's New dialog showing the changes from the
last version.
KMail
KMail now uses less memory by only loading some widgets when needed.
MimeTreeParser/Merkuro
We have unified the verification message for signed messages between Kleopatra,
KMail and Merkuro by moving the implementation to LibKleo.
KAlarm
We replaced the libcanberra audio backend with VLC, since libcanberra is
unmaintained and does not recognise recent audio formats. There is also
the option for distributions to use MPV as audio backend.
Next Saturday, this year’s Akademy starts in Würzburg, Germany. After a rather long absence – the last Akademy I attended in person was in Mechelen (2008) – I am very much looking forward to meet old friends and make new ones. Mainly due to my own summer vacation plans and conflicting family matters, I was not able to make it to the event in recent years. Now, as the venue is only just over 100 kilometers from my home and I have no other commitments, I’m traveling to
My plan is to arrive on Friday late afternoon and join the welcome event. The conference schedule is pretty loaded and I have only decided on a few talks I definitely want to visit. For more, I need to take another look at the schedule and also the list of planned BoFs on Monday and Tuesday.
Topics I am interested in are (not in a particular order)
Getting KMyMoney to be properly build on the CI/CD for MacOS (both ARM and x86_64)
Meet people in person I only know from the online world
What is needed on the project configuration (Gitlab, metadata) side to move onto KF6
For 1. I hope to get some more background information out of the KDE’s CI and CD Infrastructure talk held by Ben, Hannah, Julius and Volker on Sunday and the CI/CD BoF on Tuesday.. For other topics I will see.
Looking forward to seeing many of you KDE fellows next week in Würzburg!

 @jriddell:kde.org
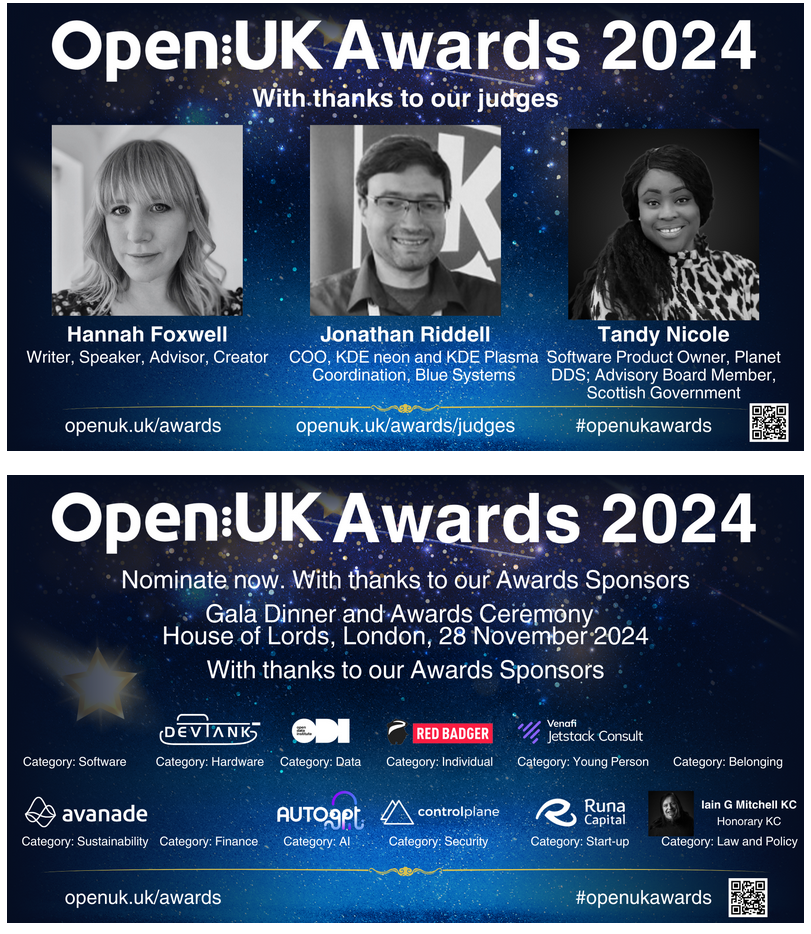


 CarlSchwan