Akademy 2024 (the annual world summit for KDE) is happening in Würzburg, Saturday 7th – Thursday 12th September. (I hope you knew that)
First of all, if you're reading this and thinking, "Should i go to Akademy?"
The answer is [most probably] YES! Akademy has something for everyone, be it coders, translators, promoters, designers, enthusiasts, etc.
Now, with this out of the way, one of the many things that makes Akademy is the talks on the weekend, and you know who has something to say? *YOU*
Yes, *YOU*. I'm sure you've been working on something interesting, or have a great idea to share.
*YOU* may think that your idea is not that great or the things you work on are not interesting, but that's seldomly the case when someone explains me their "boring" thing they've been working on, i always think "Wow that's great".
Ok, so now that I've convinced you to send a talk proposal, when better than *TODAY* to send it?
Yes I know the Call for Participation is open until the 24 of May, but by sending it today you make sure you don't forget sending it later and also [more important for me] you help those of us in the Program Committee not to worry when the final date starts approaching and we don't have lots of talks yet because you all prefer sending talks on the very last minute.
Like in many families, there's always a bit of.. turmoil and drama in FOSS.
Something breaks (either on purpose or by accident), people get frustrated.. The usual.
It is kind of to be expected when it comes to very social projects, like let's say, Linux desktop environments.
People have their own visions and ways to see things. They often clash. That's normal. It's quite human.
I do like to think that Linux desktop environments especially are like siblings that have rivalries.
But we got to remember that it's not "us vs them" here. We don't have the resources to fight each other.
We need to work together even with our incompatible visions sometimes. Otherwise things will keep fracturing
and get even worse.. And nobody gains from that. Well, except the proprietary platforms. :P
In the end we all want to make good software for everyone to use and enjoy.
Let's help each other to do that as well as we can.
Nothing wrong with "Oh you made that? Well watch this!" type of friendly rivalry however,
it keeps us doing what we do best. :)
I just wanted to write this down as somekind of reminder that we got to remember to
work together if we want to succeed. Even when frustrated.
And no I am not any high and mighty person to really say this, I have had my own share of frustrations and quips.
This post serves also as a reminder for myself.
Screenshots taken from the GNOME bugtracker, copies to not stall their GitLab instance.
I think that is rather unpleasant and for e.g. the left icon-only border just an unusable insult.
Why? The Adwaita Icon Theme no longer follows the FDO icon naming spec
There was no information that they want to break away from the icon naming ’the world’ does assume (given there is a spec).
And now we have that state for our users there, at least on these spins.
That is not that nice, we did spend a lot of work to get our applications working cross-desktop and even cross-platform and now that…
I feel rather infuriated, finding this before going to sleep, even more after reading the feedback in the GNOME bugtracker and that this is just closed as ‘so be it’.
Then please don’t install it as FDO icon theme and break all FOSS apps that rely on the naming spec…
If you care for non ‘GNOME core apps’ to work per default properly on distributions like that, please either get them to fix it (hints are given in the linked issue) or get the distributions to install a compliant theme.
We can plan to work around this mess in the future on our side, but that will not un-break the application versions that are now already shipped to our users and non-KDE frameworks based stuff that will just run into the same issues.
Last week, like many other people, I was in Berlin for the Mega^WGoals sprint. Natually the three goals (Sustainability, Accessibility, and Automatability; the three abilities) attracted a diverse crowd of people that brought also other topics, so it turned into a proper megasprint.
Being interested in all three goals made it a bit callenging to follow all relevant discussions unfortunately, but on the flip side it never got boring.
Most of my goal-related work was towards the automation goal. One thing I was working on is a CI job that checks for spelling mistakes in the code, so that those can be caught when doing a MR. A while ago I create a website that tracks which KDE projects are ported to Qt6. What started out as a joke for a talk turned out to be a useful tool for planning porting work. During the print I fixed the site to actually work correctly again and, most importantly, changed the text from “No” to “Yes” since most projects actually use Qt6 now. For a while the site also has auto-generated reports for other things, like showing which projects don’t yet have clang-format applied to them or which projects don’t enforce passing test in the CI. I used the latter list to enable this for the remaining projects that don’t have failing tests right now and prepared a change to the CI system that enforces passing tests by default. In the same spirit others and I also fixed some currently failing tests. We also discussed the idea of extending the site with more checks and turning it into a proper KDE site that isn’t hosted on my personal infrastructure.
Harald, Carl, and I worked on a dashboard to show the CI status for our project. This is something we haven’t really had since switching to Gitlab CI but is very useful e.g. as part of the release checklist. We do have a working prototype, but some things remain to be ironed out. As part of this we also fixed some of the currently failing builds.
My main contribution to the systainability goal was debugging why Nate’s NeoChat is using too much CPU. With a team effort we eventually pinpointed this to an invisible animation constantly repainting the window, which was then promptly fixed.
In terms of accessibility I was mainly involved in discussions about challenges and new developments with accessibility on Wayland. Expect to hear more on this soon.
In “off-topic” topics there were plently of discussions about visions, ideas, and challenges for our application development story. This included discussions on visions for design/UX, theming, API design, and software distribution. Being KDE’s Software Platform Engineer it is part of my responsibilities to facilitate these kinds of discussions. Later this year I want to host a sprint dedicated to application design to discuss and establish our vision there. If you are interested do reach out to me.
All in all it was a fun few days with great people. Thanks to MBition and Aleix for hosting us, and thanks to those donating to KDE to make these sprints possible.
I'm happy to have been able to attend my first in-person KDE event, the Automation & Systematization Sprint in Berlin. Previously, my contributions to KDE have consisted of submitting and triaging bug reports. During this weekend, I was able to meet some of the KDE team in person, and become more involved. I've started working with the Bugzilla Bot code, and plan to start digging into the automated test code.
The Bugzilla product list had fallen out of date, so first I updated that (yay, my first accepted MR!). I also started working on using the GitLab API to automate these updates. In the near future, I'll be tackling some requested improvements to the Bugzilla Bot. This will lessen the amount of boring manual bug chores and free people up to do more valuable work.
Thanks to the KDE team for being so friendly and willing to help me learn the development environment. I'm happy to have found more ways to contribute that I enjoy, and will be valuable to the project.
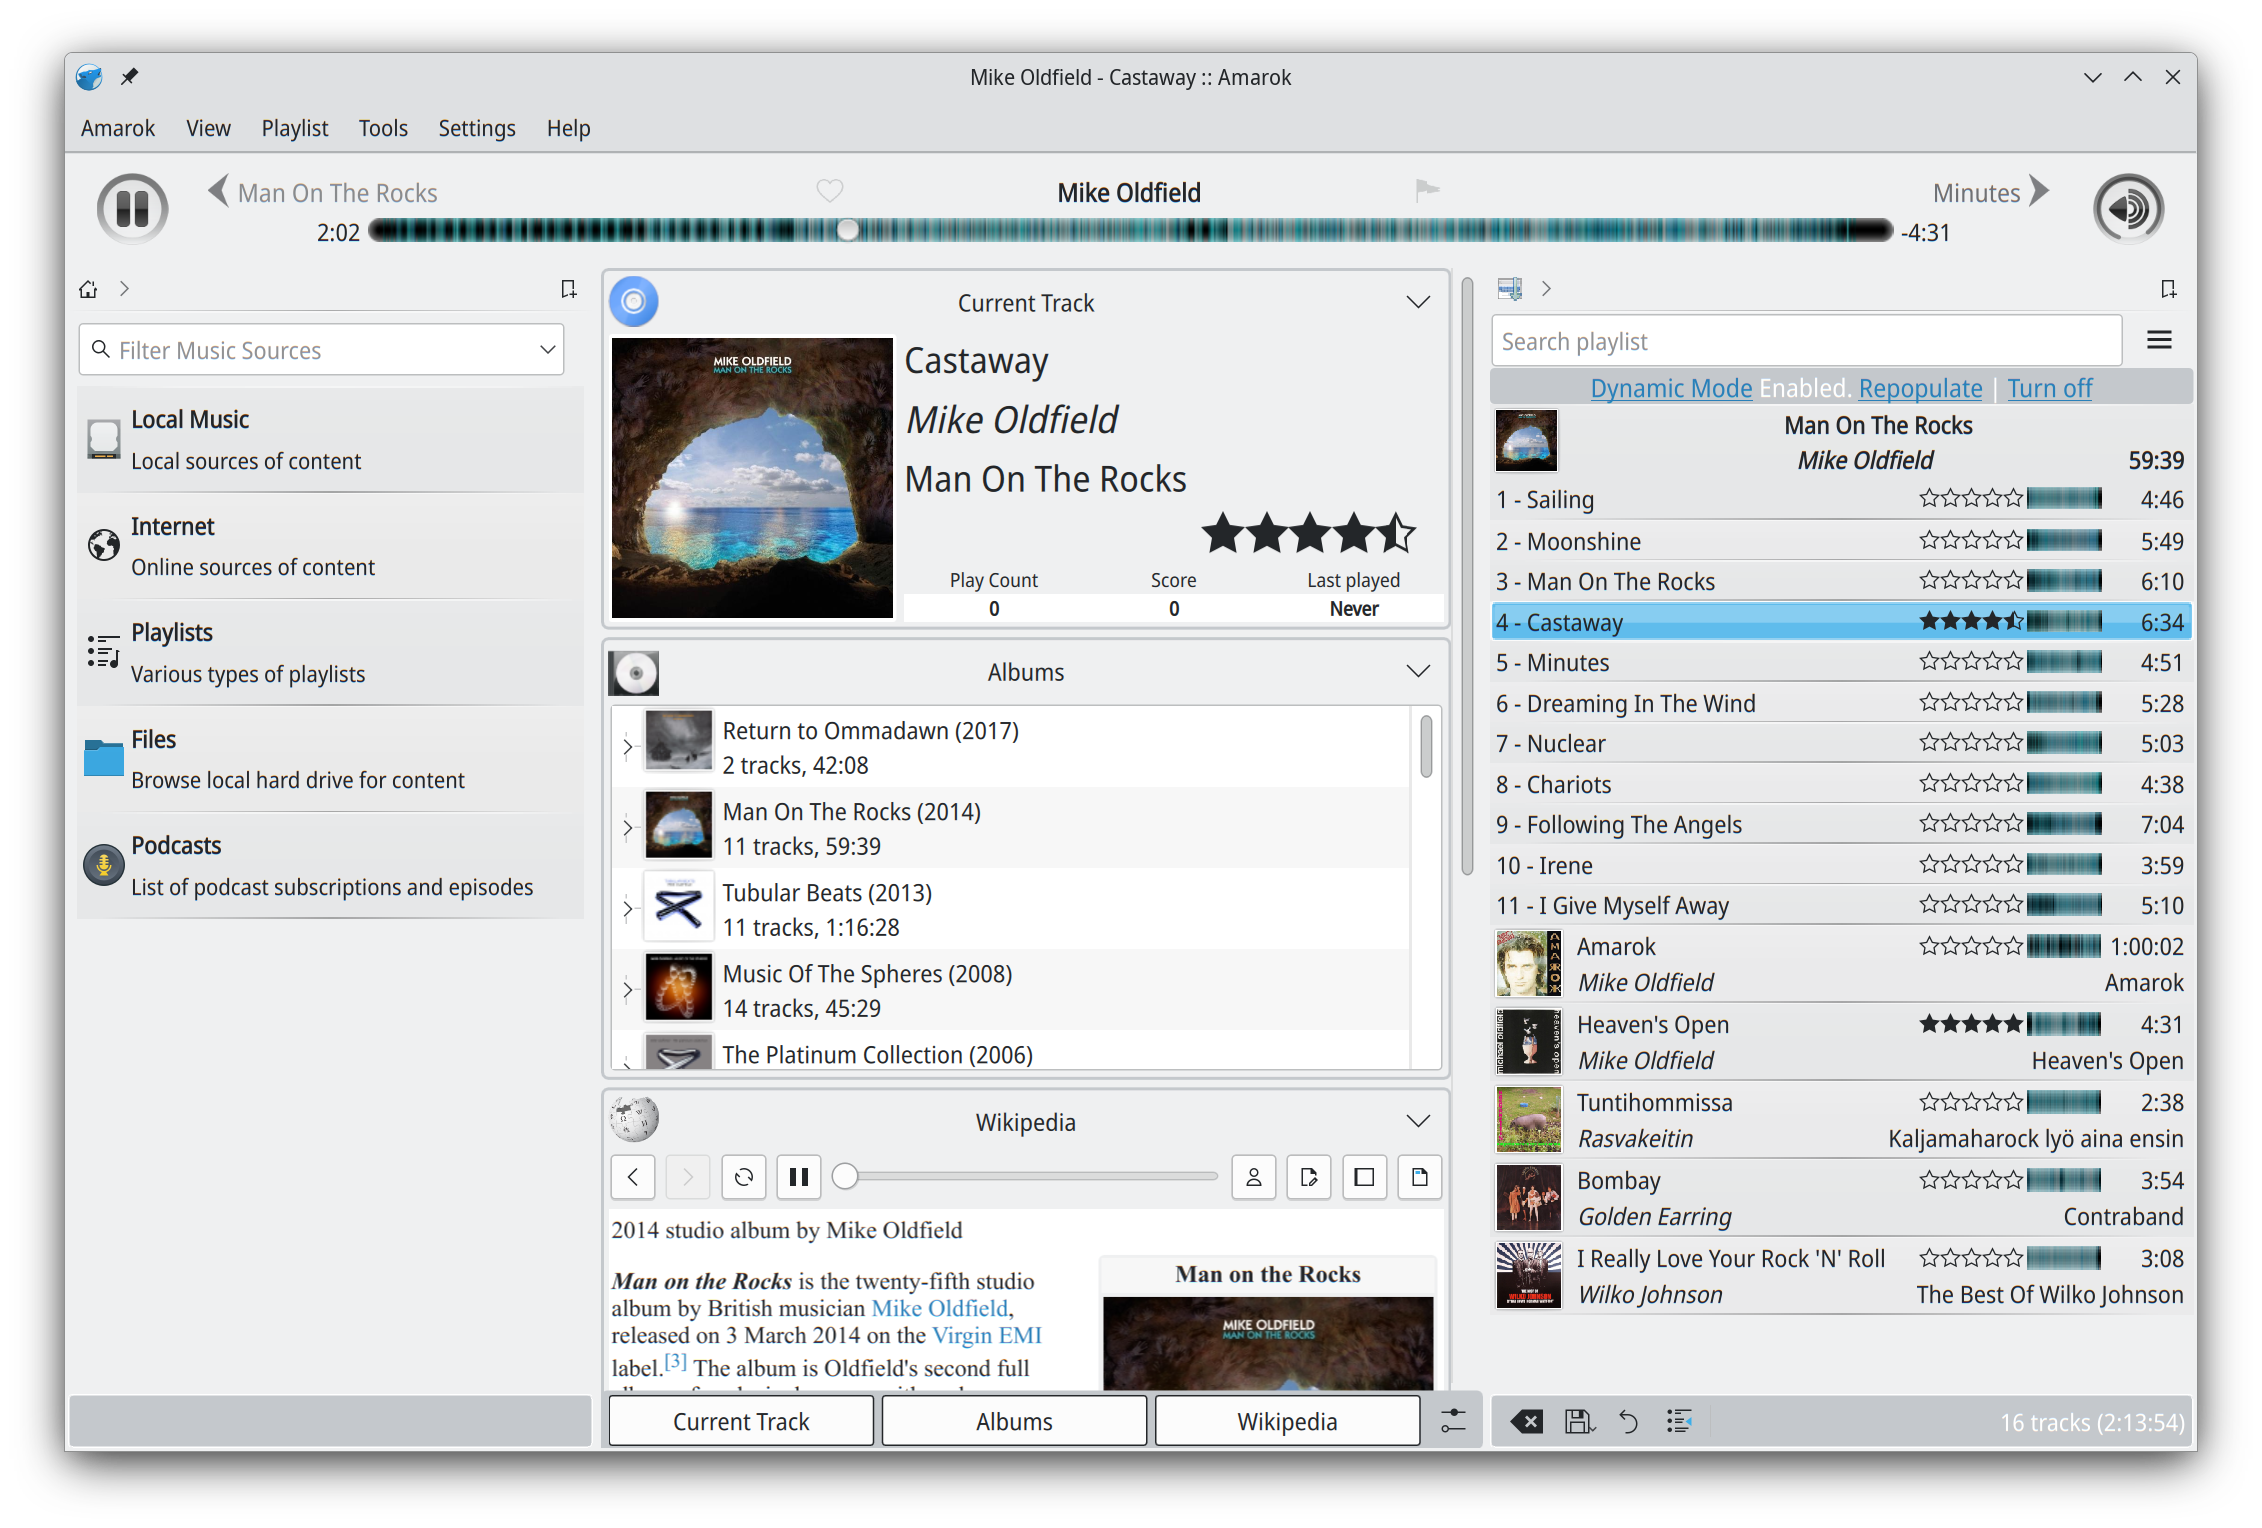
The Amarok Development Squad is happy to announce the immediate availability of Amarok 3.0 "Castaway"!
The new 3.0 is the first stable Qt5/KDE Frameworks 5 based version of Amarok, and first stable release since 2018,
when the final Qt4 based version 2.9.0 was released.
The road to 3.0 has not been a short one. Much of the Qt5/KF5 porting was done in 2015 already, but finishing and polishing everything up has been
a slow, sometimes ongoing and sometimes stalled process ever since.
3.0 Alpha was released in February 2021 and has been since used by many people, as have been nightly builds of git master available for various distributions.
Now in the past few months, an effort was made to get everything ready for a proper 3.0 release.
Common usecases should work quite well, and in addition to fixing KF5 port related regressions reported in pre-releases,
3.0 features many bugfixes and implemented features for longstanding issues, the oldest such documented being from 2009.
However, with more than 20 years of development history, it is likely that not every feature Amarok has been tested thoroughly in the new release, and specifically
some Internet services that have changed their API in recent years are not available, at least for now.
It might well be that getting them in better state wouldn't require huge effort, however, so if you know your way with Qt and KDE Frameworks and your favourite Internet music service does not work with Amarok 3.0,
you are extremely welcome to join in and help!
In the following months, minor releases containing small fixes and additions, based on both newly reported and longer-standing bug reports and feature requests, are to be expected.
Work on porting to Amarok to Qt6/KDE Frameworks 6 should start in the following months, the goal being to have a usable Qt6/KF6 based beta version in 2024 still.
One should observe that due to scripting framework port from QtScript to QJSEngine still being a work in progress,
previous Amarok 2.x scripts are often not compatible. The script API documentation at community wiki is also partially out of date.
Additionally, due to incompatibilities and other issues, KNewStuff downloading of scripts is disabled for the time being.
Having script support in more polished shape is something to work on after an initial Qt6/KF6 version starts to be usable.
It is also evident that the web site and community wiki pages largely originate from more than ten years ago,
and contain partially outdated information. Some work on refreshing them and pruning the documentation to make it more maintainable is likely to happen during the following months.
Now it's time to Rediscover Your Music in the 2020's!
Changes since 3.0 Beta (2.9.82)
FEATURES:
Added a visual hint that context view applets can be resized in edit mode.
Display missing metadata errors in Wikipedia applet UI.
Add a button to stop automatic Wikipedia page updating. (BR 485813)
CHANGES:
Replace defunct lyricwiki with lyrics.ovh as lyrics provider for now. (BR 455937)
Show only relevant items in wikipedia applet right click menu (BR 323941), use
monobook skin for opened links and silently ignore non-wikipedia links.
Don't show non-functional play mode controls in dynamic mode (BR 287055)
BUGFIXES:
Fix loading of some Flickr photos in the photos context view applet and show more relevant photos. (BR 317108)
Fix playlist inline play control slider knob & draw playlist delegate icons with
higher DPI.
Fix searching for composer and album info for local files in Wikipedia applet.
Don't remove wrong songs from collection when contents of a folder, whose name is
a substring of another collection folder, are changed (BR 475528)
Prefer symbolic systray icon to fix colours in Plasma6 systray (BR 485748)
The complete ChangeLog, which includes the pre-releases, is available
in the git repository.
To provide some insight on the road from 2.9.0 to 3.0.0,
statistics collected from git repository are presented:
Commits and added/removed lines of code between 2.9.0 and 3.0 alpha (2.9.71)
l10n daemon script: 117 commits, +898, -192 Heiko Becker: 72 commits, +5641, -2112 Laurent Montel: 69 commits, +9478, -9697 Aroonav Mishra: 65 commits, +15474, -6808 Pino Toscano: 31 commits, +6892, -1637 Malte Veerman: 30 commits, +19466, -29990 Olivier CHURLAUD: 27 commits, +1106, -474 Yuri Chornoivan: 19 commits, +966, -806 Pedro de Carvalho Gomes: 8 commits, +145, -407 Pedro Gomes: 7 commits, +7222, -805 Luigi Toscano: 7 commits, +15, -14 Mark Kretschmann: 6 commits, +27, -17 Wolfgang Bauer: 5 commits, +31, -7 Tuomas Nurmi: 4 commits, +39, -23 Stefan Derkits: 4 commits, +20, -19 Andreas Sturmlechner: 3 commits, +189, -75 Aditya Dev Sharma: 3 commits, +47, -46 Stephan Wezel: 2 commits, +12, -7 Andreas Sturmlechner: 2 commits, +8, -6 Andreas Hartmetz: 2 commits, +2, -2 Victor Mataré: 1 commits, +7, -3 Tobias C. Berner: 1 commits, +5, -1 Thiago Sueto: 1 commits, +1, -1 Sven Eckelmann: 1 commits, +5, -3 Somsubhra Bairi: 1 commits, +1, -1 Simon Depiets: 1 commits, +2, -2 Rishabh Gupta: 1 commits, +1, -4 Nicolas Lécureuil: 1 commits, +4, -2 Nate Graham: 1 commits, +7, -7 Johnny Jazeix: 1 commits, +2, -2 Elbin Pallimalil: 1 commits, +11, -5 Christophe Giboudeaux: 1 commits, +1, -2 Antonio Rojas: 1 commits, +1, -0 Alexandr Akulich: 1 commits, +1, -1 Albert Astals Cid: 1 commits, +1, -0
Commits and added/removed lines of code between 3.0 alpha 2.9.71 and 3.0.0
l10n daemon script: 317 commits, +1597783, -75585 Tuomas Nurmi: 147 commits, +3813, -1550 Friedrich W. H. Kossebau: 9 commits, +1075, -1044 Jürgen Thomann: 8 commits, +130, -101 Heiko Becker: 8 commits, +187, -19 Pino Toscano: 6 commits, +3361, -24 Toni Asensi Esteve: 4 commits, +100, -13 Pedro de Carvalho Gomes: 4 commits, +51, -9 Mihkel Tõnnov: 4 commits, +4486, -800 Zixing Liu: 2 commits, +140, -8 Fabian Vogt: 2 commits, +9, -0 David Faure: 2 commits, +4047, -15 Damir Islamov: 2 commits, +401, -420 Yuri Chornoivan: 1 commits, +1, -1 Sebastian Engel: 1 commits, +21, -21 Nicolas Fella: 1 commits, +1, -1 Nicolás Alvarez: 1 commits, +7, -7 Nate Graham: 1 commits, +1, -0 Matthias Mailänder: 1 commits, +5, -0 Jonathan Esk-Riddell: 1 commits, +2, -6 Jakob Meng: 1 commits, +1, -1 Heiko Becker: 1 commits, +17, -17 Christophe Giboudeaux: 1 commits, +3, -4 Carl Schwan: 1 commits, +7, -2 Boris Pek: 1 commits, +1, -1 Andreas Sturmlechner: 1 commits, +2, -0
The goal of KDE neon is to build all KDE’s software on a stable Ubuntu LTS base, we do it in an automated way and for the User edition have automated QA to deploy rapidly but safely. For the KDE 6 Megarelease there was a lot of updates and the system didn’t work as well as it ought, not all the update issues could be tested and this broke some the operating system on some people’s computer which is a horrible experience that should not happen.
What happened?
We were testing KF6, Plasma 6 and KDE Gear 24.04 in our unstable and testing repos for some time before the release. A week ahead of release we were building it in our User repo and testing upgrades. Jonathan, as release manager for both the MegaRelease and neon, travelled to Malaga to do an in person joint release with Paul from promo, this helped the coordinated release but lost some testing time. Some package transitions happened during the pre-release week which made the updates more complex than they had to be and meant extra work (for better end result in theory). Once the MegaRelease sources were published on Thursday the testing of Neon was ongoing and many later fixes were made to make for a successful upgrade on the tests. Neon’s KF6/Plasma6/KDE Gear 24.02 packages were published later on Thursday and Jonathan drove home, alas due to bad weather there was no internet available on the ferry limiting later fixes.
Although the semi automated upgrade tests passed this didn’t cover all cases and some people had incomplete upgrades due to packaging transitions being incomplete. This was fixed over the next day or two and also an update to the installer Calamares was brought in which turned out to have a bug with the final install setup so although upgrades now worked the ISO installs were broken. Quite horrible.
On the Monday Jonathan fixed some more upgrade issues and Calamares so the neon end of things was fixed but there remain other problems with KF6 and Plasma 6 which affect all distros and many of these have since been fixed and some are ongoing, many caused by the switch to Wayland or Akonadi switching to sqlite.
Issues?
There wasn’t one big problem that caught everyone. There was lots of small but significant problems which caught many people.
KMyMoney package issues – needed a rebuild which we did after release
Ocean sound theme not installed – new package which was added after release
Palapeli packages in wrong location – an incomplete change that was made during the transition
Video and pdf thumbnailers broken – these packages needed added to the main install
KOrganizer had invalid dependency – that needed removed
xwaylandvideobridge error on shared library – needed a rebuild
libzxing needs soname bump – that transition needed completed
akonadi not working on upgrade – for some reason some users had to manually reinstall the mysql akonadi backend
Calamares install fails to happen – a bug from Calamares that was initially avoided but later included in our ISO
OEM mode no longer worked – this affects Slimbook systems and some parts just needed ported to Plasma 6, ideally it would be code which was in Calamares and not in Neon
NVidia users had a number of issues often caused by the switch to Wayland. Most users can switch back to X11 to get it working but that is hardly a user friendly setup.
This is just a small sample, there were more similar issues.
Review
Neon is a small team, Jonathan working on it (alongside release duties for Plasma and Frameworks) from Blue Systems and top volunteer helper Carlos with occasionally Harald and others helping out.
We had a review with KDE’s QA star Nate of what happened and why and mitigations and we also had two open calls with neon community members where they gave their feedback.
Ponderings
The Plasma 6 and KF6 upgrades in neon were too fragile and caused too much pain for many of our users.
There wasn’t one single problem and many people had a perfectly good experience doing the upgrade but too many people were caught with problems which will be painful when you are just wanting to have a useful Linux system.
Conclusions
Our constantly rolling release model and small team means we can’t guarantee total stability so we will stop using terms like “rock solid base” on our website and emphasise the new-ness factor.
When doing big updates test and if travelling bring in other people to do testing and fixes.
We can’t support NVidia hardware as we don’t have the skills, time, hardware or access to source to fix it.
Switching to Wayland was a choice of Plasma and after a decade in development a necessary choice but we should be aware of issues there and communicate those.
Get more QA on ISO images, currently we don’t have any prior to release which is going to lead to problems.
Consider if we can to upgrade QA on older snapshots as well as the current one.
Consider how to do more QA on KDE PIM apps.
Thanks to all our lovely users for staying with us, sorry to those who we let down and those who have left us. Thanks to our community for staying supporting of each other and us as developers. Of course there’s plenty of alternatives if you want a slower release cycle (Kubuntu have just made a new LTS with Plasma 5) but if you want the freshest software from KDE then neon continues to be a great place to get it.
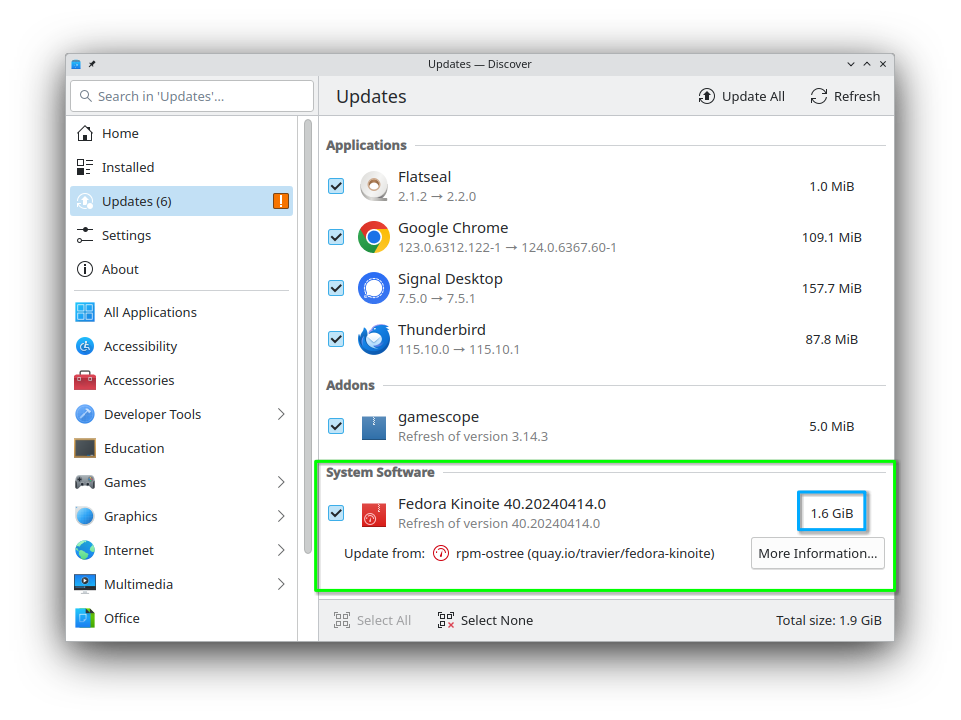
Fedora 40 has been released!
🎉 So let’s see what comes in this new release for the Fedora Atomic Desktops
variants (Silverblue, Kinoite, Sway Atomic and Budgie Atomic).
As you might have guessed from the title, we are now called Fedora Atomic
Desktops! See the
Introducing Fedora Atomic Desktops
Fedora Magazine article for all the details.
The summary is that the Fedora Atomic Desktops are made up of four atomic
spins:
Status update on bootloader updates (bootupd integration)
Unfortunately, we could not land
bootupd support
in this release due to an issue found late in Anaconda’s handling of bootupd
installations which relied on incomplete functionality in bootupd.
We will attempt to add bootupd again after the release, via an update.
If you encounter Secure Boot errors or need to update your bootloader in the
meantime, you can try the instructions from
fedora-silverblue#543.
Make sure to have a Live USB ready in case you encounter an issue. Please make
backups beforehand.
We are hoping to land improvements to bootupd that should simplify this process.
No longer overlay language packages (langpacks) by default
GNOME Software will no longer overlay the langpack packages for your locale on
the first update. This should make updates much faster as they won’t need to
overlay packages anymore (unless you explicitly decide to overlay some
packages).
If you are updating from a previous release, you will have to remove this
overlayed package manually. For example:
Find the overlayed package using rpm-ostree status:
Note that this will remove the dictionaries for the corresponding language
from your system and thus for applications included in the image.
For Flatpaks, the dictionaries are downloaded according to the languages set
in the Flatpak config. If you have set your preferred languages in GNOME
Settings, this configuration should have been set already. For example:
# Get the current config$ flatpak config --list
languages: en;fr;de (default: en)
extra-languages: *unset*# Set the languages to use$ flatpak config --set languages "en;fr"
This will also remove the translated man pages for system commands. To get the
man pages back, you can install them in a container using toolbox for example:
If you have a NVIDIA GPU and encounter issues, I recommend looking at Universal
Blue images, waiting for an upcoming NVIDIA driver update that will hopefully
improve Wayland support or trying out the updated Nouveau / NVK stack for
supported cards.
KDE Apps as Fedora Flatpaks
A subset of KDE Apps are now installed by default as Fedora Flatpaks by
Ananconda for new installations. The Flatpaks are
not installed on updates but
you can install them from the Fedora Flatpak remote or from Flathub.
KDE Flatpak on Flathub
Most KDE Apps are directly published and maintained on Flathub by the KDE
community and we have mostly completed the transition to the Qt 6.6 / KDE
Framework 6 Runtime.
Fedora Budgie Atomic ships with the latest release of the
Budgie Desktop 10.9
“release series”. Budgie 10.9 features some initial porting work to
libxfce4windowing as it progresses towards its move to Wayland and redesigns
its Bluetooth applet with new direct (dis-)connect functionality.
Additionally, Fedora Budgie Atomic ships with the latest Budgie Control Center
and takes into use budgie-session. As Buddies of Budgie officially supports
Fedora, Budgie Desktop has also received numerous backported bug fixes to
provide Fedora users an even better experience.
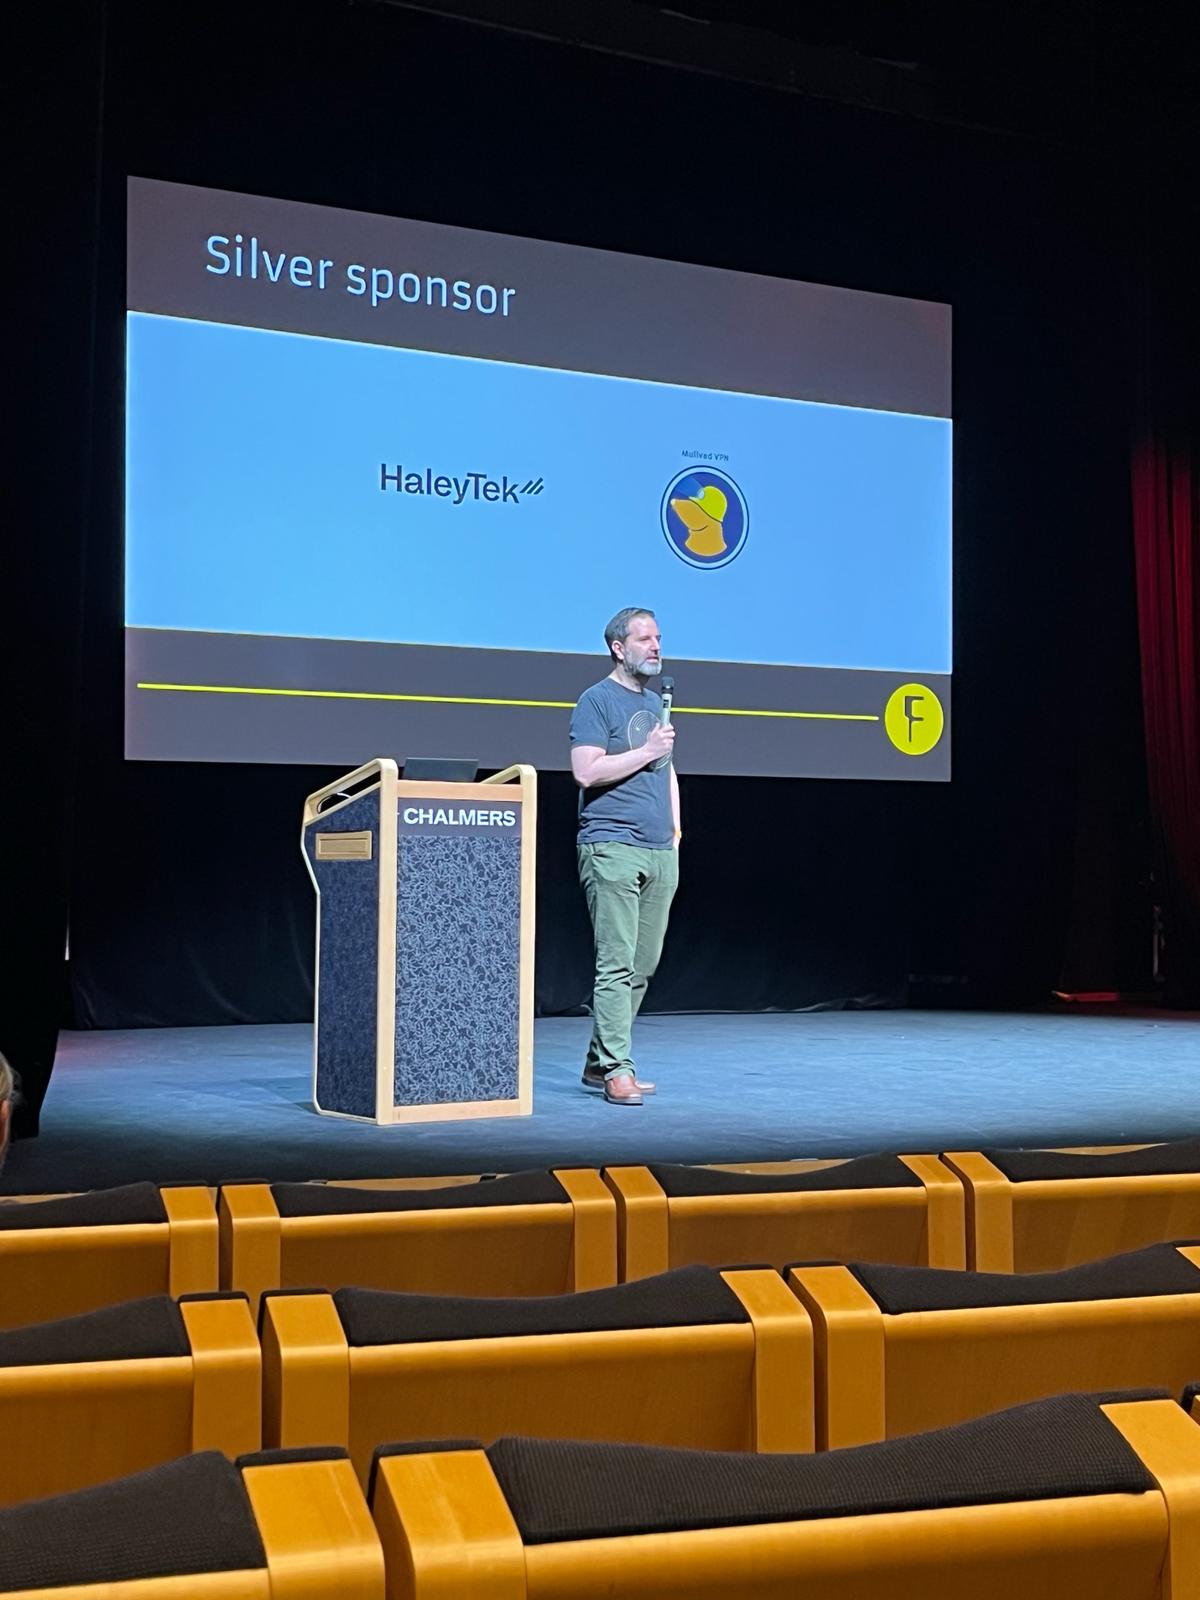
This year’s foss-north was the tenth incarnation. I’ve been organizing foss-gbg since 2013, and foss-north since 2016 (two events in 2020 makes it ten in total). It’s been quite a journey – moving between three venues, working with amazing speakers and sponsors, finding a way through the pandemic, while getting to know so many people.
The conference continued when fscons moved from town. Henrik, who helped start fscons has been invaluable during the foss-north years.
Over the years, there has been multiple people helping out with things like announcing speakers, manning the registration booth, finding speakers and creating a program. One of the people who has been around the whole time is Tobias, who is ran a large portion of the show this year and is taking over the lead organizer role.
Private life has been rough over the past two years, so the decision to step back from foss-north has been more or less inevitable. So it’s a great feeling to be able to sit down and enjoy the show and know that the event is in good hands with Tobias.
Thank you all for speaking, visiting, helping out at, and sponsoring foss-north. See you at next year’s event. I’ll have more time to mingle than ever before! ;-)

 TSDgeos
 GSoC
GSoC

 @christoph-cullmann:matrix.org