Skip to content

Monday, 24 July 2023

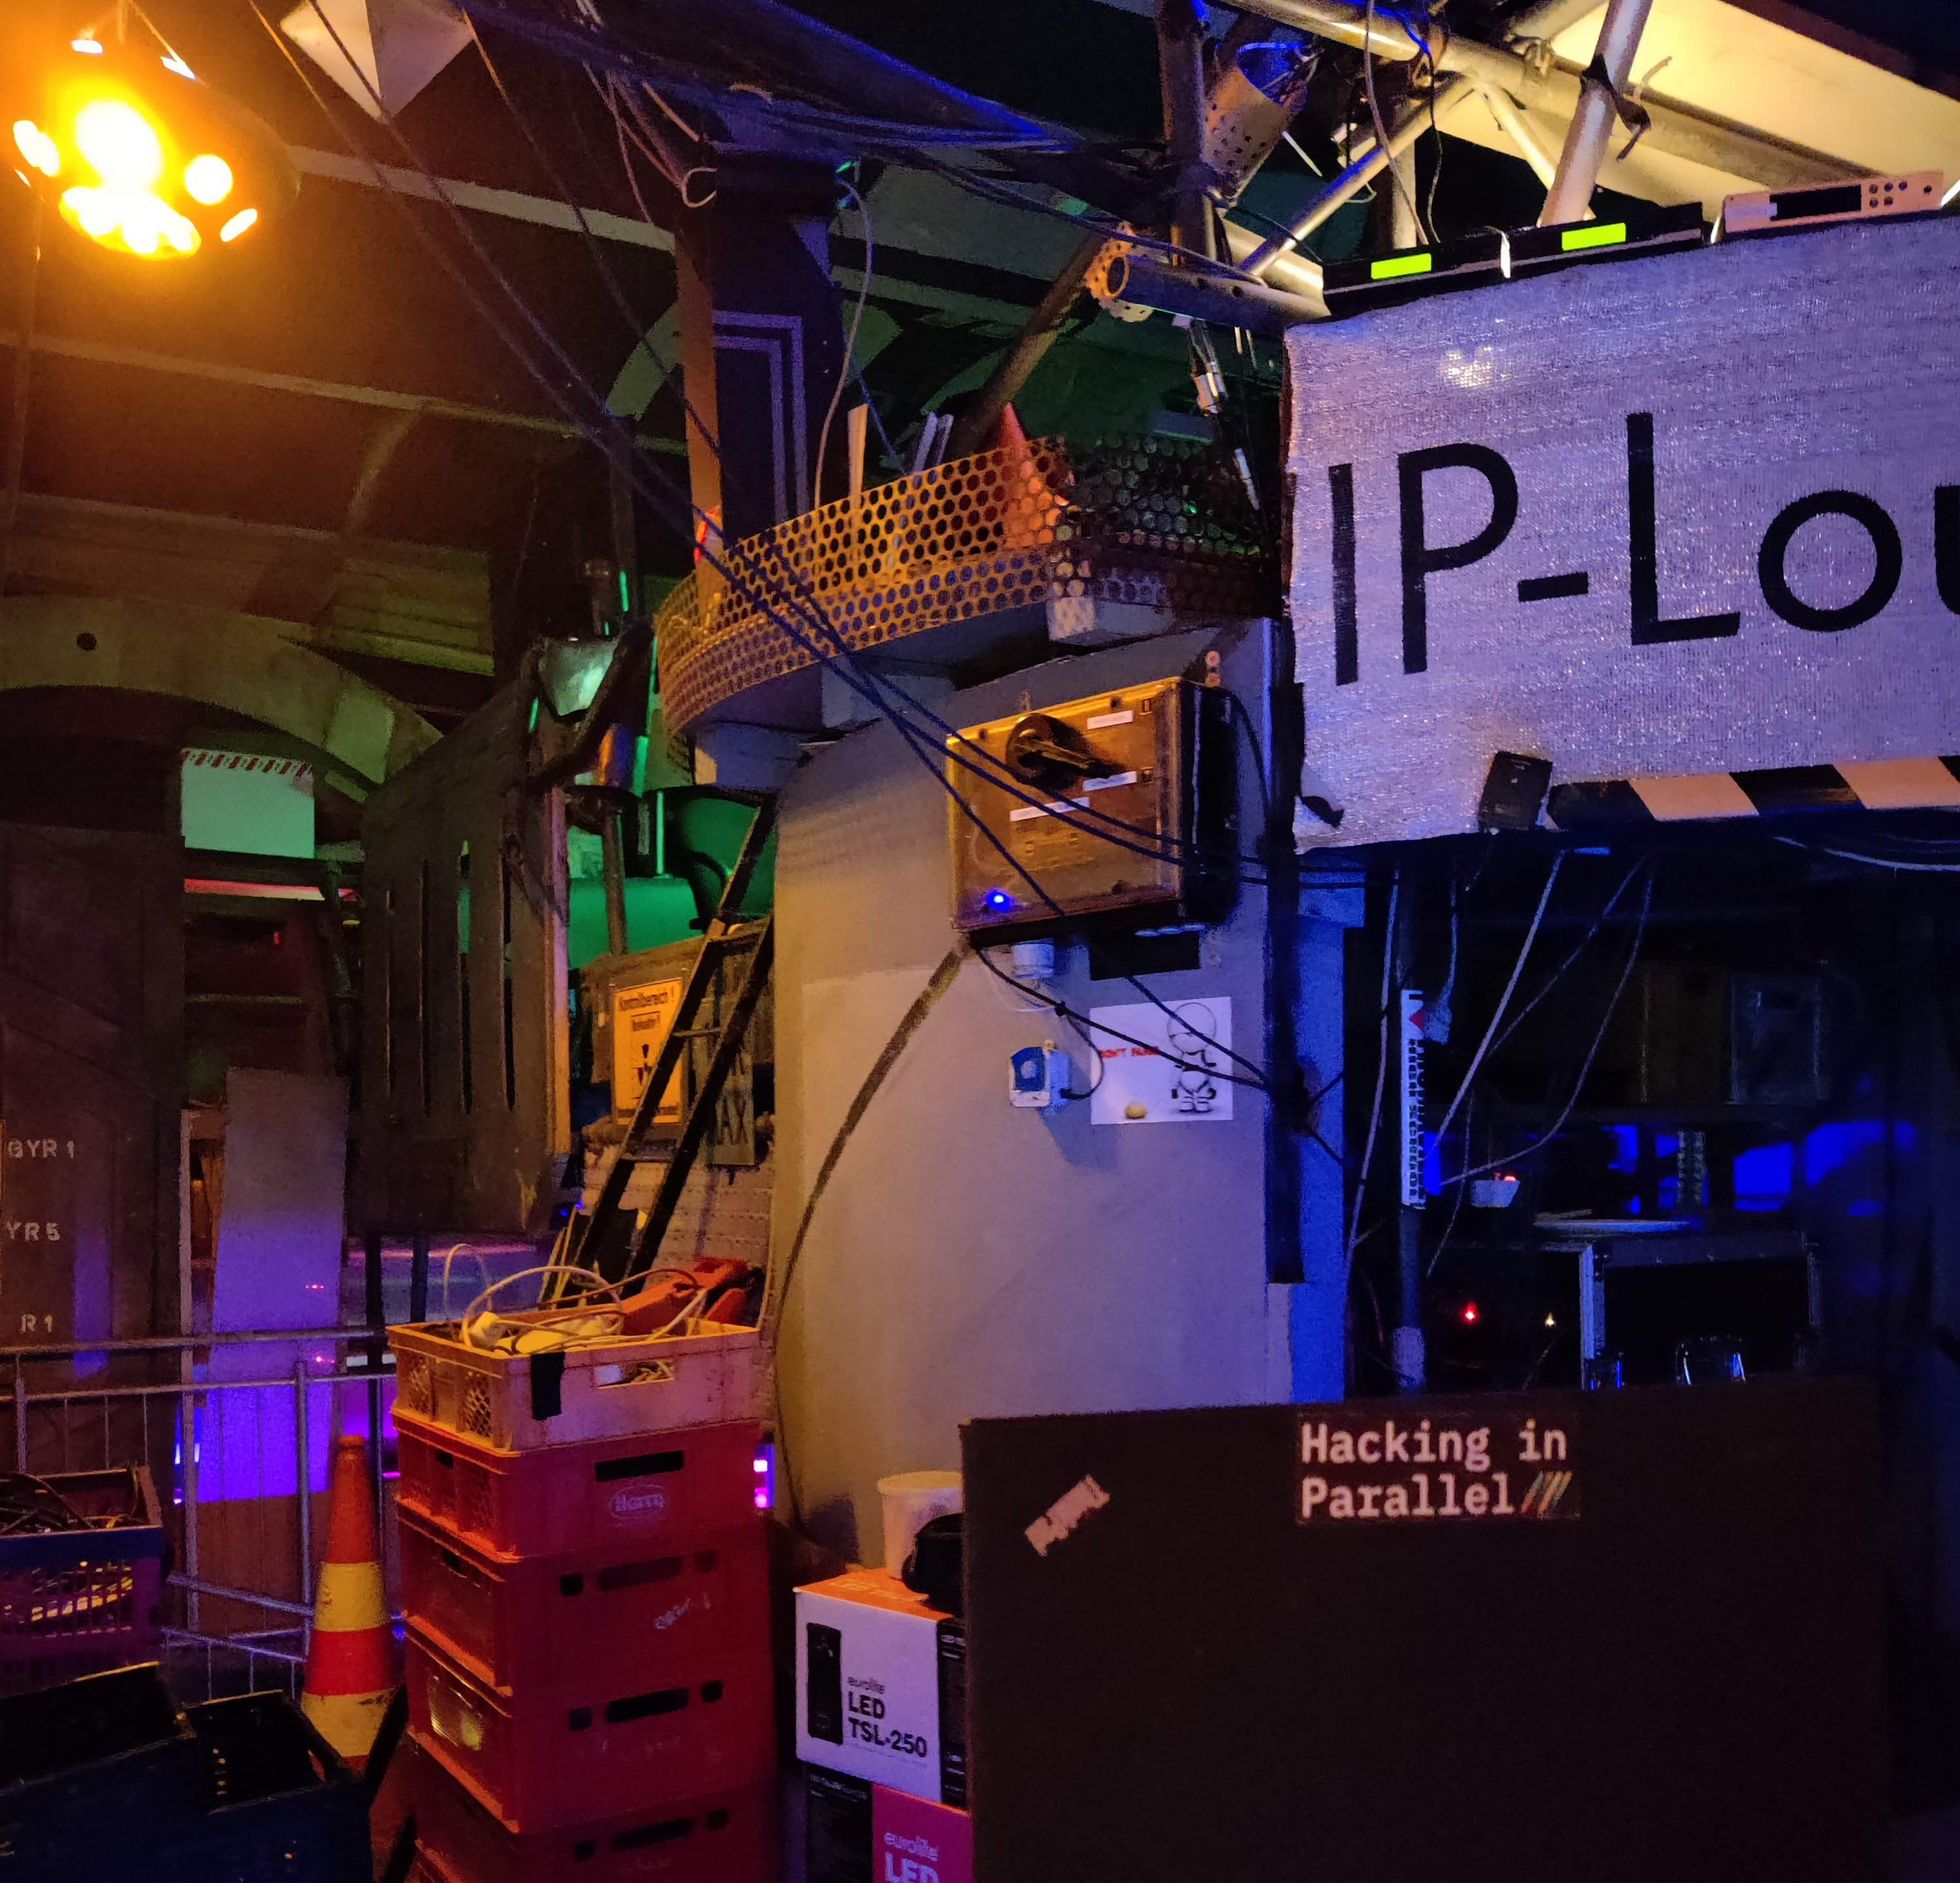
My conference badge On Friday Akademy 2023 came to a close. This was the second time I attended the conference physically after the online editions of 2020 and 2021 and I want to give short retrospective this blog post.

Talks

Akademy started with two days full of talks on Saturday and Sunday and I have to say sometimes it was hard to choose between the two parallel tracks. Overall it provided a nice mixture between what happens in the community, learning how people solved problems and learning from them (for example Ingo fixing accessibility in Kleopatra) and insight into new technologies (I had never heard of Slint before). Apart from the two standout keynotes about Kdenlive and the Libre Space Foundation I want to highlight Joseph’s talk about Internal Communication at KDE which it turns out also projects outwards for example to new potential contributors. The talk itself was well structured and presented and had engaged with the audience nicely as well.

This year I did not submit a talk myself but stood in for Albert for an update about what’s happening in the KDE Free Qt Foundation and in the KDE e.V. KDE Free Qt Working Group during the KDE e.V. Working Group reports. since he had a talk at the same time in the other room.

I also tried something new and held a panel in the “KDE Wayland Fireside chat” together with Aleix, David Edmundson, Vlad and Xaver which was intended to be an opportunity to interact for people with their favourite KDE Wayland developers. I think it turned out nicely with very good online participation - probably half of the question came from chat! The size of the physically audience was maybe less than what I would expected beforehand but we had very strong opposition with the lighting talks happening at the same time in room 1 while we were the last session in room 2. Speaking of them, I am looking very much forward to watch the recording of them and all the other talks that I missed because I was in another room.

BoFs and all the other things

After the talks come the BoFs, where people meet, discuss, plan, roadmap and workshop together. My personal self-selected schedule consisted among other things of a whole lot of KF6, Plasma 6 and to round it out more KF6. We discussed what is left to do, challenges left, and even potential roadmaps to release. Here the strong presence of people from the Qt Group proved valuable as they could help with some challenges we are facing and were interested in some problems we faced along the way. We even discovered that we share common interest into improving some areas of Qt.

Thursday was dominated by Wayland discussions. It started with a discussion on input methods and virtual keyboards where we recapped what’s happening upstream, how this fits to our needs and vision of Plasma. Afterwards we discussed some challenges of Qt on Wayland with regards to its QInputDevice API. This session showed again how useful it is to have Qt and KDE people in the same room as the discussion switched quickly from outlining missing features to making gestures and scrolling work nicely in Qt and for application developers in a Wayland world using existing infrastructure.

But Akademy is not only the things that are on the official schedule. It’s meeting familiar and new faces at the welcome and social events. It’s going on to the day trip together. It’s having a spontaneous Itinerary almost BoF in hacking room. It’s going to and having dinner together after an exhausting day. And of course it’s sometimes also just hanging out and chilling with cool people. So thanks to the KDE e.V, the Akademy team and all the volunteers who made this awesome event possible.

Akademy, KDE’s annual conference, recently took place in Thessaloniki, Greece. Lots of people were super excited about the prospect of getting GUI Testing off the ground based on the Selenium tech I built last year. Since KDE produces cross-platform applications an obvious question arose though…

What about Windows?

It’s surprisingly easy! Indeed the most time consuming part is probably getting your hands on a Windows Development Virtual Machine. Once you have a Windows installation we need to only spin up our toolchain and off we go. Here’s a handy command list:

\# Download and install WinAppDriver: https://github.com/microsoft/WinAppDriver/releases

winget install openjs.nodejs
winget install python.python.3.11

npm install --location=global appium
# restart terminal to apply PATH change
set-executionpolicy -scope currentuser remotesigned # allow script execution
appium driver install --source=npm appium-windows-driver

pip install appium-python-client
appium # start server, needs firewall exception on first start

Before we go further into the nitty gritty of testing on Windows I suggest you read the earlier blog post Selenium + AT-SPI = GUI Testing, since a lot of the concepts are the same regardless of platform.

First let us get our ducks in a row.

What Accerciser is to Linux is inspect.exe to Windows, namely an inspector tool for applications. You can find it in your Windows SDK folder %ProgramFiles(x86)%\Windows Kits\10\bin\10.0.22000.0\x64\inspect.exe or there abouts. Opening it greets you with this beauty:

Ignoring the verbosity for a moment we’ll note that it contains similar information to Accerciser on Linux, albeit in a more flat overview. Most importantly what is called the AutomationId is constructed from QObject objectNames, similar to the Accessible IDs on Linux. This is insofar interesting as it means we have a couple of avenues for cross-platform element locating - specifically we could match elements by their name (e.g. the text of a Label or Button), or more uniquely by their objectName-based ID (applicable to all QObjects).

For the purposes of this post we’ll do some trivial testing on Filelight and try to make it work for both Linux and Windows by using the element names. Relying on objectNames is more reliable but unfortunately requires some retrofitting in the source code. To avoid having to build Filelight on Windows we’ll work with what we have got: names. Let’s write our test. Don’t forget to install Filelight first :)

First thing, as always, is our setup boilerplate

#!/usr/bin/env python3

# SPDX-License-Identifier: MIT
# SPDX-FileCopyrightText: 2023 Harald Sitter <sitter@kde.org>

import unittest
import sys
from appium import webdriver
from appium.options.windows import WindowsOptions
from appium.options.common import AppiumOptions
from appium.webdriver.common.appiumby import AppiumBy
from selenium.webdriver.support.wait import WebDriverWait
from selenium.webdriver.support import expected\_conditions as EC

class SimpleFilelightTests(unittest.TestCase):
    @classmethod
    def setUpClass(self):
        options = WindowsOptions()
        options.app('KDEe.V.Filelight\_7vt06qxq7ptv8!KDEe.V.Filelight')
        self.driver = webdriver.Remote(
            command\_executor='http://127.0.0.1:4723',
            options=options)

    @classmethod
    def tearDownClass(self):
        self.driver.quit()

if \_\_name\_\_ == '\_\_main\_\_':
    unittest.main()

The only really interesting bit here is how we specify the application on Windows. Since Filelight is a store application we can start it by the Application User Model ID (AUMID) instead of a path; this is pretty much the same as starting by-desktop-file-id on Linux.

Now then. With the boilerplate out of the way we can write an incredibly simple test that simply switches pages a bit: If we click on ‘Scan Home Folder’ it should take us to the scan page and clicking there on ‘Go to Overview’ should take us back to the overview page.

    def test\_scan(self):
        self.driver.find\_element(by=AppiumBy.NAME, value="Scan Home Folder").click()
        overview = WebDriverWait(self.driver, 120).until(
            EC.element\_to\_be\_clickable((AppiumBy.NAME, "Go to Overview"))
        )
        overview.click()
        WebDriverWait(self.driver, 4).until(
            EC.element\_to\_be\_clickable((AppiumBy.NAME, "Scan Home Folder"))
        )

Cool. We now can test Filelight on Windows. Next we should try to make this test also work for Linux. Thankfully we only need to switch out our app name for a desktop file id.

    def setUpClass(self):
        if sys.platform == 'nt':
            options = WindowsOptions()
            options.app = 'KDEe.V.Filelight\_7vt06qxq7ptv8!KDEe.V.Filelight'
        else:
            options = AppiumOptions()
            options.set\_capability('app', 'org.kde.filelight.desktop')

Putting it all together we get our final test which runs on both Linux and Windows.

\# Windows
# start appium in a terminal
python .\\test.py

# Linux selenium-webdriver-at-spi-run ./test.py


The complete test code:

#!/usr/bin/env python3

SPDX-License-Identifier: MIT

SPDX-FileCopyrightText: 2023 Harald Sitter sitter@kde.org

import unittest import sys from appium import webdriver from appium.options.windows import WindowsOptions from appium.options.common import AppiumOptions from appium.webdriver.common.appiumby import AppiumBy from selenium.webdriver.support.wait import WebDriverWait from selenium.webdriver.support import expected_conditions as EC

class SimpleCalculatorTests(unittest.TestCase):

@classmethod
def setUpClass(self):
    if sys.platform == 'nt':
        options = WindowsOptions()
        options.app = 'KDEe.V.Filelight\_7vt06qxq7ptv8!KDEe.V.Filelight'
    else:
        options = AppiumOptions()
        options.set\_capability('app', 'org.kde.filelight.desktop')

    self.driver = webdriver.Remote(
        command\_executor='http://127.0.0.1:4723',
        options=options)

@classmethod
def tearDownClass(self):
    self.driver.quit()

def test\_scan(self):
    self.driver.find\_element(by=AppiumBy.NAME, value="Scan Home Folder").click()
    overview = WebDriverWait(self.driver, 120).until(
        EC.element\_to\_be\_clickable((AppiumBy.NAME, "Go to Overview"))
    )
    overview.click()
    WebDriverWait(self.driver, 4).until(
        EC.element\_to\_be\_clickable((AppiumBy.NAME, "Scan Home Folder"))
    )

if __name__ == ‘__main__’: unittest.main()


Discuss this blog post on [KDE Discuss](https://discuss.kde.org/t/writing-selenium-appium-tests-on-windows/3145).

Saturday, 22 July 2023

Monday, 17 July 2023

Make sure you commit anything you want to end up in the KDE Gear 23.08 releases to them

Dependency freeze is next July 20

The Feature Freeze and Beta is Thursday 27 of July.

More interesting dates  
  August 10: 23.08 RC (23.07.90) Tagging and Release
  August 17: 23.08 Tagging
  August 24: 23.08 Release

https://community.kde.org/Schedules/KDE_Gear_23.08_Schedule

Sunday, 16 July 2023

During this week Akademy 2023 is going on in Thessaloniki, Greece. It’s always awesome, to see many old friends and getting together with that amazing hacker community which is KDE.

There, me and Niccolò gave a talk about what;s happening in Plasma 6 and what will change, Noccolò on more visual things, about some changes we are cooking on the UI and on the visual themes. Here you can find a recording of the talk (alongside all the others of the day)

I talked more about the work I’ve bein doing in the Plasma shell during the last couple of months: code rafactors and how the API for writing plasmoids will change.

There were many things we were not quite happy about and now with the major release is the occasion for streamlining many things.

Now, It’s very important those changes are are well communicated, and easy to do for developes, because there are *a lot* of 3rd party plasmoids on the KDE store, which people are using and enjoying.

Let’s go trough the most important changes:

Dataengines

Dataengines were an API designed in early KDE 4 times, especially one of for our first offereings of Plasmoid API which was the pure JavaScript API, which existed long before the QML existed.

But now in a QML world, their API doesn’t really fit, instead is a much better fit having a QML extension which offers classes with all the needed properties, data models and signals that provide access to the needed data, such as tasks, notifications etc.

Dataengines are now deprecated and moved into a separed library, called “plasma5support” which will be still available for the time being, but consider porting away from it as we plan to eventually drop it.

Base Plasmoid API

The way plasmoids are declared in QML changed a bit: we used to have a magical “plasmoid” context property available from anywhere. This was an instance of a QQuickItem which was both the item where all the plasmoid contents were *and* a wrapper for some of the api for the central plasmoid object: the C++ class Plasma::Applet.

Now the access to plasmoid is an attahced property, the (uppercase) “Plasmoid”, which is directly the access to the instance of the central Plasma::Applet, without an in-between wrapper anymore.

The central QQuickItem is now called “PlasmoidItem”, and must be the root item of the plasmoid, just alike ApplicationWindow is for applications.

PlasmoidItem will have the purely graphical properties, such as the “compactRepresentation” or “fullRepresentation”

Here is a very minimal example of a plasmoid main file under plasma6:

import org.kde.plasma.plasmoid 2.0
PlasmoidItem {
    Plasmoid.title: i18n("hello")
    fullRepresentation: Item {....}
}

Actions

Plasmoids can export actions to their right mouse button menu, such as “mute” for the mixer plasmoid and so on.

In Plasma 5 we had an imperative API to add those actions, which was again coming from that old pure JS API, which really looked a bit out of tune in QML. In Plasma 6 the API has been replaced with a completely declarative API, in this form:

PlasmoidItem {
    Plasmoid.contextualActions: [
        PlasmaCore.Action {
            text: i18n("Foo")
            icon.name: "back"
            onTriggered: {...}
        },
        PlasmaCore.Action {
             ...
        }
    ]
}

PlasmaCore.Action is actually a binding to QAction (not the internal QML action type), so that it can be shared between C++ and QML easily

SVG theming

Plasma Themes don’t really have changed for now (and you can expect any old theme from the store to keep working), but the C++ and QML API for them has been moved to a standalone framework called KSvg. Plasma Svgs have quite some interesting features over the pure QtSvg API, such as disk caching of the rendered images, stylesheet recoloring to system colors and the 9 patch rectangular stretched images of FrameSvg.

Some applications were interested in using that, but couldn’t due to the long dependency chain of plasma-framework, so now they can be used as a much more manageable compact framework, offering both the usual C++, QPainter based api and QML bindings.

import org.kde.ksvg 1.0 as KSvg
FrameSvg {
    imagePath: "widgets/background"
}

Kirigami all the way down

Designing Kirigami in the beginning we lifted two concept from the Plasma API (which again we couldn’t use directly due to the dependency chain) Theme and Units

Theme gives access to the named system colors, and Units to standard spacing and animation durations.

Over the years the Kirigami version got way more advanced then the Plasma version, and having this code duplication didn’t make much more sense, to in Plasma6 whenever referring to a named color or an unit, the Kirigami version should be used, as the Plasma version is going away.

import org.kde.kirigami 2.20 as Kirigami
RowLayout {
    spacing: Kirigami.Units.smallSpacing
    Rectangle {
        color: Kirigami.Theme.backgroundColor
        bordere.color: Kirigami.Theme.textColor
    }
}

Friday, 14 July 2023

Hello and welcome back to my blog! This time I will be reviewing the work I've done during the first coding period of GSoC '23. This blog is written as part of my work for GSoC '23, to detail all the work I have done. Let's get started!

Challenges faced

Some of the challenges I faced are:

  • Time: Sometimes it felt like time was not on my side. Between college, assignments, exams, and family time, I found it hard to find time to concentrate on GSoC. However, I'm hoping I can improve my time management to remove this issue.

  • Lack of Documentation: For Android-NDK, there was a lack of documentation for things that are considered simple when developing a traditional Java app for Android. This made it more annoying to deal with Android libraries (especially since I'm using CMake). Sometimes I had this feeling while dealing with Poppler as well, but luckily my mentor helped me out massively.

  • Lack of experience in Android development: Going into the project, I didn't have much experience with Android development, much less Android-NDK based development. This proved to be a hindrance at times, as I did not know how to do simple things due to my lack of knowledge.

Work done

My goal for the first coding period was to implement a font-fetching API in Poppler, so that if a document has unembedded fonts, Okular can still display the document by using similar fonts found in the system.

I've successfully implemented this into Poppler along with help from my mentor, Albert Astals Cid (aacid@kde.org). To do so I had to implement multiple things:

The AFontMatcher API

The Afontmatcher functionality was introduced in Android-NDK around Android API level 29. It can be used to fetch a font that best matches the font family and the text to be rendered.

To use this API to implement font-matching capabilities, I had to do just a few things:

  • Add the Android library to the CMakeLists.txt for Poppler

  • Import the required header files into poppler/GlobalParams.cc. According to the documentation, these are the required header files:

    • <font.h>

    • <font_matcher.h>

    • <system_fonts.h>

  • Implement the AFontMatcher API in the GlobalParams::findSystemFontFile() method inside GlobalParams.cc

To implement the AFontMatcher API, I implemented GlobalParams::findSystemFontFile() in the following way:

  • Create a new AFontMatcher object using AFontMatcher_create()

  • Set the font weight and italics for the AFontMatcher object by using AFontMatcher_setStyle(), and the methods GfxFont::getWeight() for font-weight, as well as GfxFont::isItalic() for font italics.

  • Get the generic family name of the required font using the GfxFont::isSerif(), and GfxFont::isFixedWidth()

  • Match the font using AFontMatcher_match() to get an AFont object

  • Use the AFont object to get a font path for the font.

  • Use the font file extension to set the font type, which depends on the font format. Since the fonts can be in .ttf, .otf, .otc, or .ttc format, we check the font file extension to set the font type.

  • Create a GooString object using the path and return it.

  • Before returning the path, close the AFontMatcher and AFont objects using AFontMatcher_destroy() and AFont_close() to prevent memory leaks.

Setting up the Base-14 fonts

The Base-14 fonts are a special subset of fonts used in PDFs. Wikipedia describes them as:

Fourteen typefaces, known as the standard 14 fonts, have a special significance in PDF documents:

- Times (v3) (in regular, italic, bold, and bold italic) - Courier (in regular, oblique, bold and bold oblique) - Helvetica (v3) (in regular, oblique, bold and bold oblique) - Symbol - Zapf Dingbats

These fonts are sometimes called the base fourteen fonts. These fonts, or suitable substitute fonts with the same metrics, should be available in most PDF readers, but they are not guaranteed to be available in the reader, and may only display correctly if the system has them installed. Fonts may be substituted if they are not embedded in a PDF.

-- Wikipedia page on PDF file format

These fonts are usually substituted since they are licensed fonts, and permission is required to use them. So we use substitute fonts for them, which are either packaged along with the application or can be found in the system

Since Android systems have a limited set of fonts that can be fetched by AFontMatcher, we'll use substitute font files for the base-14 fonts. Thankfully, these are already packaged inside Okular's APK file, in the assets/share/fonts folder.

Poppler uses the GlobalParams::setupBaseFonts() method to set up these base fonts and create a mapping between the base-14 font names and their font file paths within the filesystem.

However, since these fonts are packaged inside the APK, they cannot be accessed using regular methods. So to access the fonts, I implemented a font-copying mechanism that copies all base-14 fonts into the fonts folder of the application's internal storage. This is described in the next section.

Then I had to create an array of structs with the base-14 font name and the name of the substitute font file. Here it is:

static struct{    const char *name;    const char *otFileName;} displayFontTab[] = { { "Courier", "NimbusMonoPS-Regular.otf" },                       { "Courier-Bold", "NimbusMonoPS-Bold.otf" },                       { "Courier-BoldOblique", "NimbusMonoPS-BoldItalic.otf" },                       { "Courier-Oblique", "NimbusMonoPS-Italic.otf" },                       { "Helvetica", "NimbusSans-Regular.otf" },                       { "Helvetica-Bold", "NimbusSans-Bold.otf" },                       { "Helvetica-BoldOblique", "NimbusSans-BoldItalic.otf" },                       { "Helvetica-Oblique", "NimbusSans-Italic.otf" },                       { "Symbol", "StandardSymbolsPS.otf" },                       { "Times-Bold", "NimbusRoman-Bold.otf" },                       { "Times-BoldItalic", "NimbusRoman-BoldItalic.otf" },                       { "Times-Italic", "NimbusRoman-Italic.otf" },                       { "Times-Roman", "NimbusRoman-Regular.otf" },                       { "ZapfDingbats", "D050000L.otf" },                       { nullptr, nullptr } };

The GlobalParams::setupBaseFonts() method would then loop over this array and set a mapping between base-14 font names and the path of their substitute font files. This mapping is then used by other methods such as GlobalParams::findFontFile() to return the font file path for a particular font. However, if there is no such font, then Poppler will fall back on GlobalParams::findSystemFontFile, which on Android uses the AFontMatcher API.

Mechanism to copy font files from the APK

While the above features worked, running the GlobalParams::setupBaseFonts() method required me to copy the font files manually, using adb push. However, the end user should never have to manually intervene in the application's files to make it work. Hence I began working on copying font files from the APK automatically.

To do so I needed a way to do 4 things:

  1. To get the path of the internal storage of the application. I needed to get the path programmatically, since other apps may use Poppler for PDF rendering, and those apps would have their own internal storage paths. Fortunately, Qt has a component called QStandardPaths which allows the user to retrieve the paths of standard directories. In this case, I used QStandardPaths::writableLocation(QStandardPaths::AppDataLocation) to retrieve the path of the app's internal storage directory.

  2. To get the font files from within the assets folder inside the APK. Fortunately, Qt allows access to these assets through a special syntax - by prefixing the path with assets:/ and specifying the file path relative to the assets folder. So for example, if you wanted to access the file present in assets/exampledir/examplefile, you would need to specify it as "assets:/exampledir/examplefile".

  3. A way to copy the font files into the fonts directory inside the internal storage of the application. For this purpose, I used a QDirIterator along with the file paths from earlier and copied every font file into the app's internal storage.

  4. To set the path of the font directory inside the GlobalParams.cc file so that setupBaseFonts() can create the proper font mappings. For this purpose, I created a static function in GlobalParams.cc called setFontDir().

The Results

Before

Here is a video demonstrating a pdf with unembedded fonts before the new Android font-matching functionality was added:

After

And here is one demonstrating the same pdf after implementation of the new Android font matching functionality:

Remaining work

  • More thorough testing of the code: I've only done some basic testing of the new features and with a single pdf that had unembedded fonts. To find any bugs that are still hiding in the code, more thorough testing should be done with other PDFs.

  • Making the assets font directory configurable using CMake flags: The path of the assets directory that holds the fonts is currently hard coded in the DocumentData::init() method of the qt5/src/poppler-private.cc file. To enable users of the library to change this, a CMake commandline may be added to configure it.

  • Smoothening the text rendering: While I may have finished my work on setting up an Android-specific font-matching interface, the rendering of the text in the PDF still leaves something to be desired. The rendering is a bit pixelated when zoomed out, and becomes clear only when zoomed in.


The Journey

This section describes my journey as I worked on implementing AFontMatcher. It includes setting up my development environment, the components I worked on, as well as everything I tried, what worked, and what didn't. If you are interested, read on!

The Beginning

Getting up to speed with the code

Without knowing what code I had to change, I couldn't start working on my project. I approached my mentor, Albert Astals Cid (aacid@kde.org) for help, and he pointed me toward the poppler/GlobalParams.cc file, and that I had to re-implement the GlobalParams::findSystemFontFile() and maybe GlobalParams::findBase14FontFile() so that it would work on the Android platform.

Setting up my development environment

Now I had to set up my development environment. No developer can do their work without some setup after all :)

Craft

First, I set up an environment to compile Okular for Android. For this, I used KDE's Craft tool, which is used for cross-compiling across OSs and architectures.

To set up Craft to compile for Android, I referenced the following guide: https://develop.kde.org/docs/packaging/android/building_applications/

I edited the arguments a bit, so my setup involved using the following commands:

mkdir -p $HOME/craftdocker run -ti --rm -v $HOME/craft:/home/user/ kdeorg/android-qt515 bashpython3 -c "$(curl https://raw.githubusercontent.com/KDE/craft/master/setup/CraftBootstrap.py)" --prefix ~/CraftRoot

I then setup the environment to build for the arm32 architecture. To build Okular for android and package it as an apk, I had to execute the following commands (exclude the docker command if you're already inside the Craft docker container):

# Start the docker container if not already inside itdocker run -ti --rm -v $HOME/craft:/home/user/ kdeorg/android-qt515 bash# Init the craft environment source ~/CraftRoot/craft/craftenv.sh# Craft okular for the first timecraft okular# Package okular as an apk craft --package okular# cd into ~/CraftRoot/tmp, where the packaged apk iscd ~/CraftRoot/tmp# Align the apk using zipalign /opt/android-sdk/build-tools/30.0.2/zipalign -p -f -v 4 okularkirigami-armeabi-v7a.apk okularkirigami-armeabi-v7a.signed.apk # Generate the keys for signing the apk (must only be done the first time)keytool -genkey -noprompt -keystore key.keystore -keypass 123456  -dname "CN=None, OU=None, O=None, L=None, S=None, C=XY" -alias mykey -keyalg RSA -keysize 2048 -validity 10000 -storepass 123456# Finally, sign the apk using apksigner/opt/android-sdk/build-tools/30.0.2/apksigner sign -verbose -ks key.keystore okularkirigami-armeabi-v7a.signed.apk

This will generate a signed apk (.signed.apk extension) in the ~/CraftRoot/tmp directory of the docker image. To find the apk in your computer's filesystem, you must go to the path where you created the craft directory and find the tmp directory within it. For me it was located at ~/craft/CraftRoot/tmp.

Poppler

Next, I had to set up Poppler for cross-compilation to Android arm32.

Initially, this proved to be frustrating - not only was I dealing with lots of CMake flags, but I also had to cross-compile for both the Android AND ARM32 platforms - not fun.

After a couple of days of pulling my hair out in frustration, my mentor advised me to reference the android_build section of Poppler's gitlab CI file, which can be found in the repo at .gitlab-ci.yml.

Based on the Gitlab CI file, I had to use the kdeorg/android-sdk docker image for cross-compiling Poppler. I used the following commands to set up the docker image:

# Create a directory for your source code and git clone the poppler repo into itmkdir -p ~/kde-android/srcgit clone https://gitlab.freedesktop.org/poppler/poppler.git# Launch the kdeorg/android-sdk containerdocker run -ti --rm -v $HOME/kde-android/src:/home/user/src  kdeorg/android-sdk bashcd

Now my docker container for cross-compiling Poppler was ready. I also created a build script at ~/kde-android/src/build.sh for easily building Poppler:

#!/bin/bashecho "workaround for ECM Android toolchain wanting all binaries to be shared libraries"sed -i -e 's/<LINK_FLAGS> <CMAKE_SHARED_LIBRARY_CREATE_CXX_FLAGS>/<LINK_FLAGS>/g' /opt/nativetooling/share/ECM/toolchain/Android.cmakemkdir -p /home/user/src/poppler/buildcd /home/user/src/poppler/buildrm -rf *echo -e "\n\n ##### BUILDING POPPLER ##### \n\n"ANDROID_ARCH_ABI=armeabi-v7a cmake -G Ninja .. \    -DCMAKE_ANDROID_API=29 \    -DCMAKE_PREFIX_PATH="/opt/Qt/;/opt/kdeandroid-arm/" \    -DCMAKE_BUILD_TYPE=debug \    -DCMAKE_POSITION_INDEPENDENT_CODE=OFF \    -DENABLE_DCTDECODER=unmaintained \    -DENABLE_LIBOPENJPEG=unmaintained \    -DENABLE_BOOST=OFF \    -DCMAKE_BUILD_TYPE=debugfull \    -DCMAKE_CXX_FLAGS="-Wno-deprecated-declarations" \    -DCMAKE_TOOLCHAIN_FILE=/opt/nativetooling/share/ECM/toolchain/Android.cmakeif [[ $1 == -b ]]; then    ninja -j4fi

This script should be run from the docker container. It only runs CMake by default, but it can also compile Poppler when you specify the -b flag.

Building Okular with my custom Poppler library

Now that the environment is ready, I have to figure out how to build Okular with my custom Poppler library. My mentor suggested I replace Poppler's .so files contained in the Craft container with my custom-built libraries. So I figured out all the locations where Poppler's .so files were stored inside the Craft container and made a small script to quickly replace those files with my custom-build Poppler:

#!/bin/bashpopplerdir='/home/shivodit/kde-android/src/poppler/build/android-build/libs/armeabi-v7a'declare -a paths=(    '/home/shivodit/craft/CraftRoot/build/qt-libs/poppler/work/build/android-build/libs/armeabi-v7a/'    '/home/shivodit/craft/CraftRoot/build/qt-libs/poppler/image-Release-23.03.0/lib/'    '/home/shivodit/craft/CraftRoot/build/kde/applications/okular/work/build/okularkirigami_build_apk/libs/armeabi-v7a/'    '/home/shivodit/craft/CraftRoot/build/kde/applications/okular/work/build/okularkirigami_build_apk/build/intermediates/merged_jni_libs/release/out/armeabi-v7a/'    '/home/shivodit/craft/CraftRoot/build/kde/applications/okular/work/build/okularkirigami_build_apk/build/intermediates/merged_native_libs/release/out/lib/armeabi-v7a/'    '/home/shivodit/craft/CraftRoot/build/kde/applications/okular/work/build/okularkirigami_build_apk/build/intermediates/stripped_native_libs/release/out/lib/armeabi-v7a/'    '/home/shivodit/craft/CraftRoot/lib/')for i in "${paths[@]}"; do    cp $popplerdir/* $idone

This script is run from your host system, not from within any of the docker containers. It simply creates an array of locations where the libraries must be replaced, and copies the custom Poppler to those locations, overwriting the already existing libraries. Pretty neat, right?

Now whenever I want to build Okular, I simply have to execute the following commands after entering the docker container and activating Craft:

craft --compile okularcraft --package okular /opt/android-sdk/build-tools/30.0.2/zipalign -p -f -v 4 okularkirigami-armeabi-v7a.apk okularkirigami-armeabi-v7a.signed.apk /opt/android-sdk/build-tools/30.0.2/apksigner sign -verbose -ks key.keystore okularkirigami-armeabi-v7a.signed.apk

Now let us move on to the fun part - coding.

Coding the font API

After setting up, I got started with writing the font API. This involved several steps:

Figuring out logging

Since Android is much more locked down than desktop platforms such as Linux, MacOS, Windows, *BSDs, etc. there is a bit of difficulty involved with using a debugger to test your apps. For this very reason, my mentor suggested I use print debugging instead. In hindsight, I do think this was a good decision - setting up the debugger would have taken a long time, especially since I lack much Android development experience.

On Android, the primary tool for viewing logs from apps is Logcat. However, when you use print statements (for example, cout in C++), it does not appear in logcat. Instead of printing, you have to use the logging tools that Android provides. Since I was using C++, I set up android-ndk's logging facility. Its documentation can be found here - https://developer.android.com/ndk/reference/group/logging

But before using this logging tool, I set up my CMakeLists.txt to include find the log library and link it with the Poppler library, as follows:

# finding the android logging library and storing it in a variable named android-log-lib    find_library(android-log-lib log)# some 500 lines of other statements#Linking the logging library with popplertarget_link_libraries(poppler LINK_PUBLIC ${android-log-lib} LINK_PRIVATE ${poppler_LIBS} LINK_PRIVATE ${android-lib})

It worked! Now all I had to do was import the logging library into the source file and use __android_log_print() to write to logcat.

However, I was still bothered - __android_log_print() took too long to type! So I googled a bit, and I stumbled upon some macros which made things easier. Here they are:

#ifndef MODULE_NAME#define MODULE_NAME  "AUDIO-APP"#endif#define LOGV(...) __android_log_print(ANDROID_LOG_VERBOSE, MODULE_NAME, __VA_ARGS__)#define LOGD(...) __android_log_print(ANDROID_LOG_DEBUG, MODULE_NAME, __VA_ARGS__)#define LOGI(...) __android_log_print(ANDROID_LOG_INFO, MODULE_NAME, __VA_ARGS__)#define LOGW(...) __android_log_print(ANDROID_LOG_WARN,MODULE_NAME, __VA_ARGS__)#define LOGE(...) __android_log_print(ANDROID_LOG_ERROR,MODULE_NAME, __VA_ARGS__)#define LOGF(...) __android_log_print(ANDROID_LOG_FATAL,MODULE_NAME, __VA_ARGS__)

I only used LOGV() since that's all I needed.

Of course, this was just temporary, for debugging. In my final merge request, I removed all the print debugging related stuff.

Figuring out AFontMatcher

The next step was to get a rudimentary version of the AFontMatcher API working. There was one problem though, I had no idea how to build with AFontMatcher. When I tried to include AFontMatcher's header files, the compiler threw a bunch of errors.

It seemed like I had to set up my CMakeLists to include the library that provided AFontMatcher functionality, and I couldn't seem to find it in the android-ndk documentation. I struggled with this problem for a few days, alternating between looking through the android-ndk documentation, googling, and experimenting with different CMakeList statements.

I got the bright idea to google for code that used any of the AFontMatcher functions. I stumbled upon Github's code search, and searched for "AFontMatcher_create". I found a C++ project using AFontMatcher, and looked at its CMakeLists.txt to figure out how to get AFontMatcher to compile.

Turns out I had to use find_library to find the android library, and then link it with Poppler. I added the following lines to the CMakeLists.txt:

# Find android libraryfind_library(Androidlib NAMES android REQUIRED)# Check if library is found, if yes then add it to poppler_LIBS, which will # be linked during compilationif(Androidlib)   set(poppler_LIBS ${poppler_LIBS} ${Androidlib})endif()

After adding these lines, Poppler finally compiled successfully!

I then added some code to GlobalParams.cc, inside of the GlobalParams::findSystemFontFile() method to run a rudimentary version of the Afontmatcher API.

It worked; I was thrilled! After 1.5 weeks of struggling with setup and compiling Poppler with AFontMatcher, I finally had a working build! Even though the font didn't account for font-weight or italics, and only searched for serif fonts, I had taken a step forward.

Improving AFontMatcher

Now that I have a working yet rudimentary AFontMatcher implementation, it's time to refine it.

We need to determine the following:

  • Check whether the font is supposed to be sans-serif, serif, or fixed-width.

    • GfxFont::isSerif() checks whether the font is serif, and returns a boolean value.

    • GfxFont::isFixedWidth() checks whether the font is fixed width or not, and returns a boolean value

  • Check the font-weight.

    • Used to set the thickness of the font.

    • Can be retrieved using GfxFont::getWeight().

    • It returns a value from 1 to 9, however, AFontMatcher takes weight in increments of 100, from 0 to 1000. So we must multiply its value by 100.

  • Check whether the font is italic.

    • Gfx::isItalic() checks whether the font is italic, and returns a boolean value.
  • Set the type of the returned font file.

    • GlobalParams.h defines four types of fonts in an enum:
    enum SysFontType    {        sysFontPFA,        sysFontPFB,        sysFontTTF,        sysFontTTC    };
  • Since AFontMatcher returns .otf, .ttf, .otc, or .ttc, we set sysFontTTF for .otf and .ttf, and sysFontTTC for the remaining two.

All of this results in the following code for the AFontMatcher-based API defined in GlobalParams::findSystemFontFile():

GooString *GlobalParams::findSystemFontFile(const GfxFont *font, SysFontType *type, int *fontNum, GooString *substituteFontName, const GooString *base14Name){    GooString *path = nullptr;    const std::optional<std::string> &fontName = font->getName();    if (!fontName) {        return nullptr;    }    globalParamsLocker();    // If font is not found in the default base-14 fonts,    // use Android-NDK's AFontMatcher API instead.     // Documentation for AFontMatcher API can be found at:    // https://developer.android.com/ndk/reference/group/font    std::string genericFontFamily = "serif";    if (!font->isSerif()) {        genericFontFamily = "sans-serif";    } else if (font->isFixedWidth()) {        genericFontFamily = "monospace";    }    AFontMatcher *fontmatcher = AFontMatcher_create();    // Set font weight and italics for the font    AFontMatcher_setStyle(fontmatcher, font->getWeight() * 100, font->isItalic());    // Get font match and the font file's path    AFont *afont = AFontMatcher_match(fontmatcher, genericFontFamily.c_str(), (uint16_t *)u"A", 1, nullptr);    path = new GooString(AFont_getFontFilePath(afont));    // Font has been matched and its path has been copied, delete the     // AFontMatcher and AFont objects to avoid memory leaks    AFont_close(afont);    AFontMatcher_destroy(fontmatcher);    // Set the type of font. Fonts returned by AFontMatcher are of    // four possible types - ttf, otf, ttc, otc.    if (path->endsWith(".ttf") || path->endsWith(".otf")) {        *type = sysFontTTF;    } else if (path->endsWith(".ttc") || path->endsWith(".otc")) {        *type = sysFontTTC;    }    return path;}

setupBaseFonts() and the base-14 fonts

After setting up a rudimentary afontmatcher implementation, I got started on implementing setupBaseFonts().

To start, I simply copied the code that was used for Windows' version of setupBaseFonts(), and edited it a bit to suit my needs.

I also copied the struct and its array containing the font names, and their file names. Without defining these, the setupBaseFonts function would not work. Since the copied struct had font names in .pfb and .ttf formats, I altered the struct and the array so that it only included .otf files, as follows:

static struct{    const char *name;    const char *otFileName;} displayFontTab[] = { { "Courier", "NimbusMonoPS-Regular.otf" },                       { "Courier-Bold", "NimbusMonoPS-Bold.otf" },                       { "Courier-BoldOblique", "NimbusMonoPS-BoldItalic.otf" },                       { "Courier-Oblique", "NimbusMonoPS-Italic.otf" },                       { "Helvetica", "NimbusSans-Regular.otf" },                       { "Helvetica-Bold", "NimbusSans-Bold.otf" },                       { "Helvetica-BoldOblique", "NimbusSans-BoldItalic.otf" },                       { "Helvetica-Oblique", "NimbusSans-Italic.otf" },                       { "Symbol", "StandardSymbolsPS.otf" },                       { "Times-Bold", "NimbusRoman-Bold.otf" },                       { "Times-BoldItalic", "NimbusRoman-BoldItalic.otf" },                       { "Times-Italic", "NimbusRoman-Italic.otf" },                       { "Times-Roman", "NimbusRoman-Regular.otf" },                       { "ZapfDingbats", "D050000L.otf" },                       { nullptr, nullptr } };

I had initially kept the Symbol font's otFileName as nullptr because I didn't know what substitute font it used from the Okular APK's assets folder. This caused setupBaseFonts to crash due to a null pointer dereference. My mentor pointed out the correct name for Symbol's substitute font. After adding its name, the nullptr dereference crash was gone.

Now I had to copy the fonts from the apk to somewhere where Poppler could access it. For the moment, I used adb push to copy the fonts to Androids /data/local/tmp/ directory, inside a folder named font.

I then added the path /data/local/tmp/font to the displayFontDirs array, which setupBaseFonts() would use to search for fonts:

static const char *displayFontDirs[] = { "/data/local/tmp/font", nullptr };

GlobalParams::setupBaseFonts() was now functional. Now I just had to write some code to copy the fonts contained within the apk to the application's data directory.

Writing the font file copying functionality

Since every android app has its own internal storage directory once it is installed, Poppler will need to find out what the exact path is. For example, when running okular, since its fully qualified name is org.kde.okular.kirigami, it's internal directory will be located at /data/user/0/org.kde.okular.kirigami/files/.

In order to find the internal data directory of the app, my mentor and I were looking at ANativeActivity as a way to do so. We also needed to access the fonts inside of the APK assets folder, for which we thought of using android-ndk's Assets API. However both of these seemed way too complex, so we explored other ideas.

While researching I came across QStandardPaths, and discovered that it could get the app directory path by using:

QStandardPaths::writableLocation(QStandardPaths::AppDataLocation)

And to access assets, Qt provides a special font path which can be used with Qt File functions. It simply involves prefixing assets:/ to the path. The path should be relative to the assets directory of the app's apk. For example, in this case to access a file stored in assets/filedir/file.txt, we can use the path: assets:/filedir/file.txt.

Since these Qt-based solutions seemed more elegant and straightforward than the Android-NDK ANativeActivity and Asset API, my mentor agreed that I should use these instead.

Using the above features, I used a QDirIterator to loop over the assets:/share/fonts directory and copied the font files one by one to a folder named fonts, located within Okular's internal storage directory. I wrote the code like this:

QString assetsFontDir = QStringLiteral("assets:/share/fonts");    QString fontsdir = QStandardPaths::writableLocation(QStandardPaths::AppDataLocation) + QStringLiteral("/fonts");    QDir fontPath = QDir(fontsdir);    if (fontPath.mkpath(fontPath.absolutePath())) {        QDirIterator iterator(assetsFontDir, QDir::NoFilter, QDirIterator::Subdirectories);        while (iterator.hasNext()) {            iterator.next();            QFileInfo fontFileInfo = iterator.fileInfo();            QString fontFilePath = assetsFontDir + QStringLiteral("/") + fontFileInfo.fileName();            QString destPath = fontPath.absolutePath() + QStringLiteral("/") + fontFileInfo.fileName();            QFile::copy(fontFilePath, destPath);        }    }

Initially I was implementing this not in poppler, but instead in the Okular code, in mobile/app/main.cpp. This was because we thought that since Poppler is a library that is used by Okular, it wouldn't be able to get its internal directory path.

However when implementing this, I realized I also had to set the font directory inside of Poppler.

So I asked my mentor how I could access poppler's GlobalParams.cc through Okular. He said that GlobalParams class is private to poppler, and cannot be used outside of the library. He recommended that instead of implementing this font-copying functionality in Okular, I should do it in the qt side of poppler. More specifically, in the DocumentData constructors defined in qt5/poppler-private.h.

Initially I had copy pasted the above snippet in each constructor, but later I placed it in the DocumentData::init() function defined within qt5/poppler-private.cc. This is because the init() function is called by all DocumentData constructors, and having the code in one place reduces redundancy and improves readability.

All of this was working well, all the font files were getting copied successfully. The next step was to set the font directory path inside of GlobalParams.cc, so that GlobalParams::setupBaseFonts() could search for fonts in the correct path.

To do this, I defined an Android-only static function, GlobalParams::setFontDir() in GlobalParams.h and provided its definition in GlobalParams.cc. I also replaced the static const char *displayFontDirs[] array with a static std::string variable named displayFontDir.

The GlobalParams::setFontDir() method takes an std::string as an argument. When called, it sets the displayFontDir variable to the string that was passed to it. This successfully sets the font directory. I then called this function inside the init() method, when the fonts are copied:

QString assetsFontDir = QStringLiteral("assets:/share/fonts");    QString fontsdir = QStandardPaths::writableLocation(QStandardPaths::AppDataLocation) + QStringLiteral("/fonts");    QDir fontPath = QDir(fontsdir);    if (fontPath.mkpath(fontPath.absolutePath())) {        GlobalParams::setFontDir(fontPath.absolutePath().toStdString());        QDirIterator iterator(assetsFontDir, QDir::NoFilter, QDirIterator::Subdirectories);        while (iterator.hasNext()) {            iterator.next();            QFileInfo fontFileInfo = iterator.fileInfo();            QString fontFilePath = assetsFontDir + QStringLiteral("/") + fontFileInfo.fileName();            QString destPath = fontPath.absolutePath() + QStringLiteral("/") + fontFileInfo.fileName();            QFile::copy(fontFilePath, destPath);        }    } else {        GlobalParams::setFontDir("");    }

This causes the displayFontDir variable to be set correctly.

Since displayFontDir is now an std::string instead of a const char array, we also need to modify GlobalParams::setupBaseFonts() to treat it like an std::string. Hence we remove the loop that would have looped over the earlier char array, and add a check to see if the font dir is empty.

void GlobalParams::setupBaseFonts(const char *dir){    FILE *f;    int i;    for (i = 0; displayFontTab[i].name; ++i) {        if (fontFiles.count(displayFontTab[i].name) > 0) {            continue;        }        std::unique_ptr<GooString> fontName = std::make_unique<GooString>(displayFontTab[i].name);        std::unique_ptr<GooString> fileName;        if (dir) {            fileName.reset(appendToPath(new GooString(dir), displayFontTab[i].otFileName));            if ((f = openFile(fileName->c_str(), "rb"))) {                fclose(f);            } else {                fileName.reset();            }        }        if (!displayFontDir.empty()) {            fileName.reset(appendToPath(new GooString(displayFontDir), displayFontTab[i].otFileName));            if ((f = openFile(fileName->c_str(), "rb"))) {                fclose(f);            } else {                fileName.reset();            }        }        if (!fileName) {            error(errConfig, -1, "No display font for '{0:s}'", displayFontTab[i].name);            continue;        }        addFontFile(fontName->toStr(), fileName->toStr());    }}

Finished!

Finally, the android-specific font matching API is successfully finished. I sincerely hope this new feature is useful for users.

I had initially thought that most of the work would be in implementing AFontMatcher, however base-14 fonts took much more effort.

I'd like to thank my mentor, without his support I would still be stuck at trying to build Poppler. :D

Wednesday, 12 July 2023

Today we are announcing the availability of the minor patch release 2.10.1. This release contains minor improvements and bug fixes only. The fixes are distributed over many different areas of the application and we recommend everybody update to this patch release which is available from our download page.

The full list of fixes included in this patch release are as follows:

  • Support markdown library discount version 3
  • Improve Vector BLF dependency (git download must be enabled if needed)
  • Correctly use system header of system QXlsx (BUG 468651)
  • Fix group separator problem in formulas (BUG 468098)
  • Improve log scales (auto scaling and tick number)
  • Improve auto scale (Issue #536)
  • Fix limits when changing scales (Issue #446)
  • Use system liborigin headers if linking against system liborigin (BUG 469367)
  • Properly import UTF8 encoded data (BUG 470338)
  • Do not clear the undo history when saving the project (BUG 470727)
  • Properly react on orientation changes in the worksheet properties explorer
  • In the collections of example projects, color maps and data sets also allow searching for sub-strings and make the search case-insensitive
  • Properly set the size of the worksheet in the presenter mode if “use view size” is used
  • Properly save and load the property “visible” for box and bar plots in the project file
  • Fix copy&paste and duplication of box and bar plots
  • Fix issues with loading object templates (BUG 470003)
  • Fix crash when loading projects with reference ranges
  • .xlsx import corrections:
    • fix crash importing empty cells
    • support datetime import (Issue #531)
  • Properly set the initial properties of the reference line, like line width, etc. (Issue #580)
  • Properly show the initial value of the property “visible” for the reference range (Issue #582)
  • React to Delete and Backspace keys to delete selected cells in spreadsheet columns (Issue #596)
  • Update the plot legend on column name changes used in box and bar plots (Issue #597)
  • Fix the positioning of values labels for horizontal bar plots (Issue #599)
  • Initialize the parameters for the baseline subtraction with reasonable values on first startup and improve the appearance of the preview plot

We are also working on the new features and improvements that will arrive in the next 2.11 release. This release will become available in the coming months. More on this in the next blog posts. Stay tuned!

We're happy to announce the new release 5.11.0 of KPhotoAlbum, the KDE photo management program!

Most notably, this release can be built against Exiv2 0.28, which introduced some breaking changes. Older versions are still supported as before.

Other things that have been changed and fixed (as listed in the ChangeLog) are:


Changed

  • Recalculate Checksums in the Maintenance menu and Refresh Selected Thumbnails in the thumbnail context menu have been unified to do exactly the same.
  • Simplified logging categories: kphotoalbum.XMLDB was merged into kphotoalbum.DB

Fixed

  • Fix issue where non-empty time units in the date bar were incorrectly greyed out (#467903)
  • Fix bug with the date bar showing and selecting incorrect date ranges (#468045)
  • Fix crash when the annotation dialog is opened from the viewer window and the viewer is closed before the annotation dialog (#470889)
  • Fix inconsistent UI where menu actions would not immediately be updated to reflect a change (#472109, #472113)

The list of contributors is quite short this time, it was only Johannes and me ;-) Anyway, thanks to everybody working on KPA in any way, to everybody having contributed in the past and for all future work!

Have a lot of fun with KPhotoAlbum 5.11.0 :-)

— Tobias

Monday, 10 July 2023

Dear digiKam fans and users,

After five months of active maintenance and long bugs triage, the digiKam team is proud to present version 8.1.0 of its open source digital photo manager.

See below the list of most important features coming with this release.

  • Print Creator: Add 4 new templates for 6.8 inches photo paper.
  • General : Improve usability of Image Properties sidebar tab.
  • Libraw : Update to snapshot 2023-05-14
  • Bundles : Update Exiv2 to last 0.28 release
  • Bundles : Update KF5 framework to last 5.106
  • Bundles : Includes Breeze widgets style in MacOS package to render properly GUI contents.
  • Tags : Add possibility to remove all face tags from selected items.
  • Tags : Add possibility to remove all tags from selected items except face tags.
  • Similarity : Add usability improvements about reference images while searching for duplicates images.

This version arrives with a long review of bugzilla entries. Long time bugs present in older version have been fixed and we spare a lots of time to contact users to validate changes in pre-release to confirm fixes before to deploy the program in production.

And it can be done easily, ackshually.

But what is that all about?

The problem

It has been a longstanding complaint that the ~/.config/ directory on Linux systems can get riddled with configuration files. This is the case with KDE software as well.

My idea is that we should be putting those into subdirectories inside ~/.config/.

The Freedesktop XDG Base Directory specification generally only states that standard configuration files should go under XDG_CONFIG_DIRS. Dump them there and you’re gold. So it’s not wrong to just fill the ~/.config/ directory with them.